Building the Mattone Grande. Looking for a material to use at the ‘threshold’ of the oven, where in the plans, the firebrick meets the red brick at the mouth of the oven. I’m trying to cover the red brick.
We plan to use extra insulating blankets because we live in the NE and hope to cook in winter - from what I read this will push the dome to (or close to) the edge of the upward facing red brick on each side. This leaves the only upward facing sides of the red brick exposed at the front and back of the oven.
On the sides, our plan is to cover all outward facing red brick with tile / stone.
A material I need to pick: should it be heat resistant? Slate or any stone will do? Tile? Should it be heat resistant tile? What criteria should I look for? I’d like something I can cut a straight line with a masonry blade (or ask a pro to do so).
I realize a material with similar thickness will need to be placed on all upward facing red brick faces and I will need to add enough sand to level the firebrick with the highest part laying on whatever I put on top the red brick, both for the construction of the dome and to move food in and out of the oven.
My experience with extra insulating blanket was similar. I do have about 2 inches on each side.
For your oven lip, other builders have found success by using ceramic tile or similar. Thinset mortar will do, and will help with any irregularities on what will now be the red brick substrate. Slate is another good choice (and certainly available here in the Northeast!), but it can be a bit fragile.
You might want to consider not butting it up flush with the firebrick hearth, but rather plan to leave a narrow air gap (maybe one-eighth of an inch).
Bringing the hearth up to the level of the planned lip is a good idea. Shim your mold up by the thickness of the material you’re using so that you’ll get the appropriate height for the arch. (You won’t see it from the sides or back because of the stucco shell, and it will look proper from the front once you have applied your material.) Maybe use a couple small pieces of the planned veneer at the base of the mold—which will help with getting enough mortar under your first row of firebrick.
Your general question about “heat resistant tile” is not a huge worry. Tile is manufactured by firing, so by definition it is heat resistant. You might want to ask your materials supplier if you’re concerned about a glaze or finish that is prone to cracking.
Looking forward to seeing what you come up with, and please do post photos when you can!
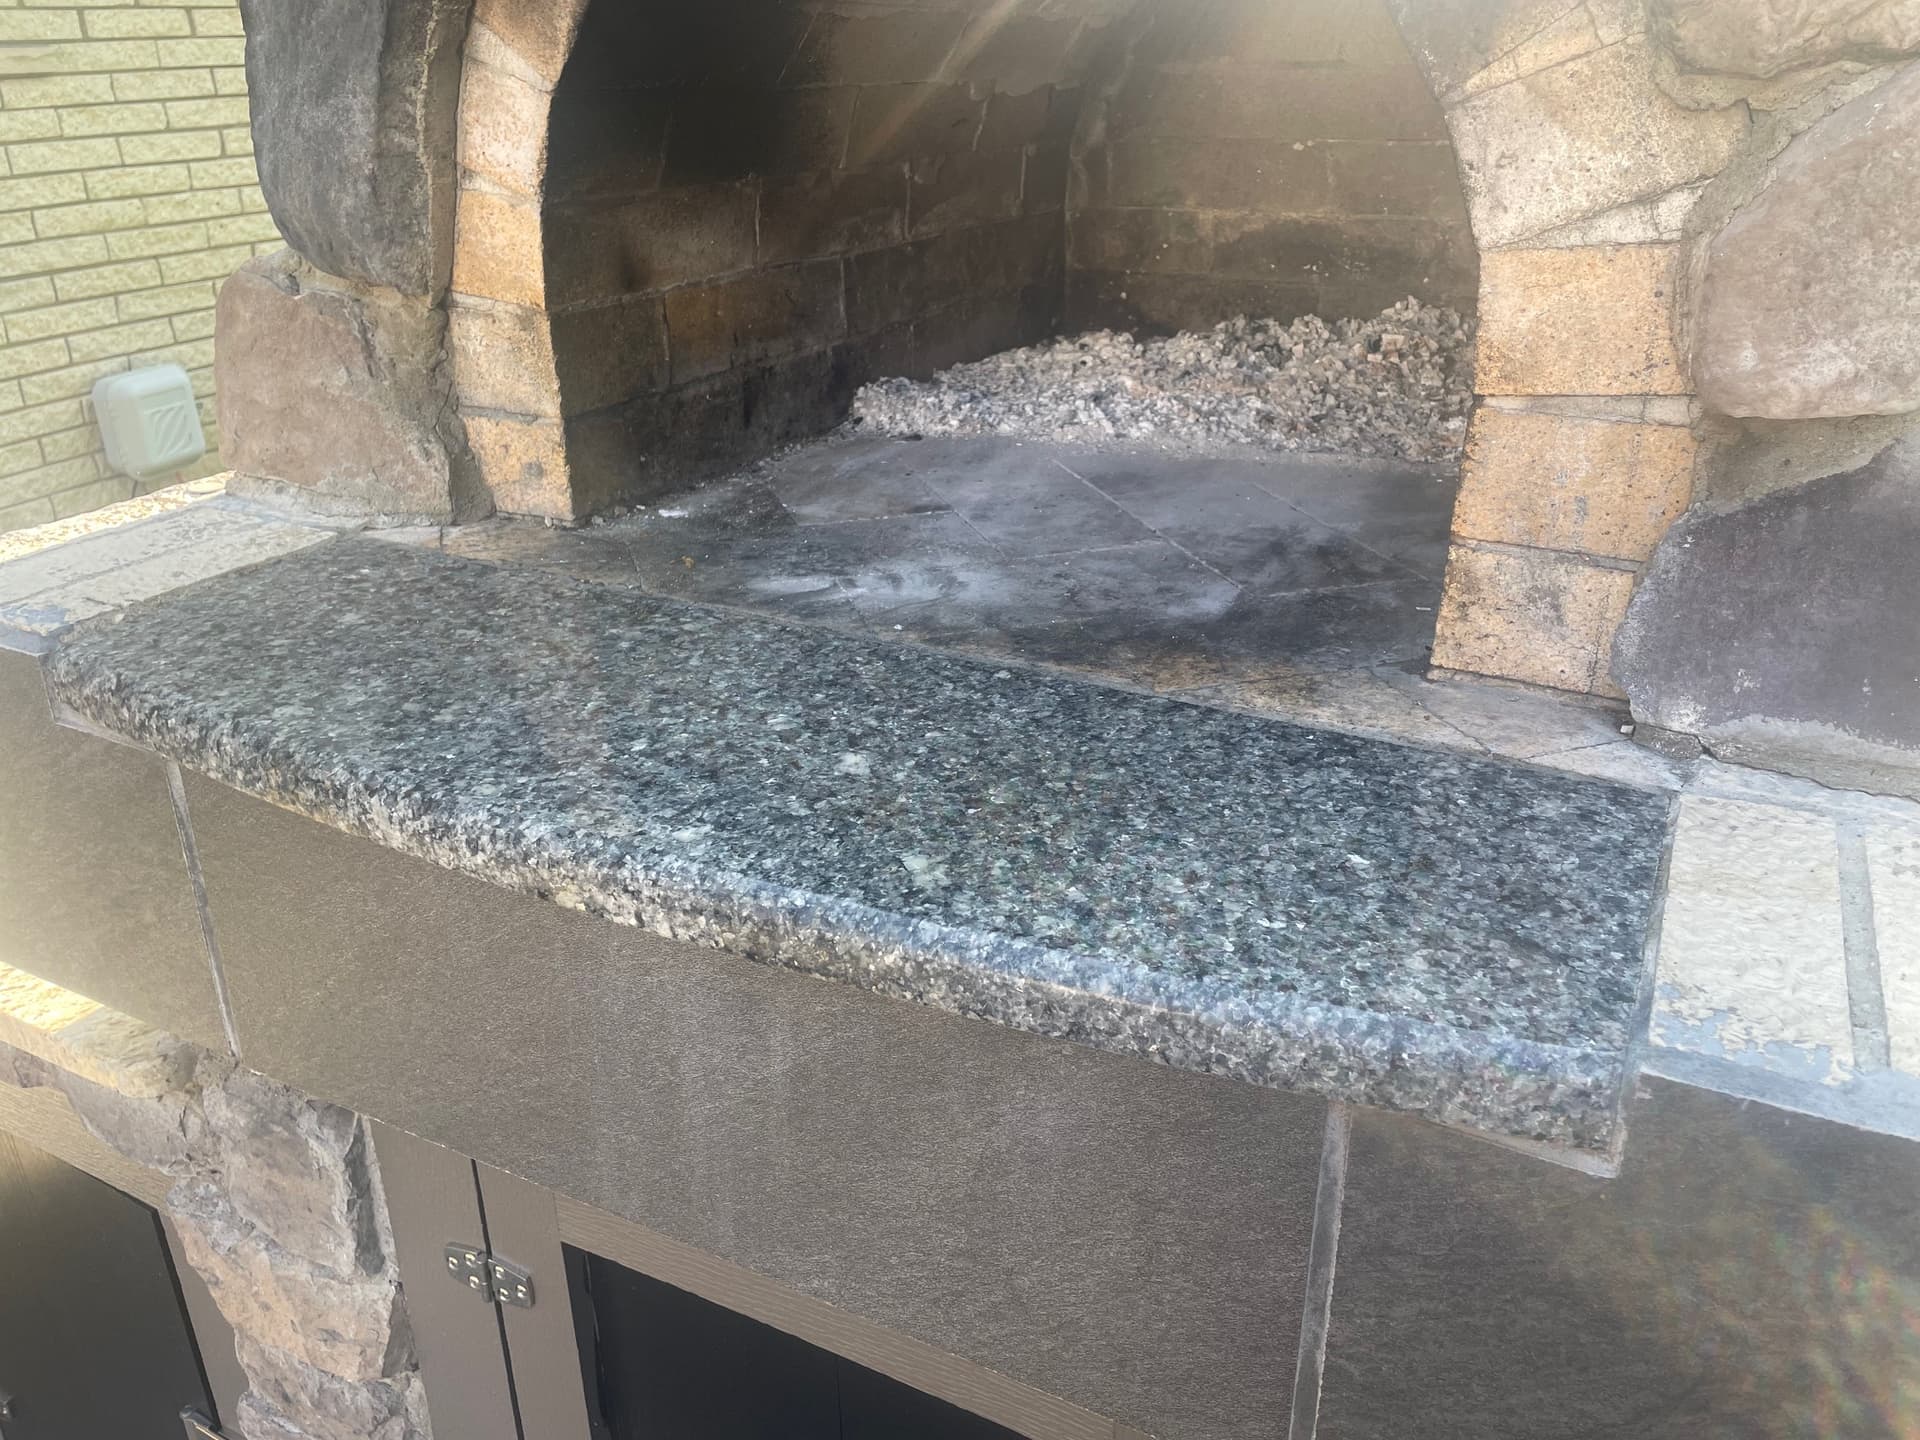
FWIW, I used granite. I did a retro fit by using my angle grinder to remove some of the brick so that my granite was flush to the cooking surface. I also slightly tilted the granite away from the oven so that water would not flow into the oven. I think this has made a big difference in how much rain gets into the oven.
The one thing I am not happy with was the decision to not go all the way across with the granite. Maybe I’ll redo it one of these years.
Just regular Type-S mortar. I needed something that would fill the gaps caused by the holes in the bricks which became exposed when I ground them down.
This makes sense. With shims under the foam mold, there will then therefore be a small gap equal to the thickness of the shim all the way around the foam mold? Might mortar ooze into this gap given that my work to date indicates I don’t have the touch when it comes to using the right amount of mortar? What’s to stop the applied mortar from surrounding the tile shim and locking it into place permanently?
Could I use wood shims? Or veneer all the way around instead so that the mortar used to secure the first course of arched firebrick has something to sit against (again, given my mortar skills are amateur). And, wood veneer will burn off if need be?
It just means that your mortar under the first course will be a little thicker. You’re using the shims to set the spacing properly, and they will also support that first course so the mortar doesn’t have to do all the work.
You want them to be wide and long enough to support the brick, but not so wide as to take the place of mortar. So, I’d do:
small pieces of the planned veneer (which is by definition the right thickness)
and, two small pieces under each brick of the first course, one at each end right before you lay down mortar and the brick itself
spread your mortar to just over the height of the shim
That should give you the right amount of mortar, a solid base for the brick, and proper adhesion to the hearth surface.
Hope this clarifies it for you, and please keep asking questions if it’s not clear. I believe strongly there are no dumb questions with a project like this.