So I had a know it all mason build my oven and gave him the instructions given to me for the Martone Barile. He not only didn’t lay the bricks as instructed but it looks like there is a much larger gap in between the bricks then instructed. My question is assuming he used the correct material between the bricks is this going to be an issue going forward making pizzas/cooking? I haven’t paid him yet and think I have time to complain but once I pay getting him back is going to be next to impossible! Let me know what you guys think. I am not trying to be difficult but I also spent a lot of money and am not trying to get ripped off considering me was the one that went rogue!

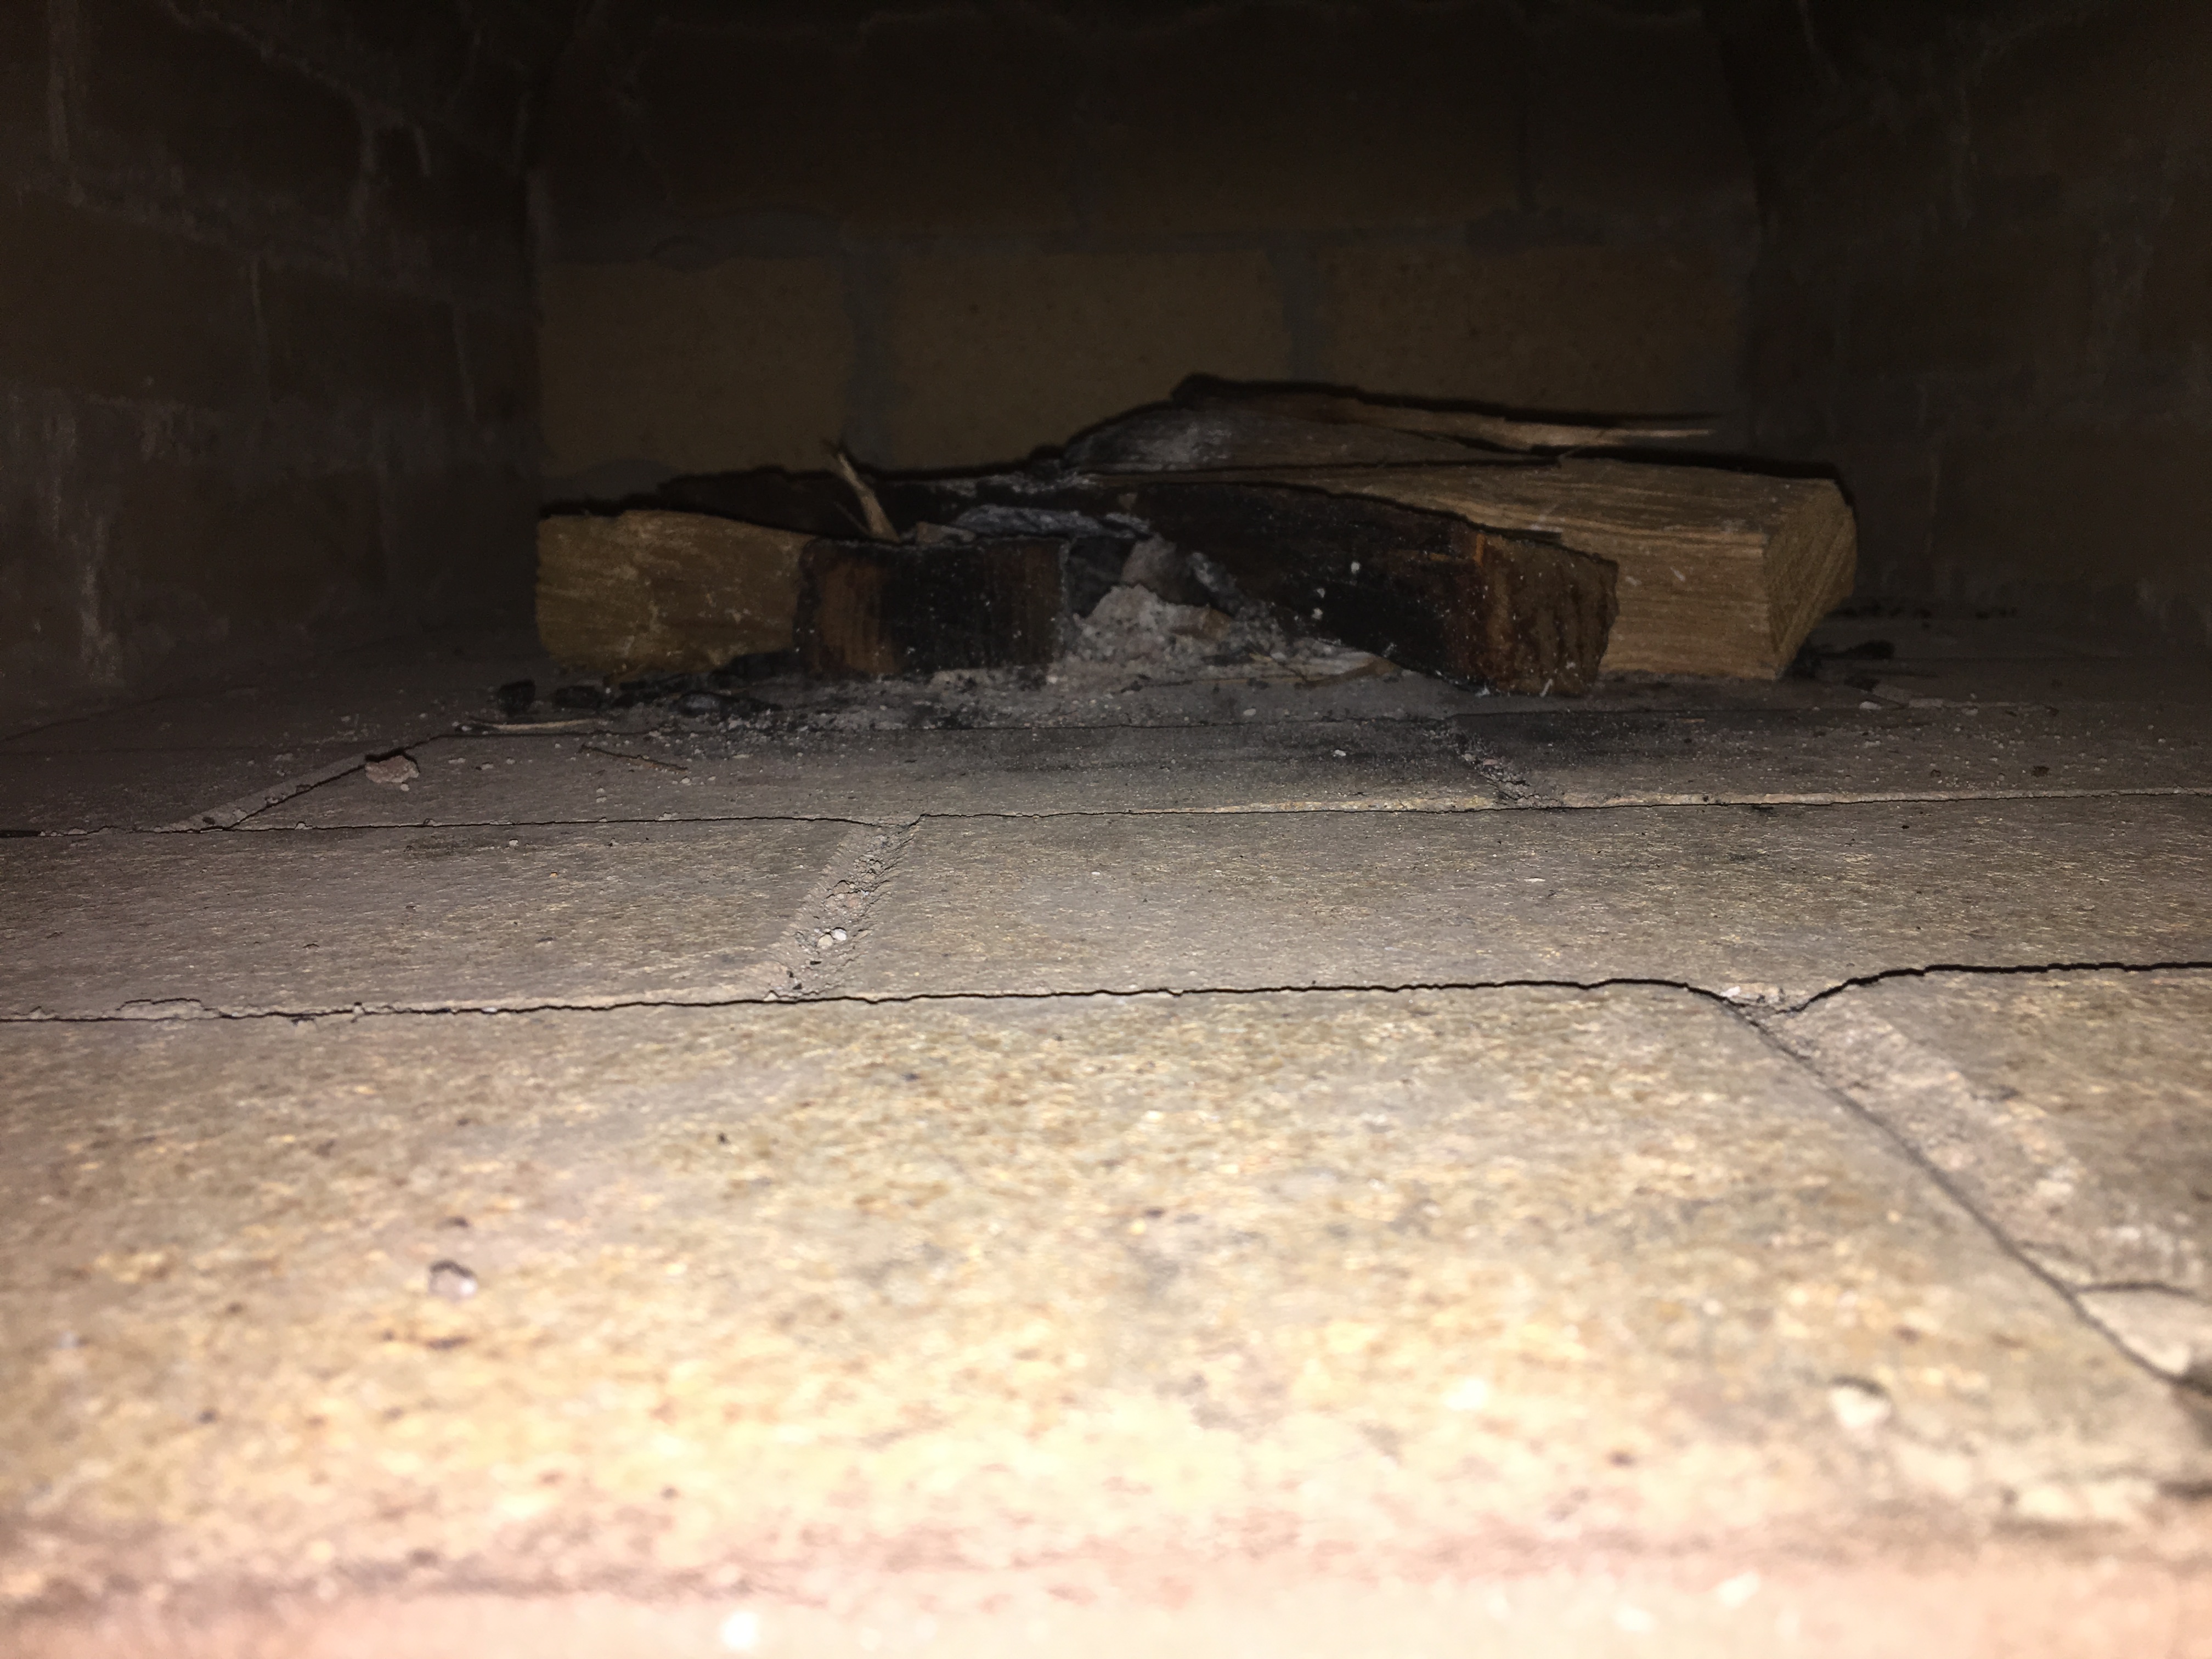
Well, there is clearly mortar between the bricks on your hearth. And the bricks in that hearth are set perpendicular, rather than at 45 degree angle. Both of these facts are going to lead to problems. How serious? I can’t speak personally to it, but at the least that hearth is not a smooth cooking surface now, and it’s going to break up under the stress of expansion and contraction.
You definitely have reason to complain as he didn’t build it to spec. When you walk through the job with him, instruct him to bring the build instructions you gave him.
I’m not yelling at you when I say this: the time to stop him and insist that the hearth be laid correctly was before the top was built. He could have corrected it at that point, but now it would involve a rebuild.
I’m also struck that he made much more work for himself by doing it that way.
You’ve got a lot on your plate, so hoping a voice of experience will chime in. Maybe there is any easier fix than the one I’m picturing. But, no, I wouldn’t pay for it as is, because it is wrong and it won’t serve its purpose.
And welcome to the forums!
Oh… Wow!
This is the problem when contractors are hired… most of them follow our instructions, but others… as you said, they go “rogue”.
As @bikerbudmatt just mentioned, the contractor really made more work for himself by mortaring in that firebrick. He could have simply sand-set the hearth firebrick at a 45° angle and that would have saved time and materials.
PROBLEMS -
-
Those mortar joints are so big and uneven - it’s going to be a nightmare trying to get a peel in-and-out of there. Impossible even.
-
If a firebrick were to crack, a mortared hearth firebrick is going to be almost impossible to remove. Whereas a sand-set firebrick that cracks - you simply pop it out and put a new one in.
-
Looking at the mortar joints on the inside walls - he was kinda sloppy w/ his work. But those walls will be black w/ soot soon, so it’s a non-issue.
-
The only way to repair that hearth floor would be to tear it down and rebuild. Something neither of you want to do (nor do I).
.
SOLUTIONS -
Having seen a similar issue w/ a contractor in SC - we verbally discussed a solution that benefited the homeowner and the contactor. It does effect the performance of the oven a tad - but only a tad… As this seems to be an ongoing issue w/ contractors, I’m going to do a quick CAD description of what I’m describing below (easier than drawing it on a coffee shop napkin)
This solution is basically placing Fire Brick Splits over the existing hearth surface w/ a 1/2"ish of sand. While it’s not the ideal installation method, it sure as heck is a LOT better than tearing down your existing oven and starting over. And our SC customer that did this stated her oven worked beautifully after this solution was implemented.
And having worked w/ HUNDREDS of landscape contractors / masons in my former life, I can tell you this with absolute certainty… If you ask them to rebuild your existing oven (even though it was their mistake), most likely, you will never see them again! At least you haven’t paid him yet.
But even if they do “rebuild” the oven, it will never look good… As he now hates you.
It’s an interesting industry - 
- USING A MITER SAW (DO NOT FREE HAND THIS) - Cut 3 or 4 FULL SIZE FIRE BRICK so they are THIS EXACT MEASUREMENT! 9.5" x 4.5" x 1.75". Using High-Temp mortar, and staring from the middle / front of the oven, attach a full size firebrick as shown. Make sure the brick is just a hair over 1" RECESSED from the front of the oven opening so you can still use your door (the flange on the rear of the door is 1" in depth).
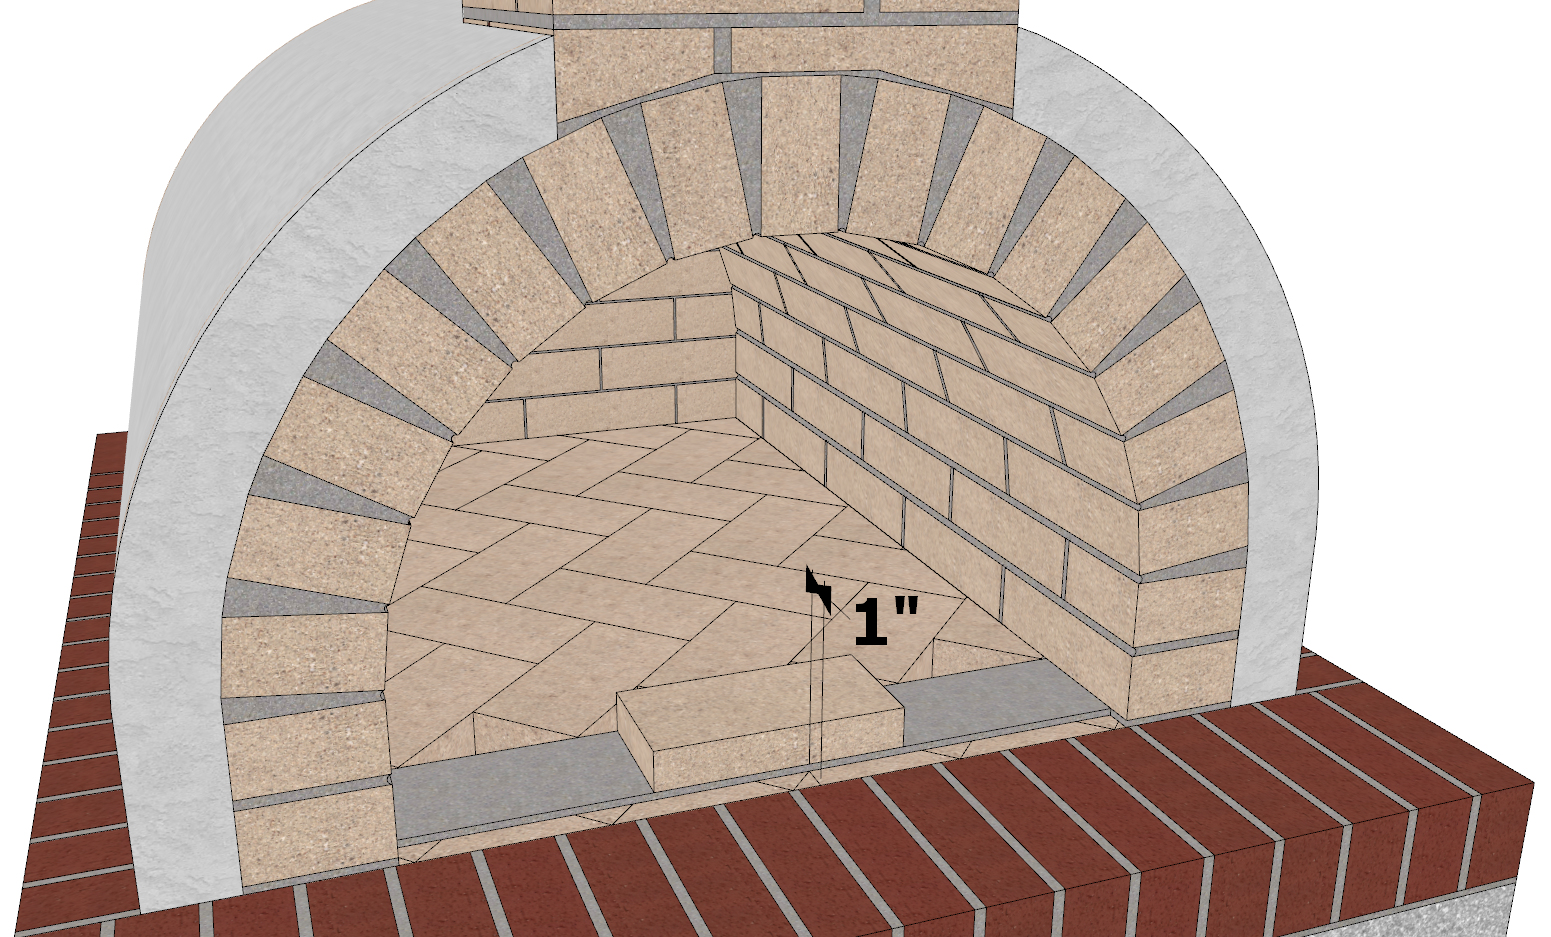
- Work your way across the front of the oven. Allow this step to dry for a few days (as you are going to put a bit of pressure on this new firebrick).
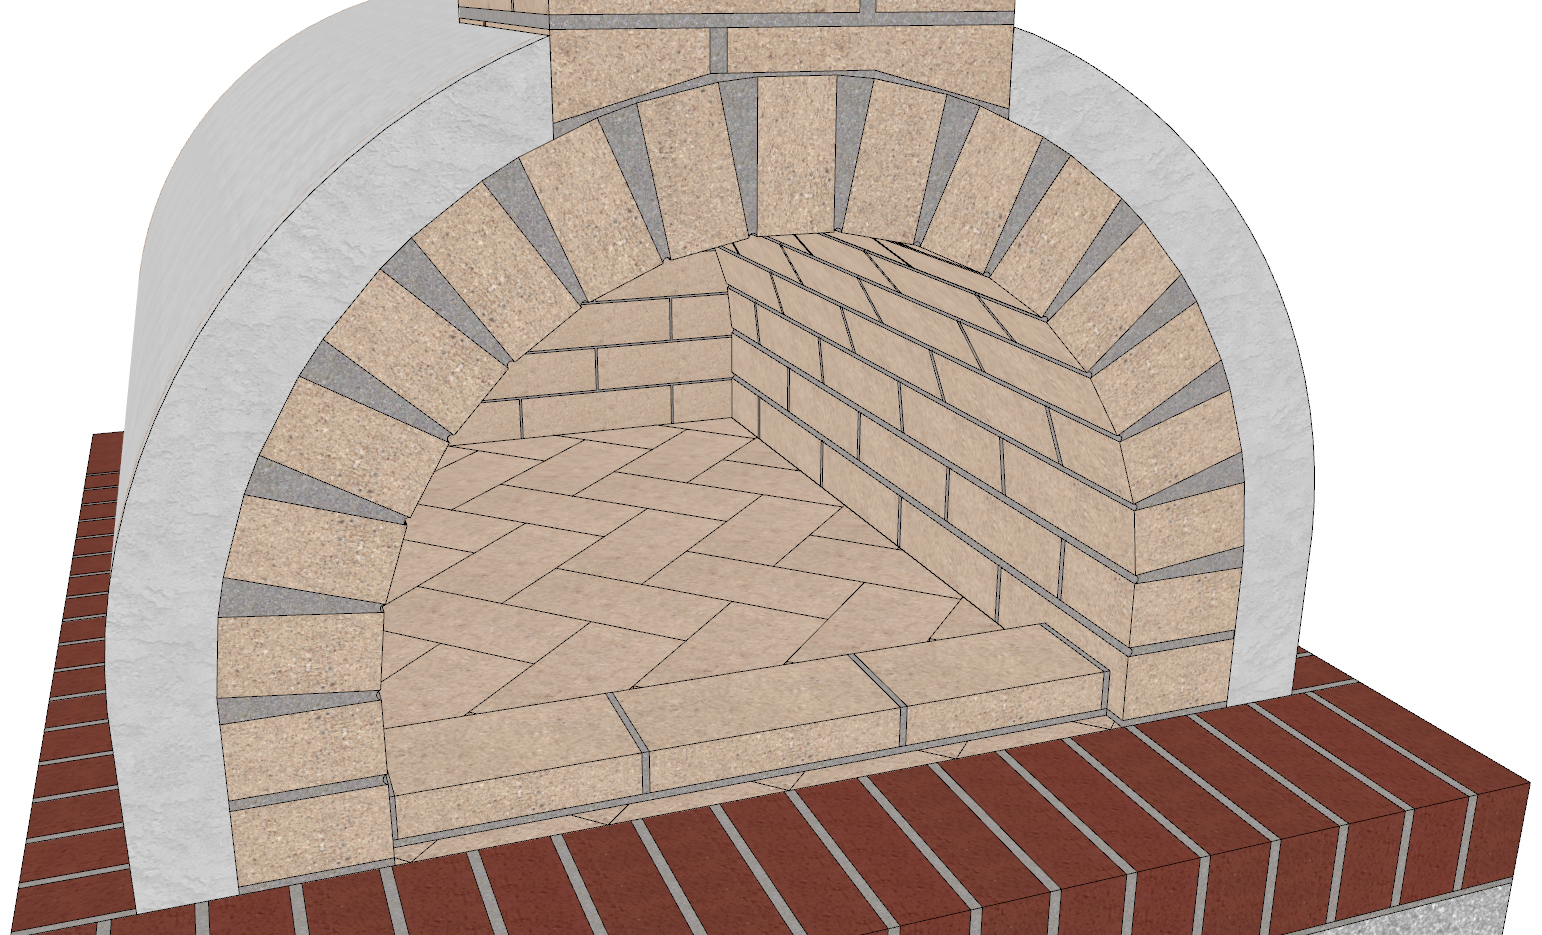
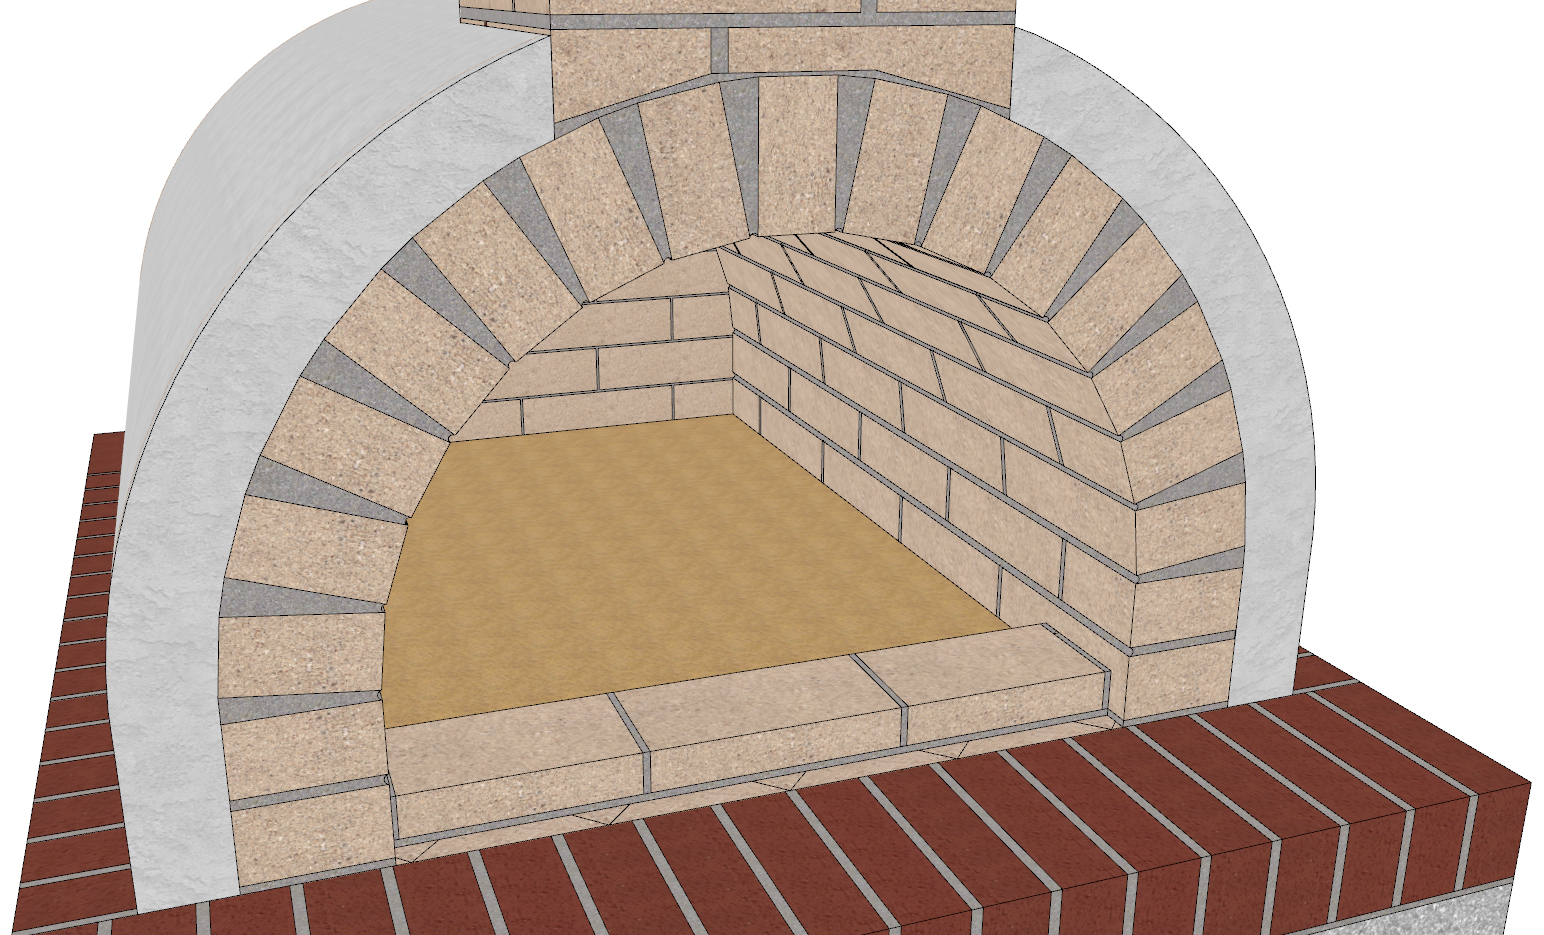
- Apply 1/2" of sand across the existing hearth surface. MAKE SURE IT’S SUPER SMOOTH / LEVEL!
- Grab 42 FIRE BRICK SPLITS - Splits are 9.5" x 4.5" x 1.25" (Notice how they are 1/2" smaller in height than the brick you cut? SAND-SET those fire brick splits on top of the sand in a HERRINGBONE PATTERN. Make sure the inside firebrick are parallel w/ the 3 brick you mortared in. You want them nice and smooth. And for the love of God - DO NOT MORTAR THESE FIRE BRICK IN PLACE!!! Sand Set ONLY!

- Make sure you LIGHTLY tap each firebrick w/ a rubber mallet to make sure all the firebrick are even / level. Problem solved… Disaster averted. Bring on the PIZZA!!!

1 Like
That oven will make particularly amazing pizza once it is repaired. It’s too bad that your contractor thought he knew better. If he does the work, you’ll need to supervise him closely for the reasons @BrickWood already mentioned. And if you hire someone else to fix it, make sure they understand the remediation plan thoroughly, especially the prayer in step 4.
Are you happy with the exterior of the oven? I know it’s not the point of your post, but wondered how that part came out.
Hiring for this kind of work can be frustrating. We’ve worked with some amazingly creative landscape contractors, but even then there’s always a detail or two that they want to do their own way. We’ve learned from them, and eventually came to have enough confidence that we do most of our own work now. It’s slower (or maybe not!), but we know exactly what we want and we’ll keep at it until we get it.
Good luck working this out, and please, please, keep us posted as to your progress. You have friends here.
1 Like
Sure, I understand that. But think of it this way: if you follow the method that @BrickWood lined out for you, you will not have to tear off the top of the oven and start all over again. And since the only point where mortar will need time to cure is after the bricks across the lip are installed, this will go relatively fast.
Small comfort, I know. At least you now know more than your know-it-all mason.