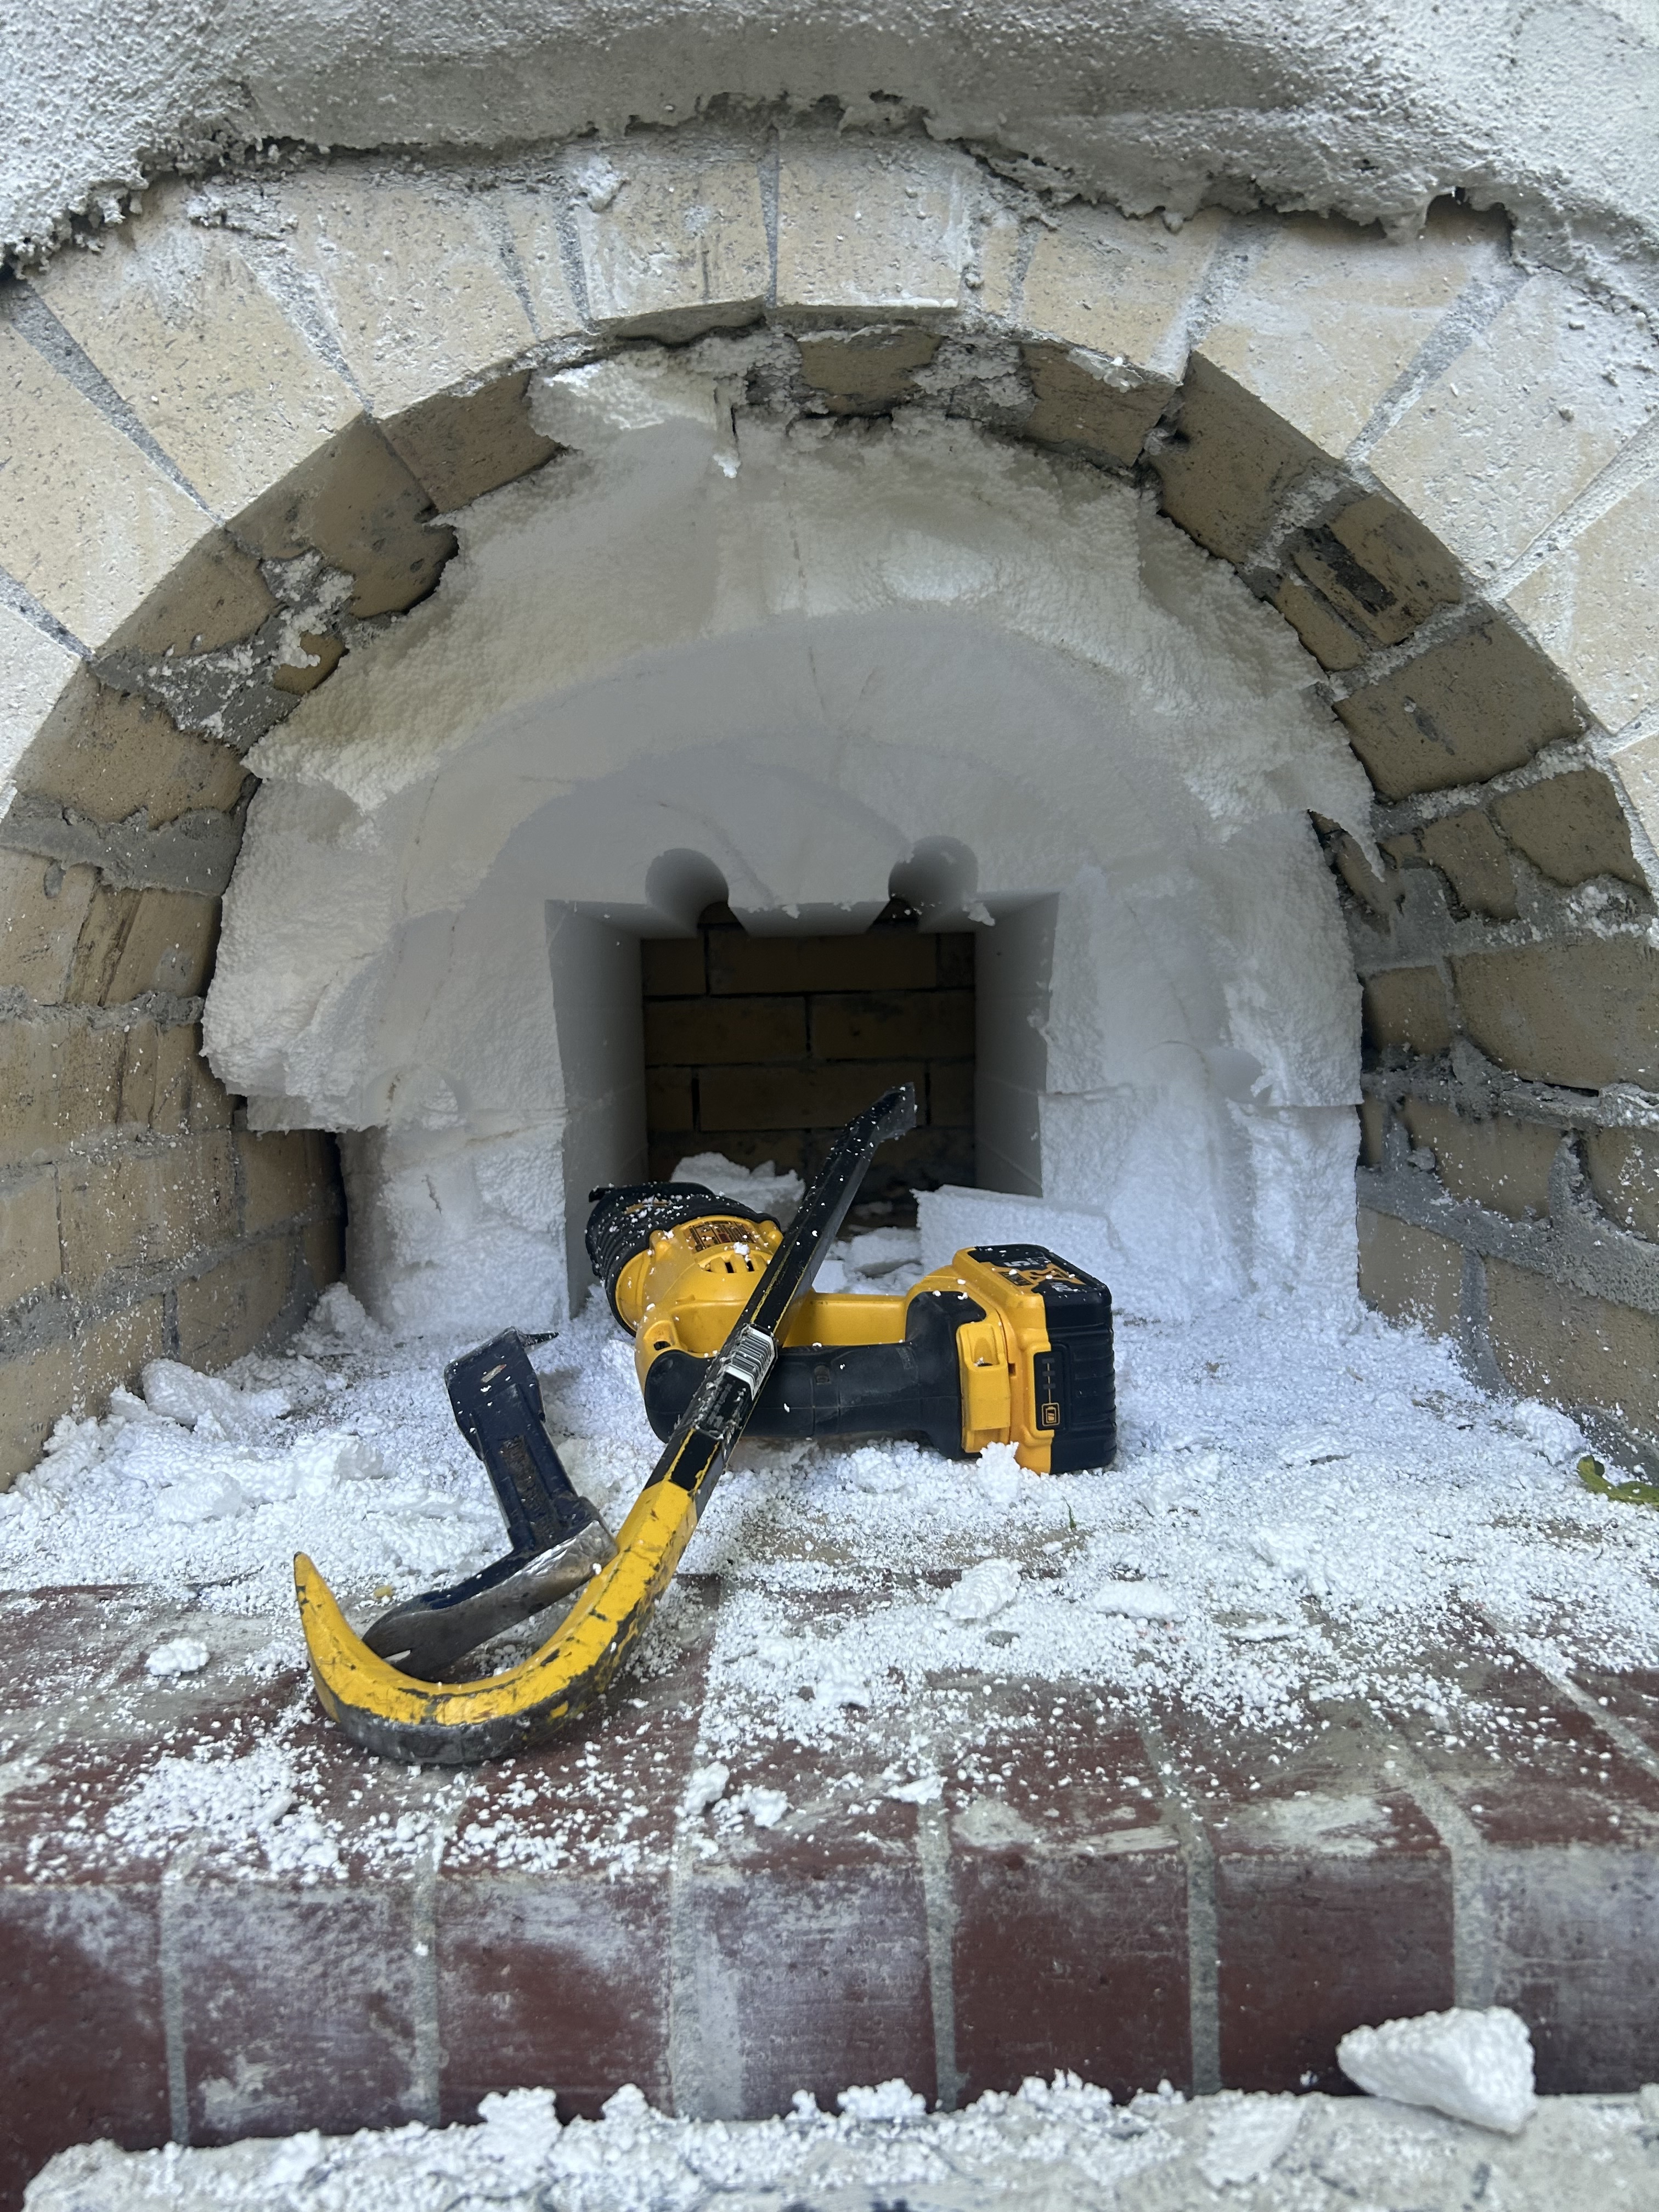
Removed the styrofoam today! I’m tempted to chip away at the excess mortar and fill in the gaps in the back. I know the instructions say no.
But, if I get it wet enough, it should be ok?
Removed the styrofoam today! I’m tempted to chip away at the excess mortar and fill in the gaps in the back. I know the instructions say no.
But, if I get it wet enough, it should be ok?
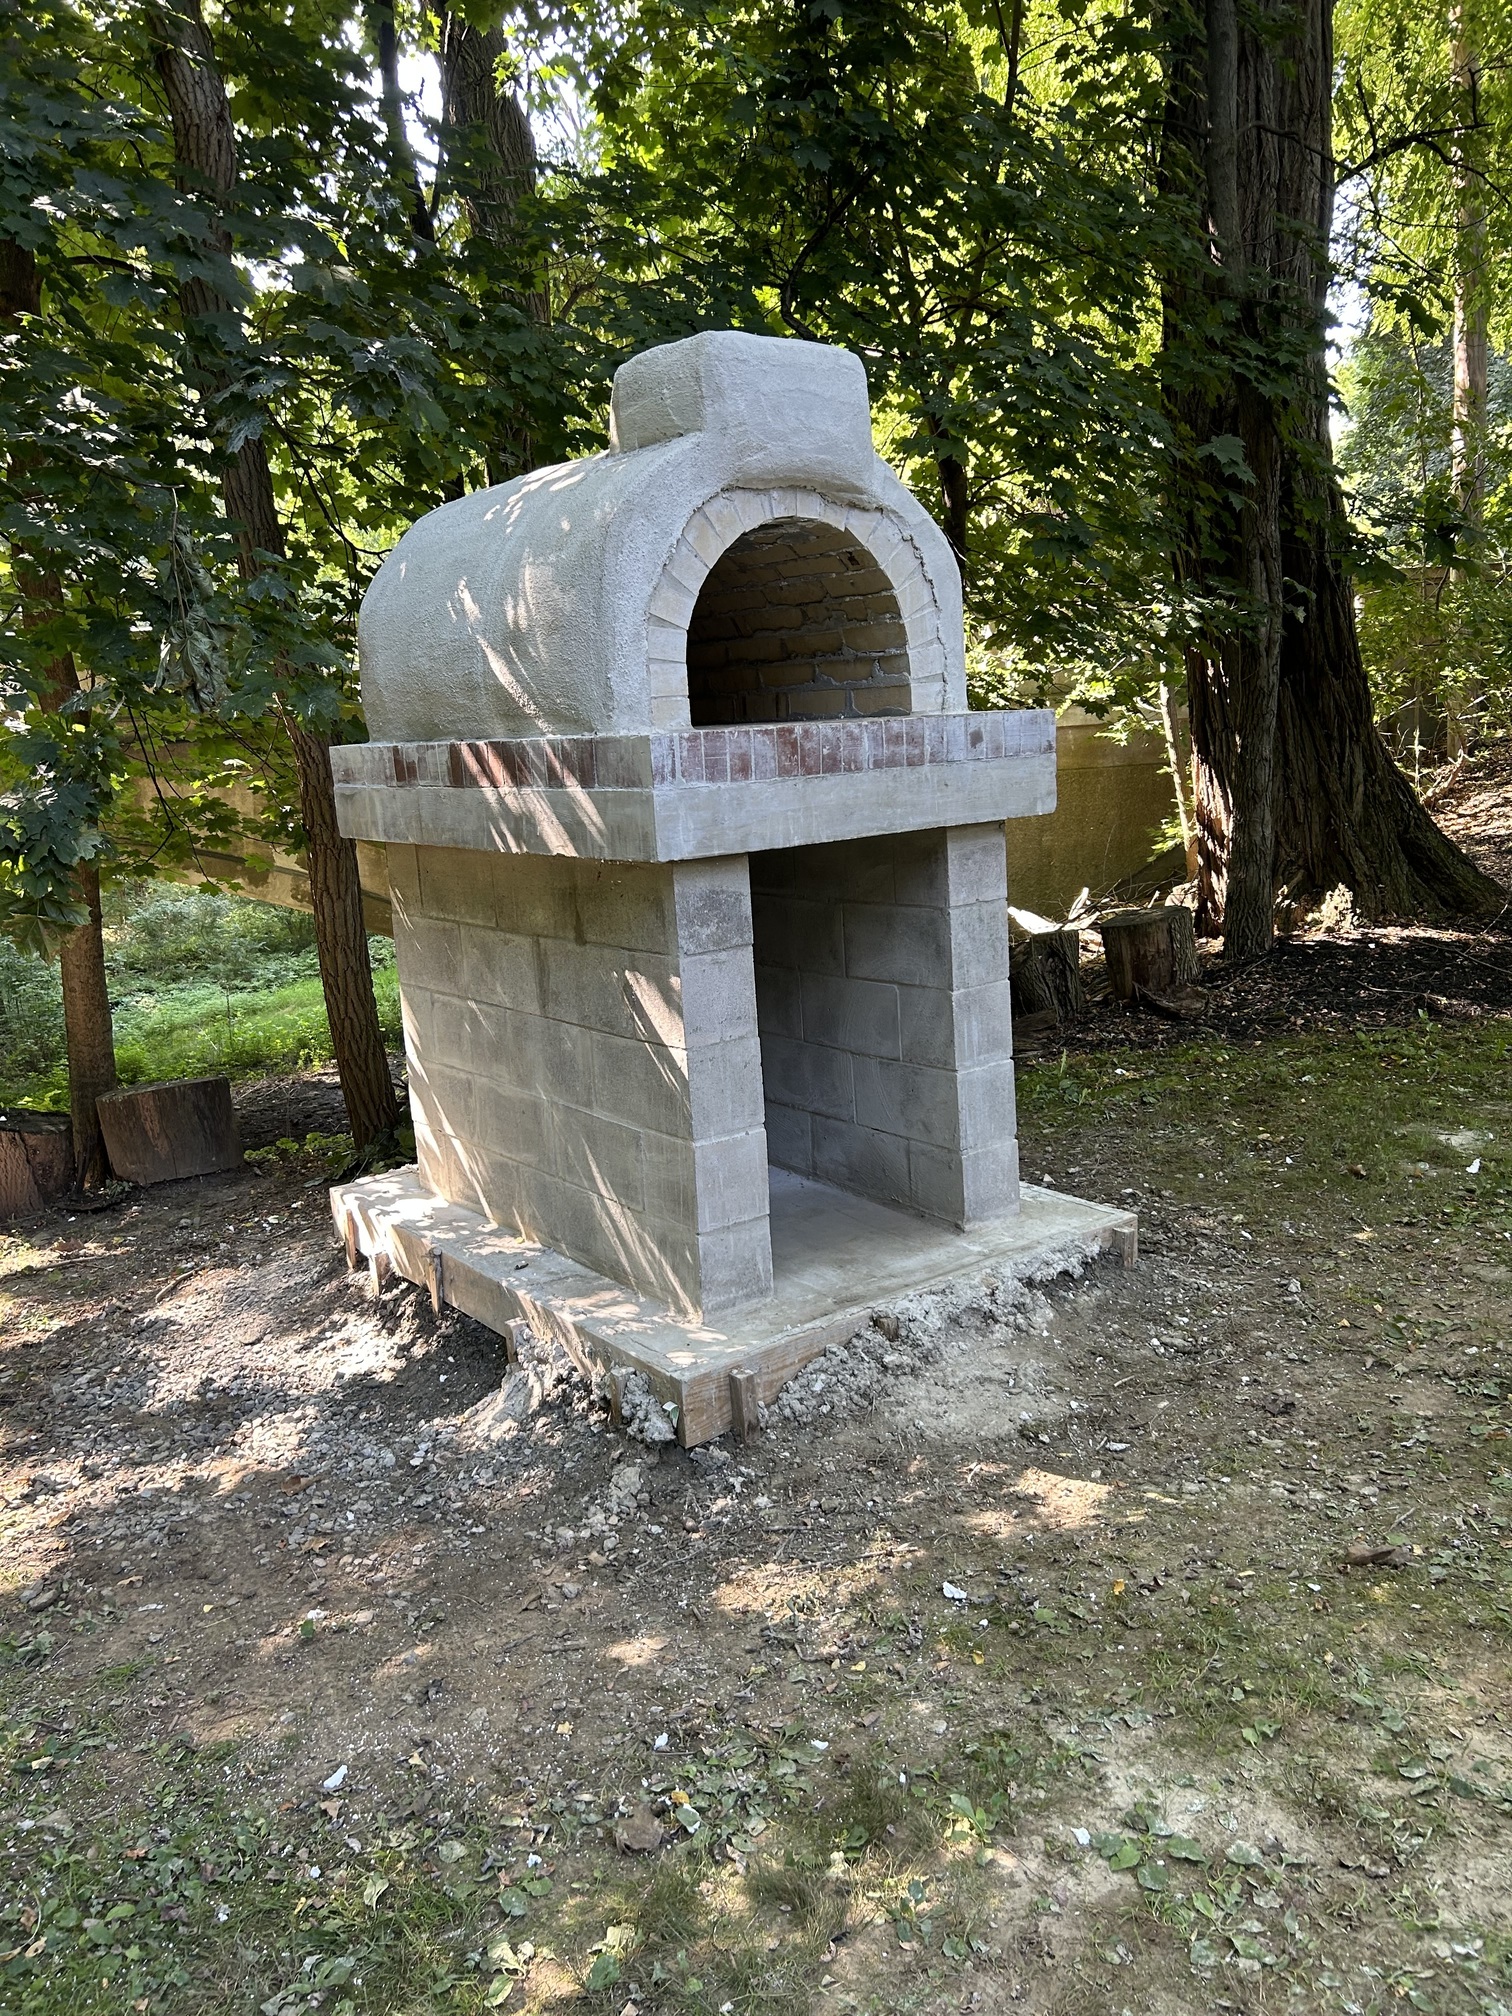
You have a great looking oven there! I was wondering about your progress so thanks for this update.
As for your gaps in the rear wall, you are in a gray zone until you start your curing fires. Do it this way:
Again, this is only advised BEFORE curing.
Hope this helps and good luck!
Thanks Matt. All very helpful.
A follow up question: I attached the chimney to the firebrick. I didn’t do a dome/slope away from the chimney. Can I just put high temp mortar over the base plate of the chimney? And slope it away?
Or do I need to pull the chimney off? Try to clean up the 10 oz tube of red stuff (that’s the technical name)? And then reinstall the chimney?
Can you provide some pics of what the top is supposed to look like?
Ugh.
Oops.
While you could get away with that for a while, I know from other posts that your chimney will eventually crack and require rebuilding. The reason to “crown” a chimney is to present a smooth and sloping surface to moisture so it will run off and away from the chimney rather than pooling and absorbing into the brick.
Moist environments, and especially moist environments that periodically freeze, will degrade the chimney faster than arid climates.
So yes, knowing that you want to do this right and have an oven that lasts for years, your best course of action is to remove the vent stack and add a crown atop the firebrick. The good news is that this isn’t hard, and I wouldn’t worry too much about the high-temp silicone. It will actually help a bit with anchoring your crown.
I don’t have a picture handy, but you want a small batch of the high heat mortar. Wet your top surface well, apply about a 1 ½ inch layer of mortar (like you’re frosting a cake), then use your trowel to slope the crown gently from the chimney opening to the edges. We’re only talking about 1 to 2 degrees of slope, maybe enough so that at the edges the mortar is still an inch thick. Finish by holding the trowel at a 45 degree angle and beveling the sharp edge. (not all the way down to the brick, just the edge itself)
Once the mortar has had 48 hours for a drying cure, you can use a new tube of high-temp adhesive silicone to reattach the vent stack. Both the silicone and the underlying mortar will cure fully once you’ve completed your curing fires.
Hope this helps, and let me know if you have other questions!
Blockquote Finish by holding the trowel at a 45 degree angle and beveling the sharp edge. (not all the way down to the brick, just the edge itself)
Blockquote
Sorry Matt. I’m having trouble following this part.
And…I’m having trouble conceptualizing this dome. How will a dome work with the flat part of the chimney? It seems like a dome will prevent the chimney from sitting flush?
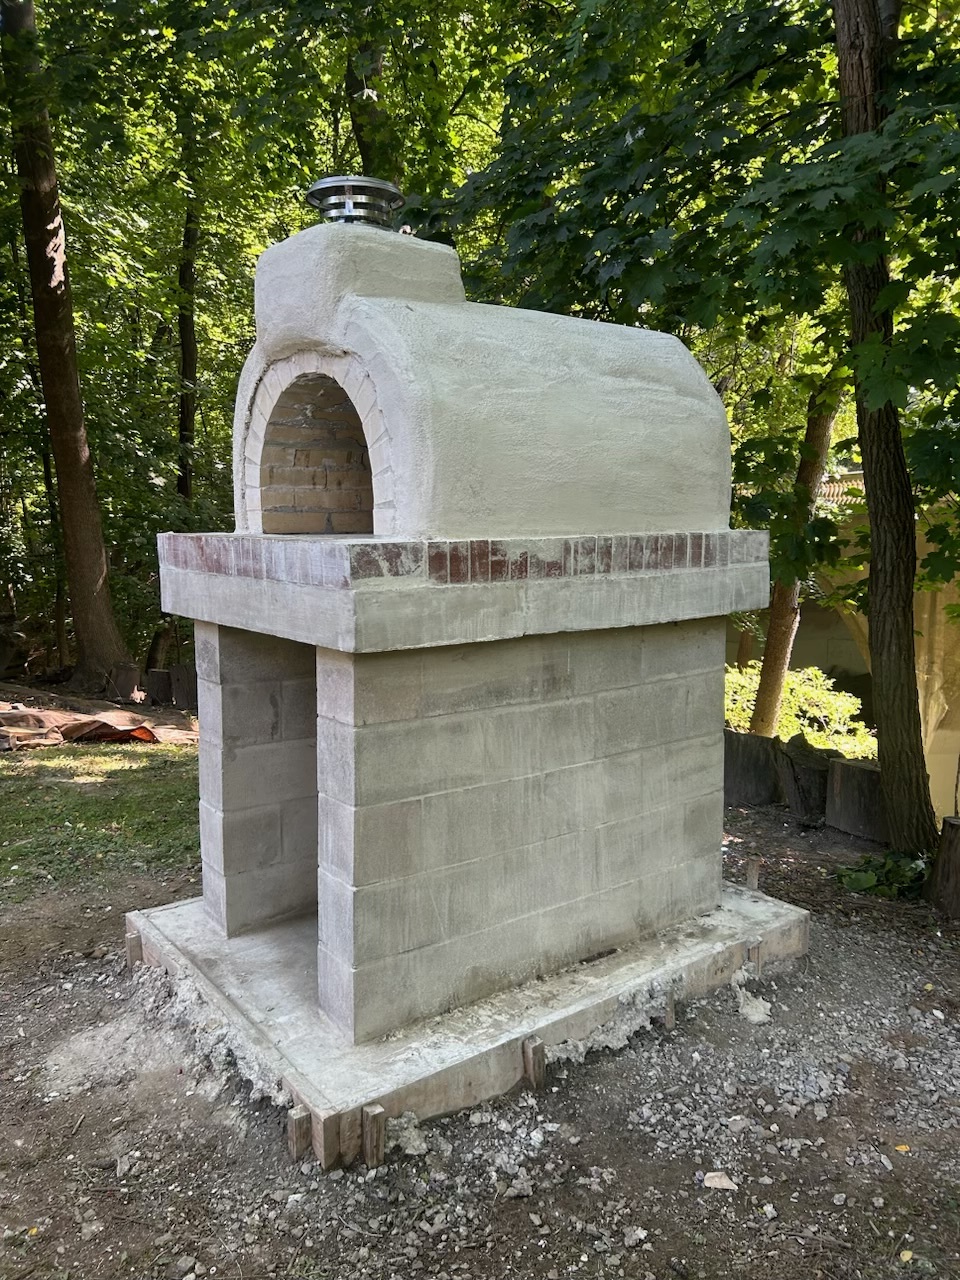
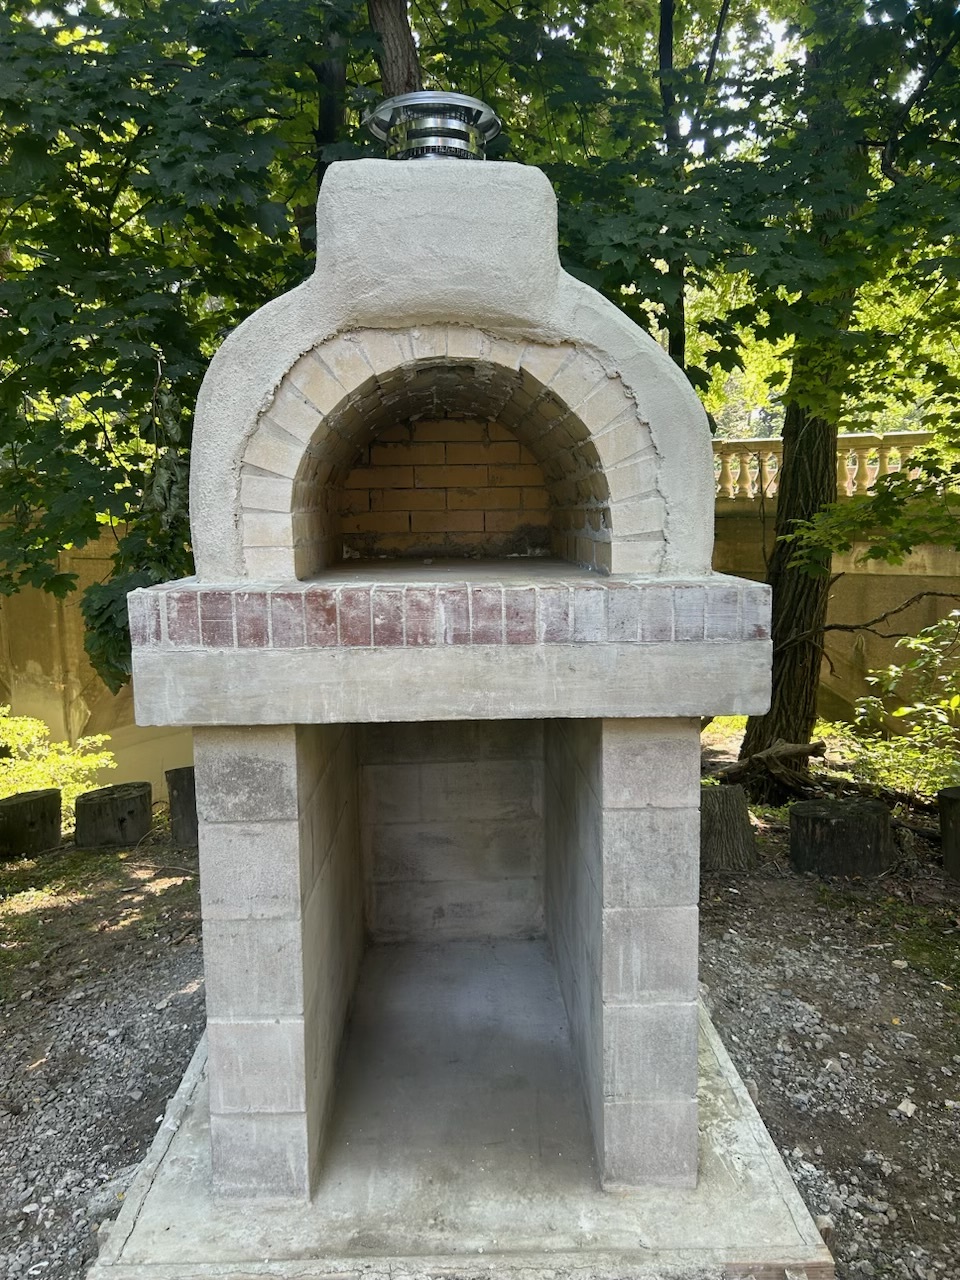
So, a photo will help! Sorry I didn’t have one before; I just went out and took this one.
You’re not making a dome, just a very gentle slope so the vent pipe sits a little higher than the edges. The silicone allows it to sit flat, and the vent plate covers your opening. As you can see I made silicone “dots” over all the openings in the vent plate that serve as anchors once the silicone cures.
The blue lines are the edge of the crown’s top surface. You’re just running the trowel at an angle across that edge to encourage water to run off rather than pool up at the edge.
The crown itself is almost flat; it is just a half inch or so higher at the vent pipe.
The mortar joints are all protected from moisture seeping in from the top and freezing/thawing, which will break apart your chimney in a matter of several cold seasons.
I hope the photo makes this clearer, and of course if it does not, continue to ask away!
I wrote in with the same question a few months ago (my oven is done now). My experience so far is that even with just a flat top chimney, water does not pool up and has not been a problem. I did seal the brick with a concrete / brick sealer so the water beads up and runs off when raining.
Thank you so much. I get it now!