Hi
Since I am by myself and have no means to lift the 3 hearth slabs up onto the base I need pour it in place on top of the base as a single slab. Has anyone done this, if so can you please share how you did it?
Thanks very much.
Hi
Since I am by myself and have no means to lift the 3 hearth slabs up onto the base I need pour it in place on top of the base as a single slab. Has anyone done this, if so can you please share how you did it?
Thanks very much.
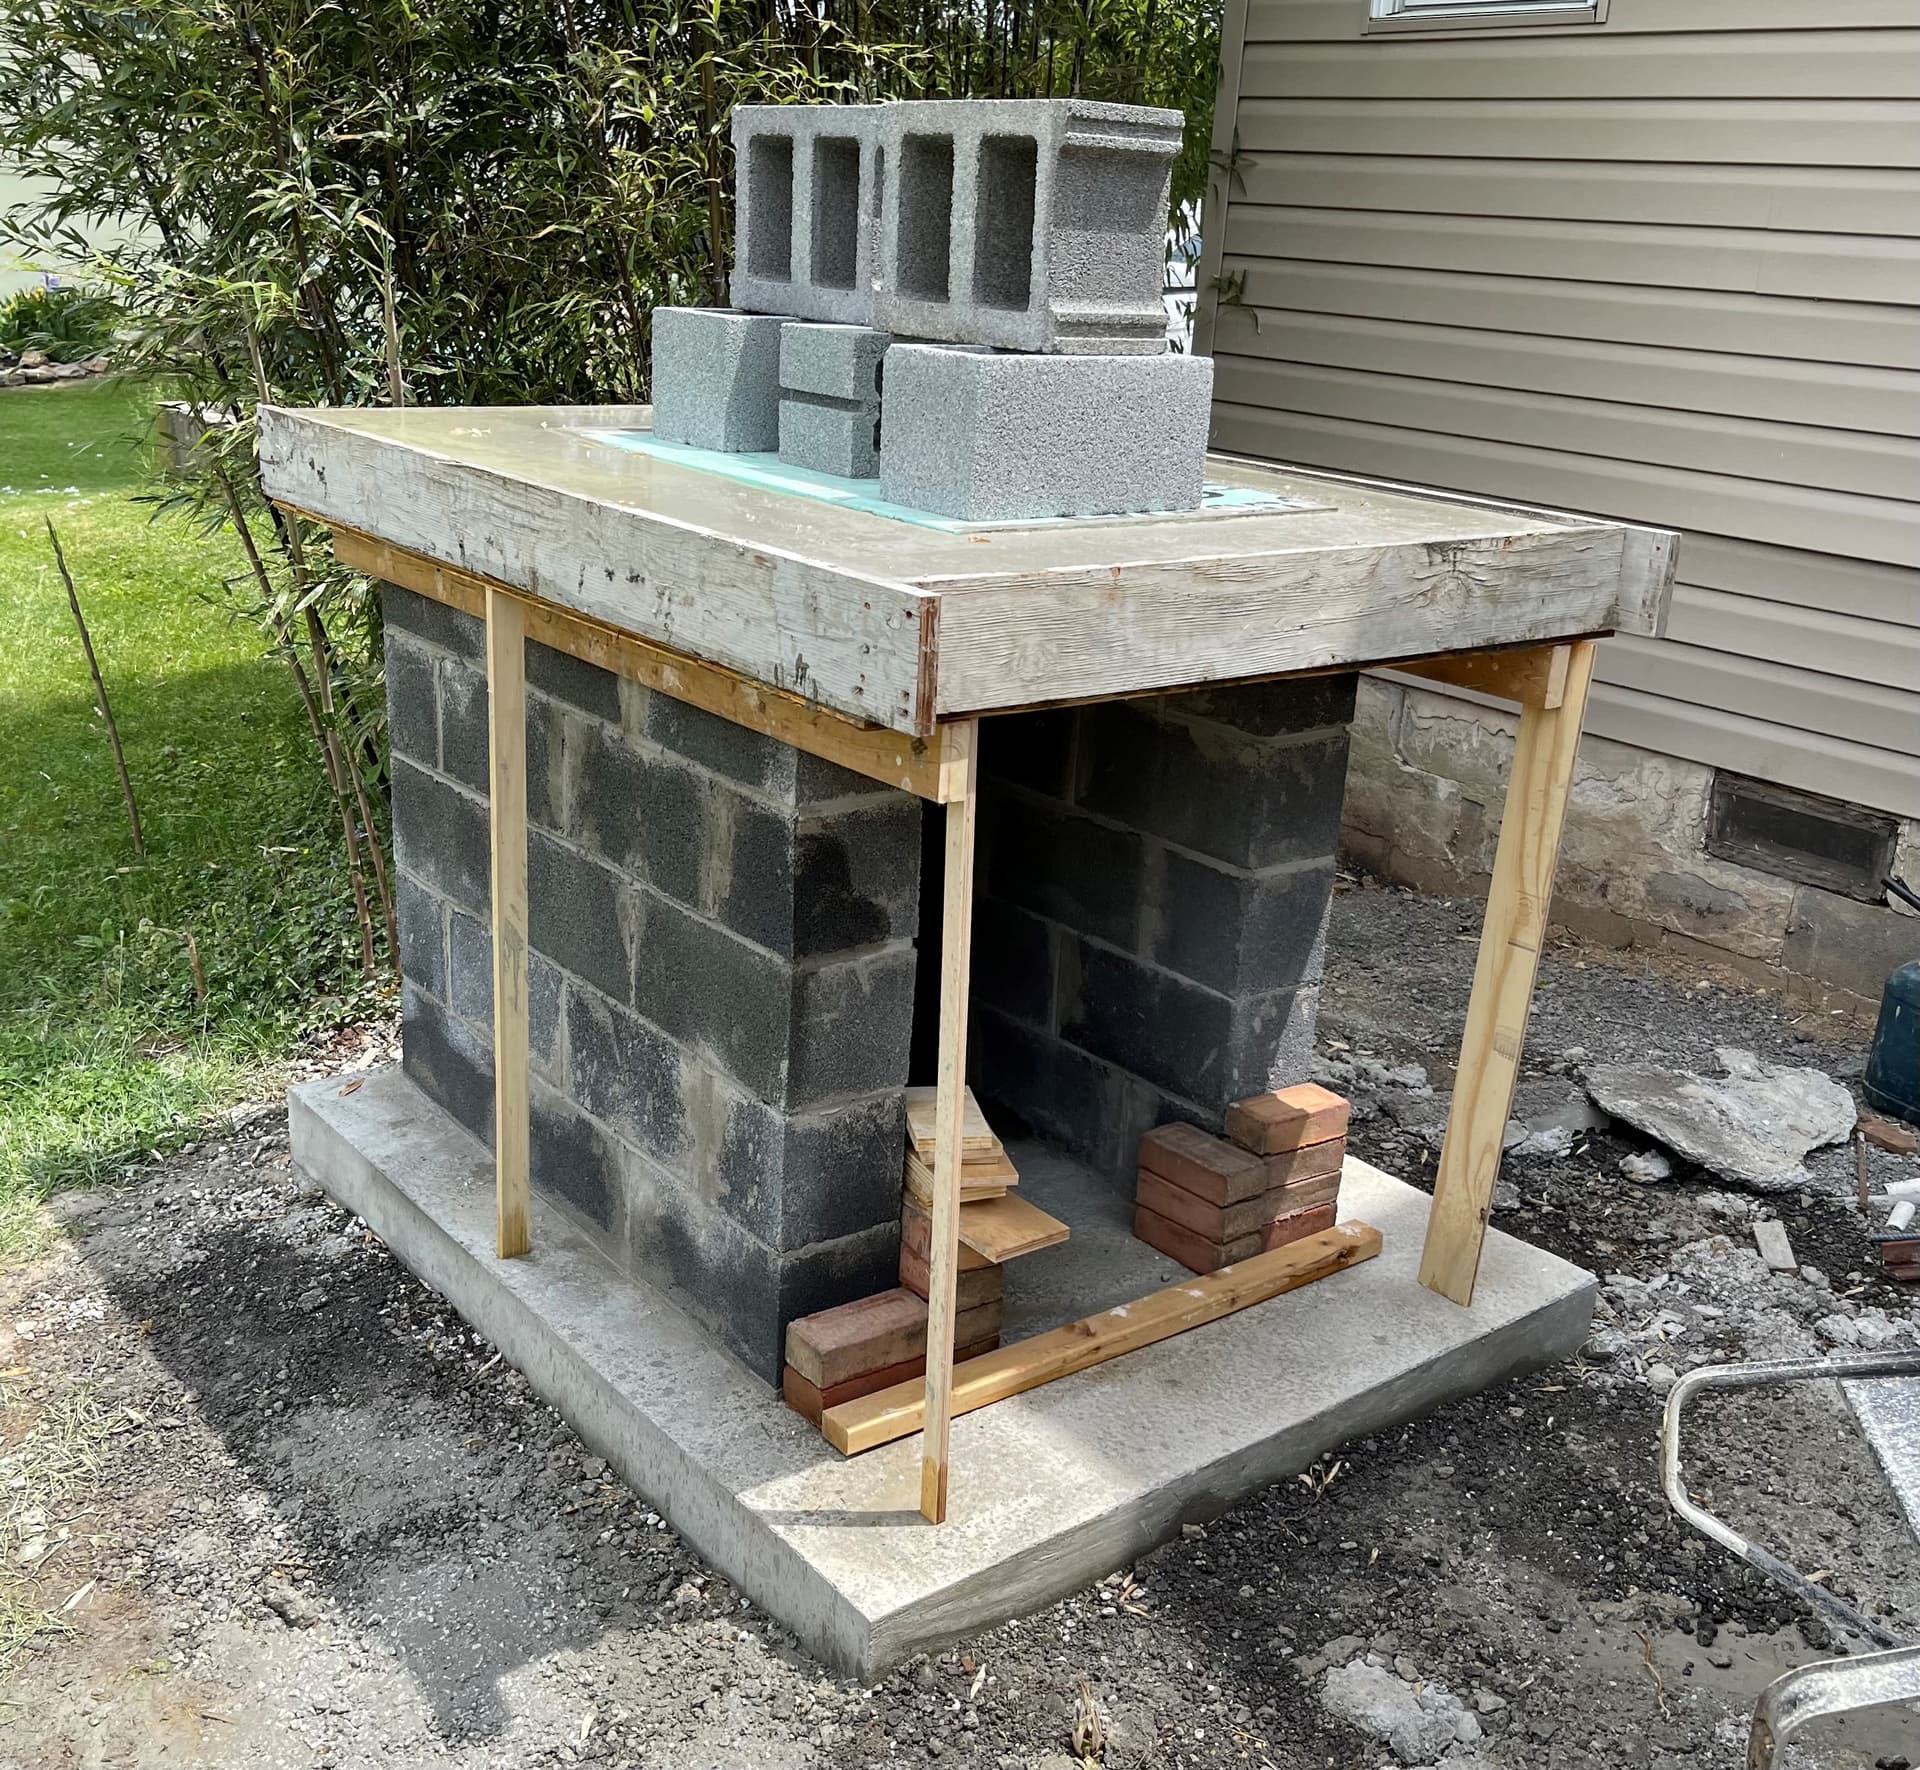
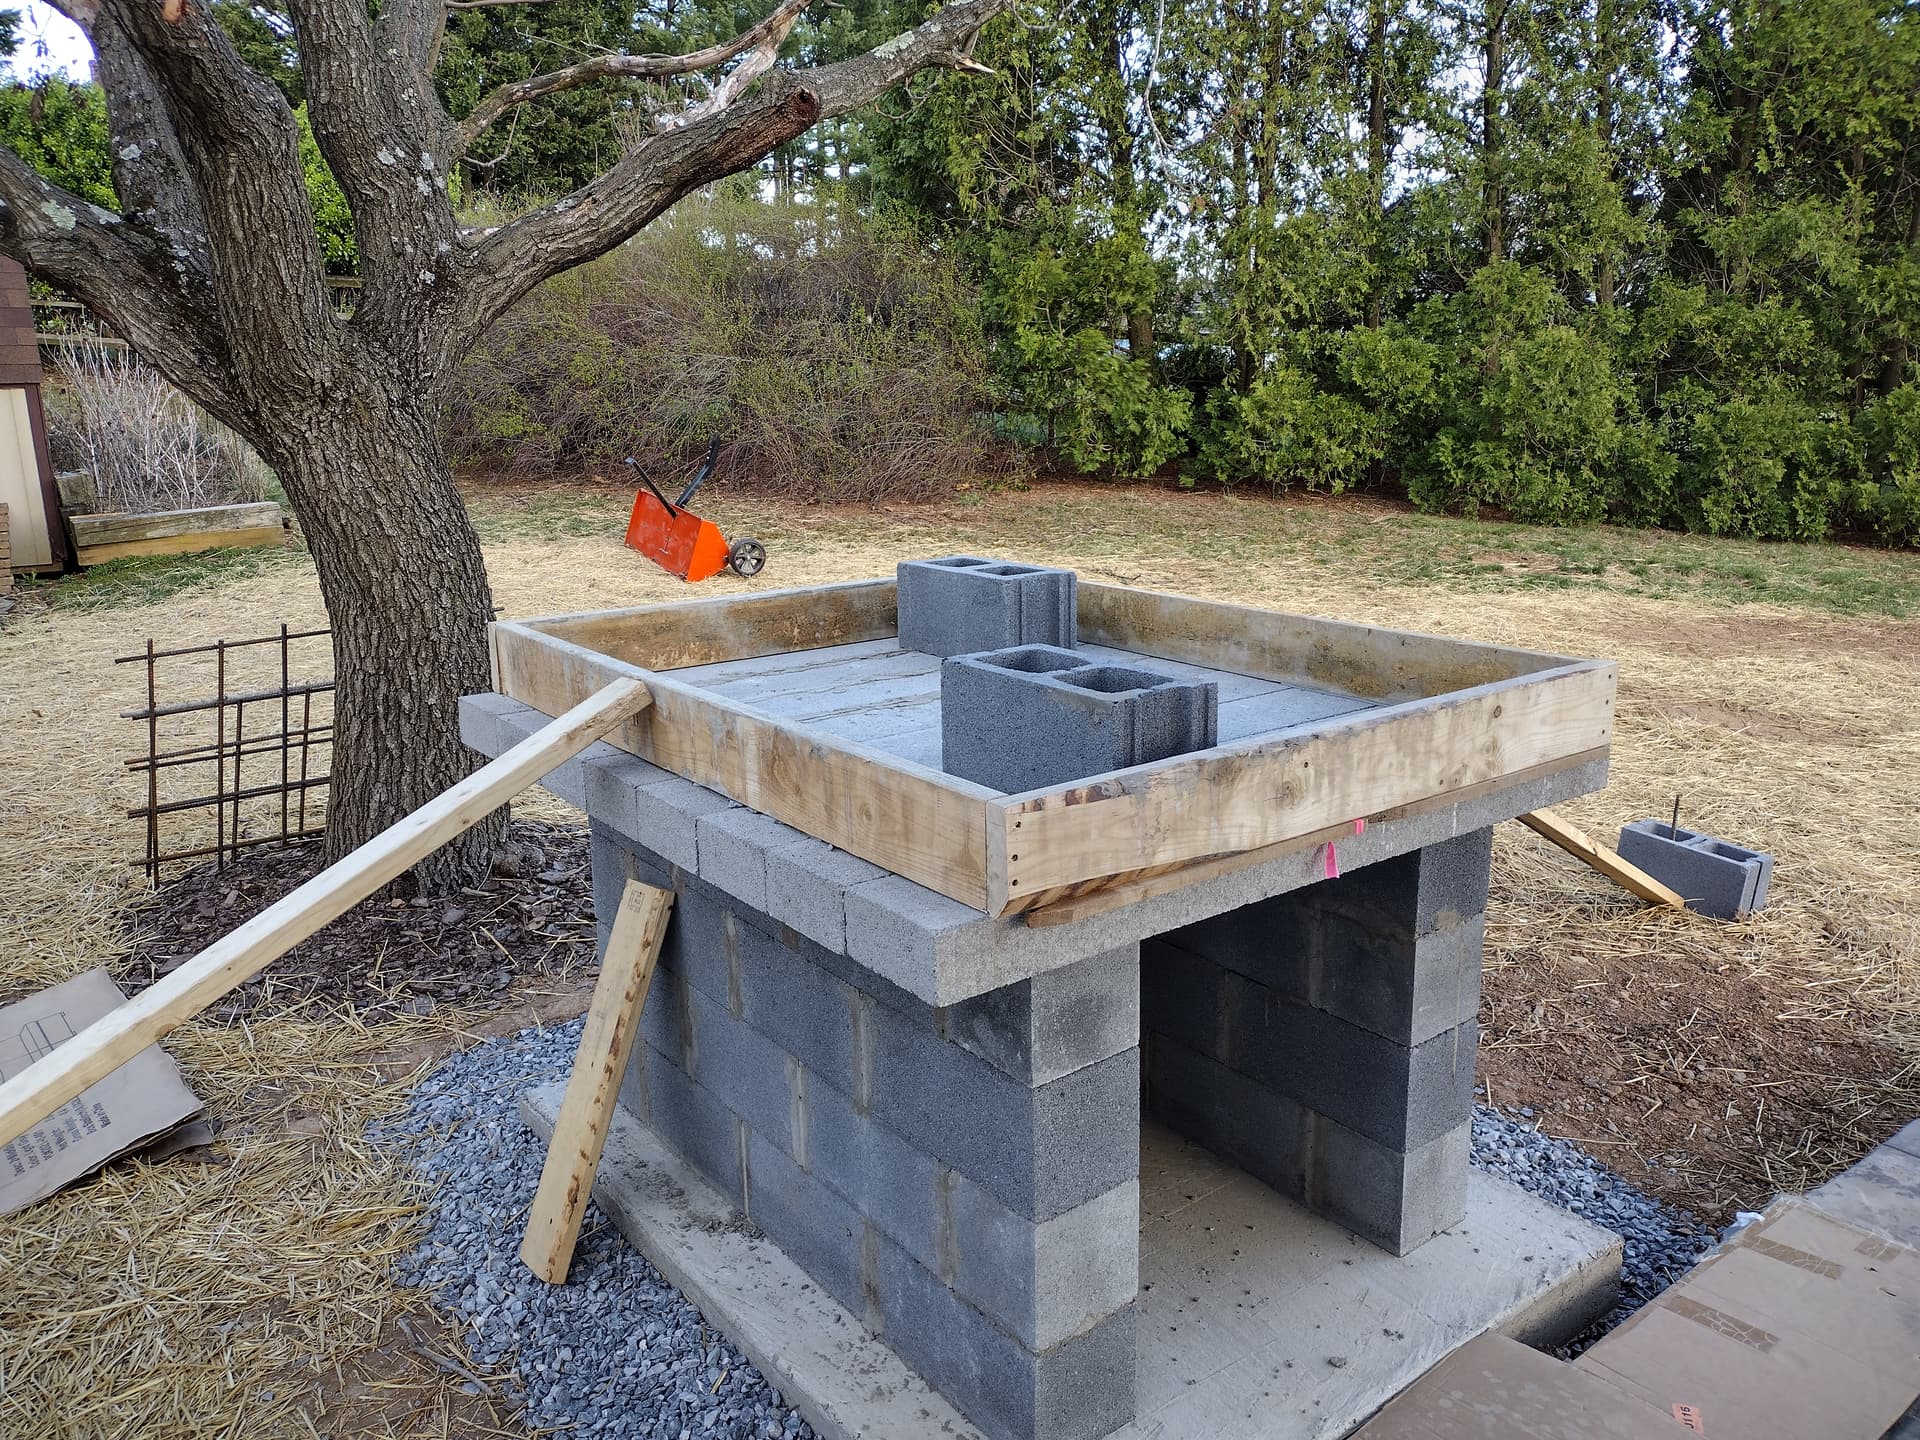
I constructed my hearth in one pour as well. I formed up the underneath (Inside the foundation walls) with plywood and supports and built a similar form around the perimeter with 3/4" plywood. I then used a piece of rigid 2" Styrofoam to make the recess for the insulated concrete layer in the center. It turned out very well.
FYI -Do not lay a piece of plywood over the entire foundation, you won’t be able to remove it and it will eventually rot. Form the center section independent of the sides. I have a picture somewhere I will try and post.
Thanks very much for sharing, this helps a lot. I had to read your description a couple times and I think I understand what you mean.
Just to confirm that I understand:
Is this correct?
Thanks again!
Greg
Yes that’s correct. I used concrete screws to fasten 2x4’s to the block as supports
@MattPoff Matthew’s description is spot on!
@BrickWood just posted a gallery of another build, start to finish, that includes pouring the slab in place. The middle photos in particular show the form. It uses aspen wood rather than plywood, but same idea.
It will take a moment for it to sink in, but when it does, you’ll see that @dlacroix set it up so that he could pull all the bottom wood out from under once the slab had set.
(This is also a shameless plug for the new gallery format that Kevin is rolling out!)
Good luck and take lots of photos!
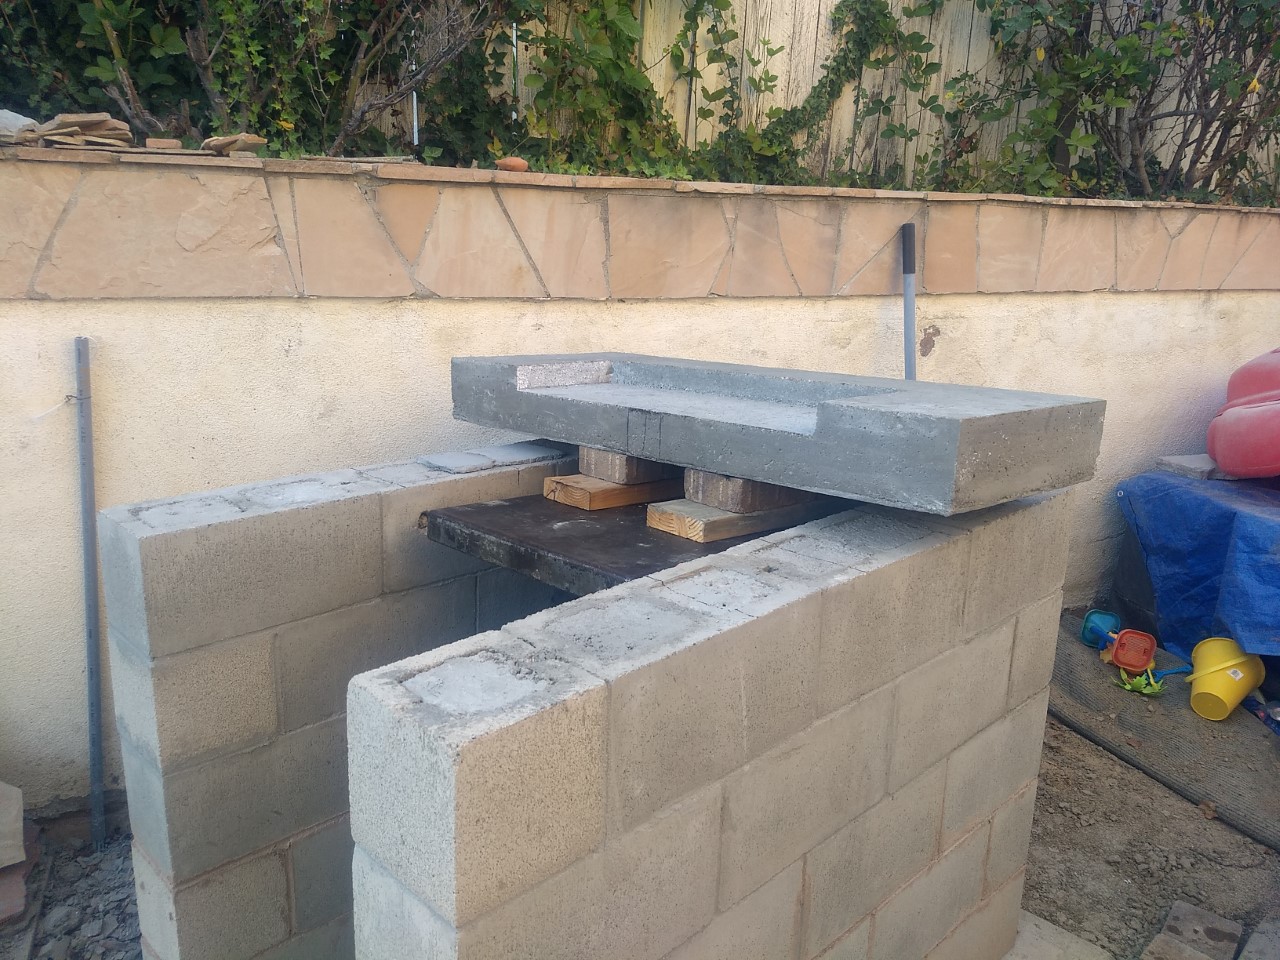
If you still want to do the thermal base in three sections you can. Rent an Engine hoist and a Motorcycle Hoist that will slide in between the cinder block side walls. Lift the sections starting with the rear section onto the cycle hoist and wheel into place over the cinder blocks. Apply mortar and lower rear section into place. Repeat with center then the front setion. It took me about an hour and a half for the three sections.
Good luck on your build however you do it. We love ours and use it two or three time a month
This is a well thought out solution to the “one worker/three slabs” problem. The design breaks the slab into three sections to make it easier to cast and hoist them, but it’s still impractical for most builders working on their own. Your solution allows for safe suspension of each slab while placing a bed of mortar on the concrete block base, and I think it’s elegant. (A caution to others wanting to try it: placement of that first slab is critical, because you’re working back to front instead of center out. Measure carefully!)
On my single slab pour pics you can see the rebar matrix that is spread throughout the hearth slab. Because I was cantilevering the slab out with the rounded corners I tied the entire hearth slab matrix into the rebar that runs through the cement block base which then ties into the base slab. Not sure if that was entirely necessary but my thinking was that I’m only building this once and did not want to have any structural issues. It’s also important to make sure you use a high strength mix for that single slab pour.
This is a great detail, thanks for sharing it. Did you also use rebar in the insulating layer (section that the firebrick is over)?
I also tied the foundation rebar into the hearth slab.
I really like the patio stone you have.
I didn’t use rebar in that layer. I did however use a section of hog fence that I had leftover. It’s kind of tricky to explain. I cut the hog fence so it would suspend from the side and back walls. The center aspenite board was about 2 inches below the hog fence and the insulating layer was poured so that the hog fence was sort of floating in that insulating layer. Once cured I added the bedding sand about an inch and a half and then set my fire brick…I hope this helps
This is a great explanation, it makes total sense thanks!
Matt,
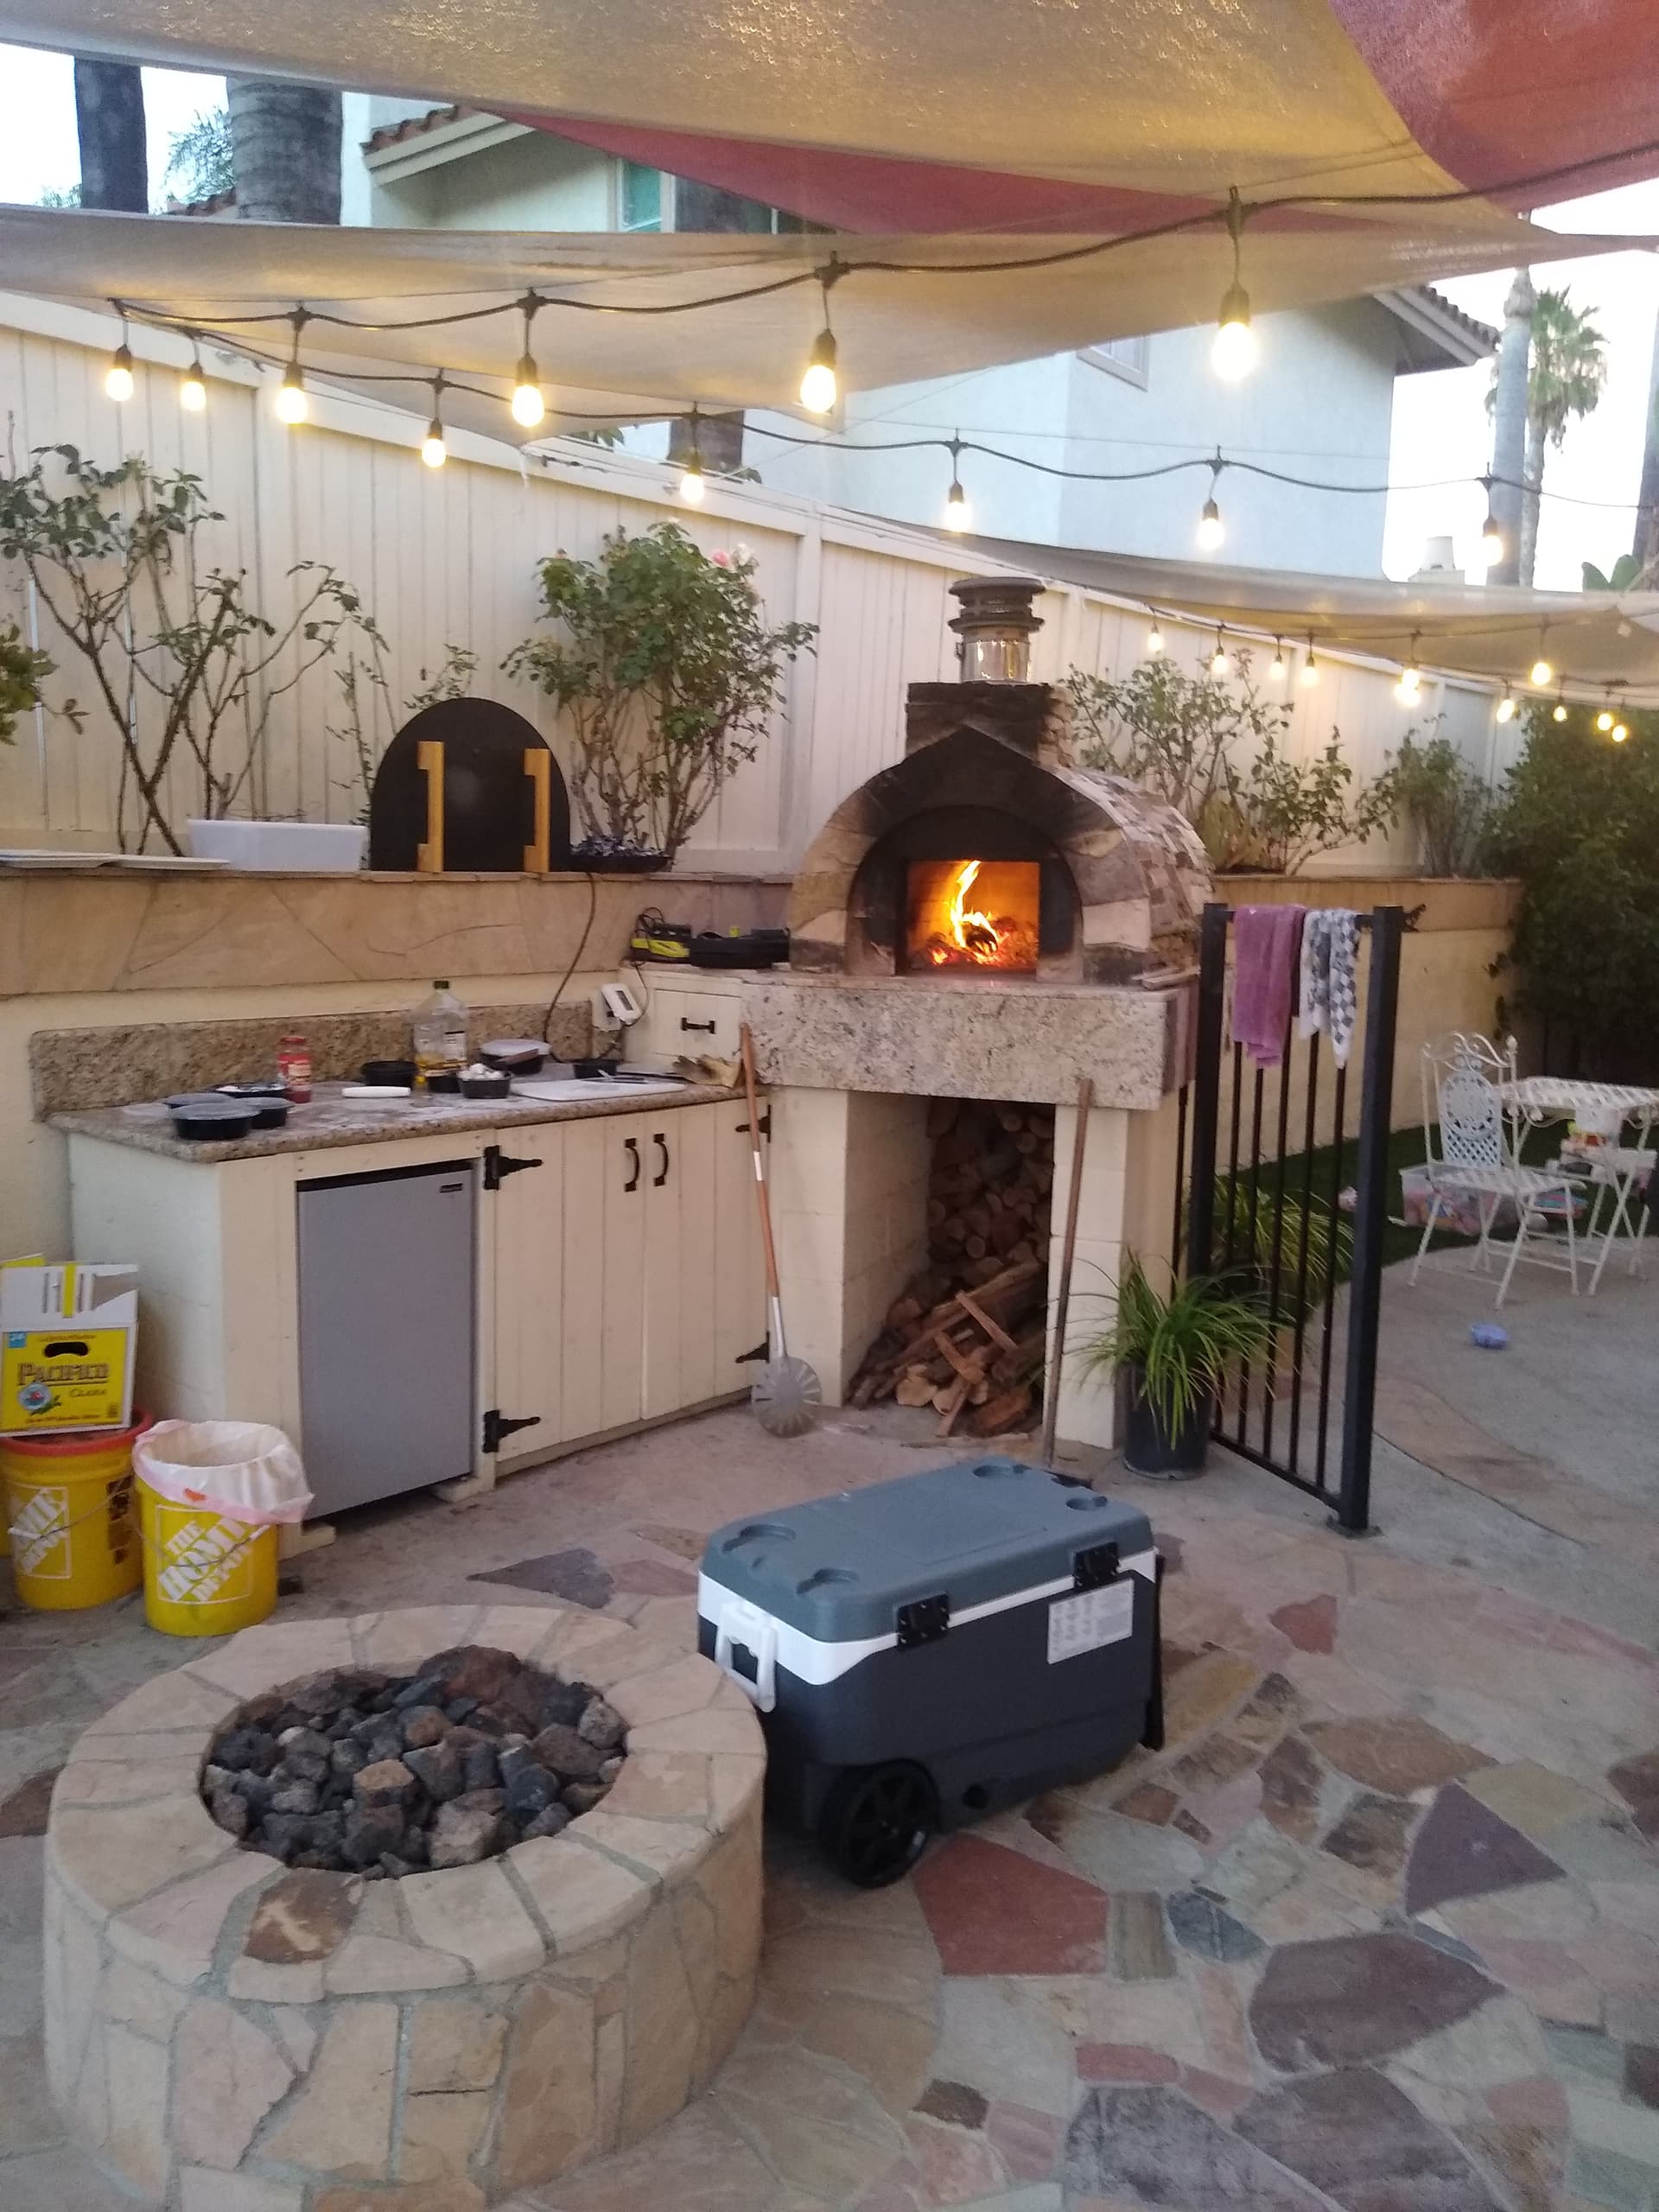
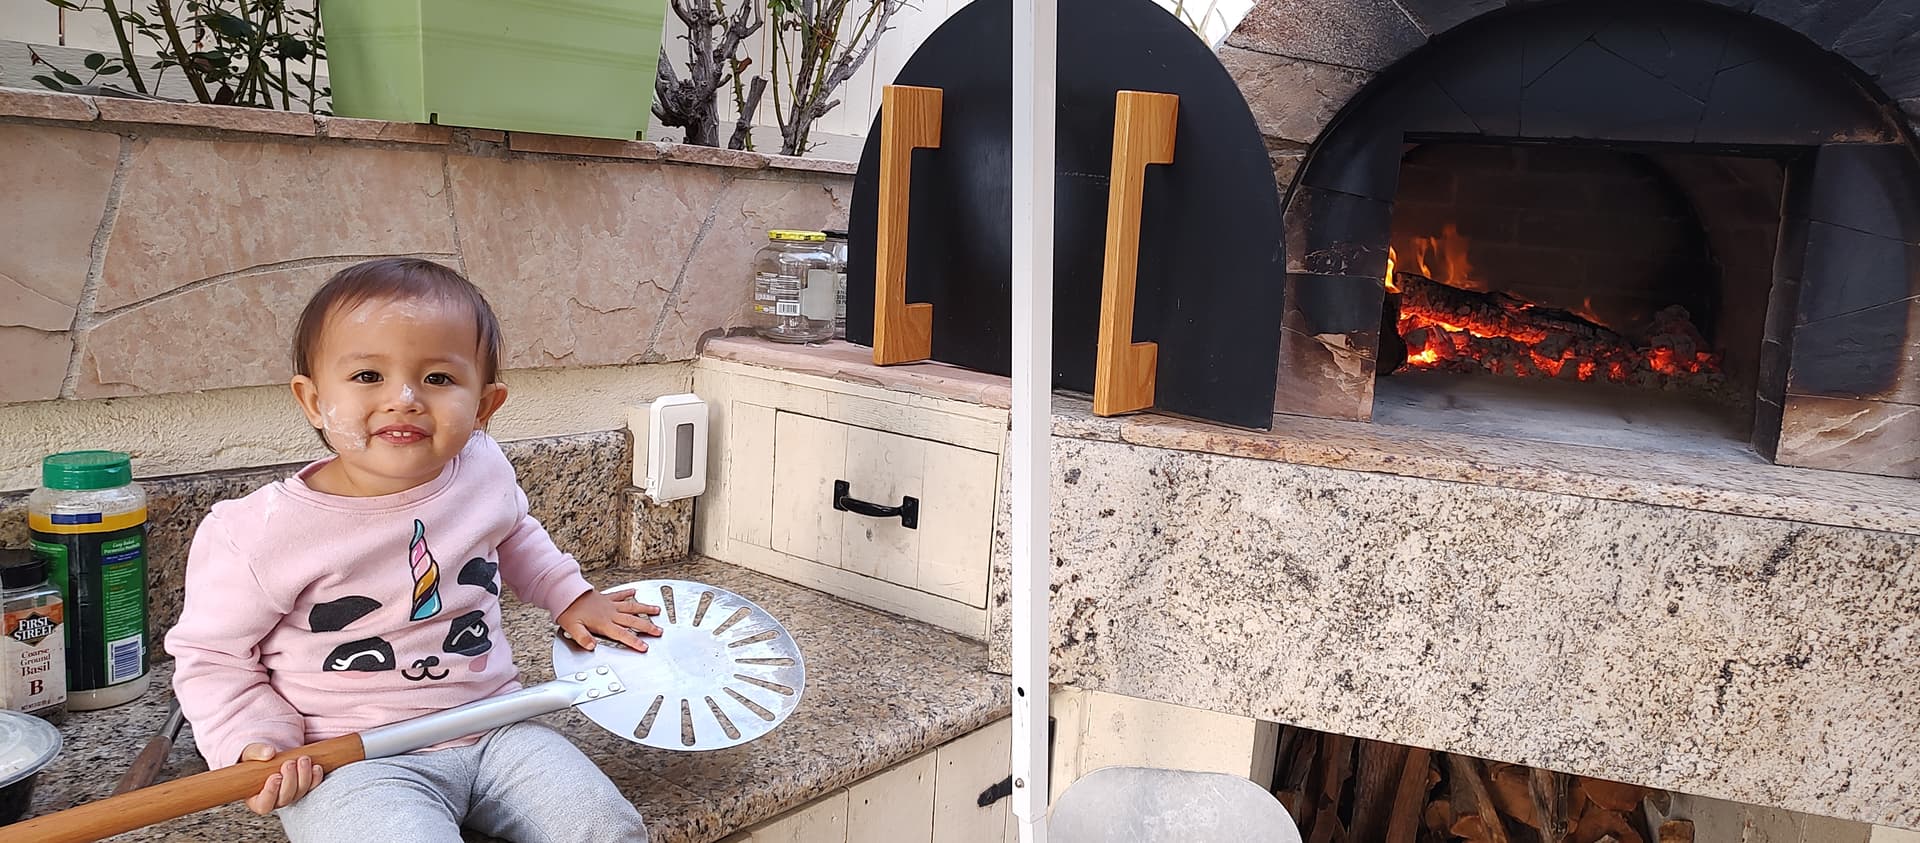
Afew photos of the finished oven on with my helper last night.Grand kids are the best.
You can also see more of the flagstone finish on the deck around the oven and pool.
Finished the build about June 2019 and just gettinf around to posting the build photos.
You’ve got a beautiful outdoor kitchen setup there, Tom! I like the small touches, such as that short section of fence that I presume keeps grandkids from running in just as a delectable pie is being pulled from the oven. (They are the best!)
Our “stage 2” is a patio built around the oven; we’ll like use the bluestone that is native to southern New England rather than flagstone, but your setup is a big inspiration to me.
Thanks again for sharing photos!
I did the single slab in place. Built the frame. I dividied the plywood in three equal sections.
I laid the plywood frame on shims. Poured the whole thing as one unit with the rebar as per the drawings. Once it was dried and curred I rigged up a jacking system to lift the slab, front center and back; and remove the plywood.
Here was my problem when I jacked it up and put it back down the whole slab was off center.
Luckily my landscape contractor, who did the base, still has is fork lift on site and we pushed the slab to get it center on the block.
The mono pour is great idea and works just have to get a way to pull the wood out
Dino
Yes…i actually used a section of hog fence i had. Sorry for late reply
Just following up on this thread. I ended up using concrete window lentils to build my hearth on. This allowed me to make a simple single rectangle form (and reuse the boards used to pour the base slab) on top of the lentils and do a single pour for the hearth. My main reason for using lentils is that they are small enough so I could lift them onto the pedestal without needing a tractor, forklift, or a bunch of help.