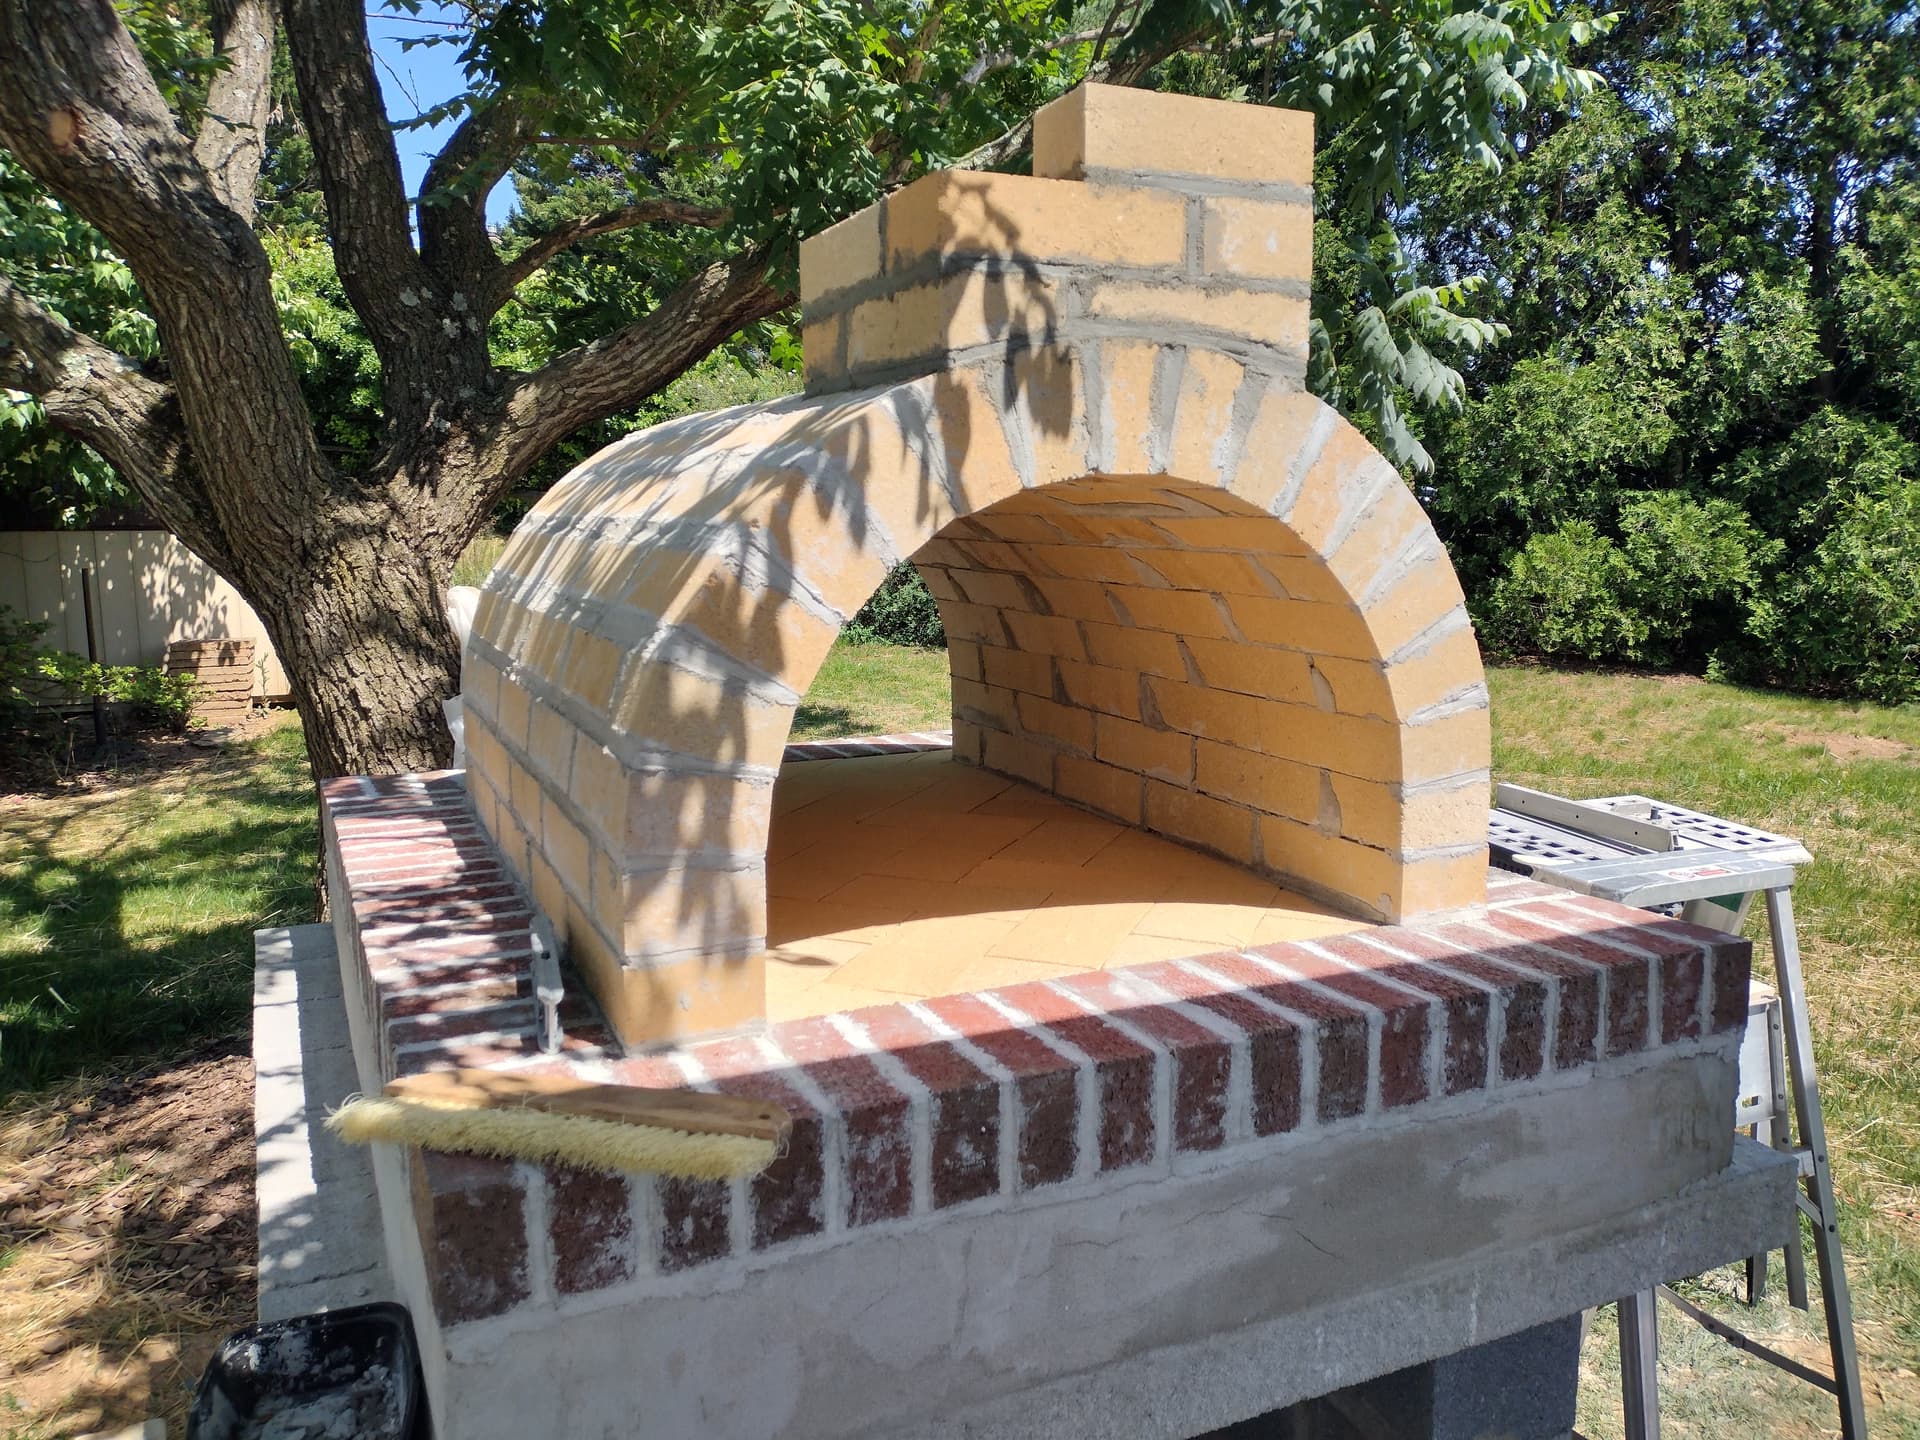
I removed the form before building the back wall. This has been my plan, and it made removal very easy for me. I simply knocked the attached legs of the form out from under the arch portion of the form. I used one of the 2x6s that I had used to build the base and a hammer to knock out the legs of the form through the length of oven (back to front). It only took a couple of minutes. After removing both legs, I simply gave the arch form a tap and it dropped to the floor for removal. I’m sure others have taken a similar approach but thought I would share my experience.
I also completed the chimney, which for me was the most challenging due to brick cuts required. I was able to make them with a small table saw and an angle grinder, but it was time consuming. On to the back wall!
This is a great technique, and having read a couple of similar accounts I’m now thinking of it as the preferred way to go. I haven’t seen any upside to leaving the form in place until the back wall is built, and doing this gives you a mechanical advantage in case the arch section of the form gets stuck in the mortar—which sometimes happens. Ask me how I know.
I’m sure that @BrickWood will appreciate your clear photos, and will join me in applauding that simple tap that dropped the form!
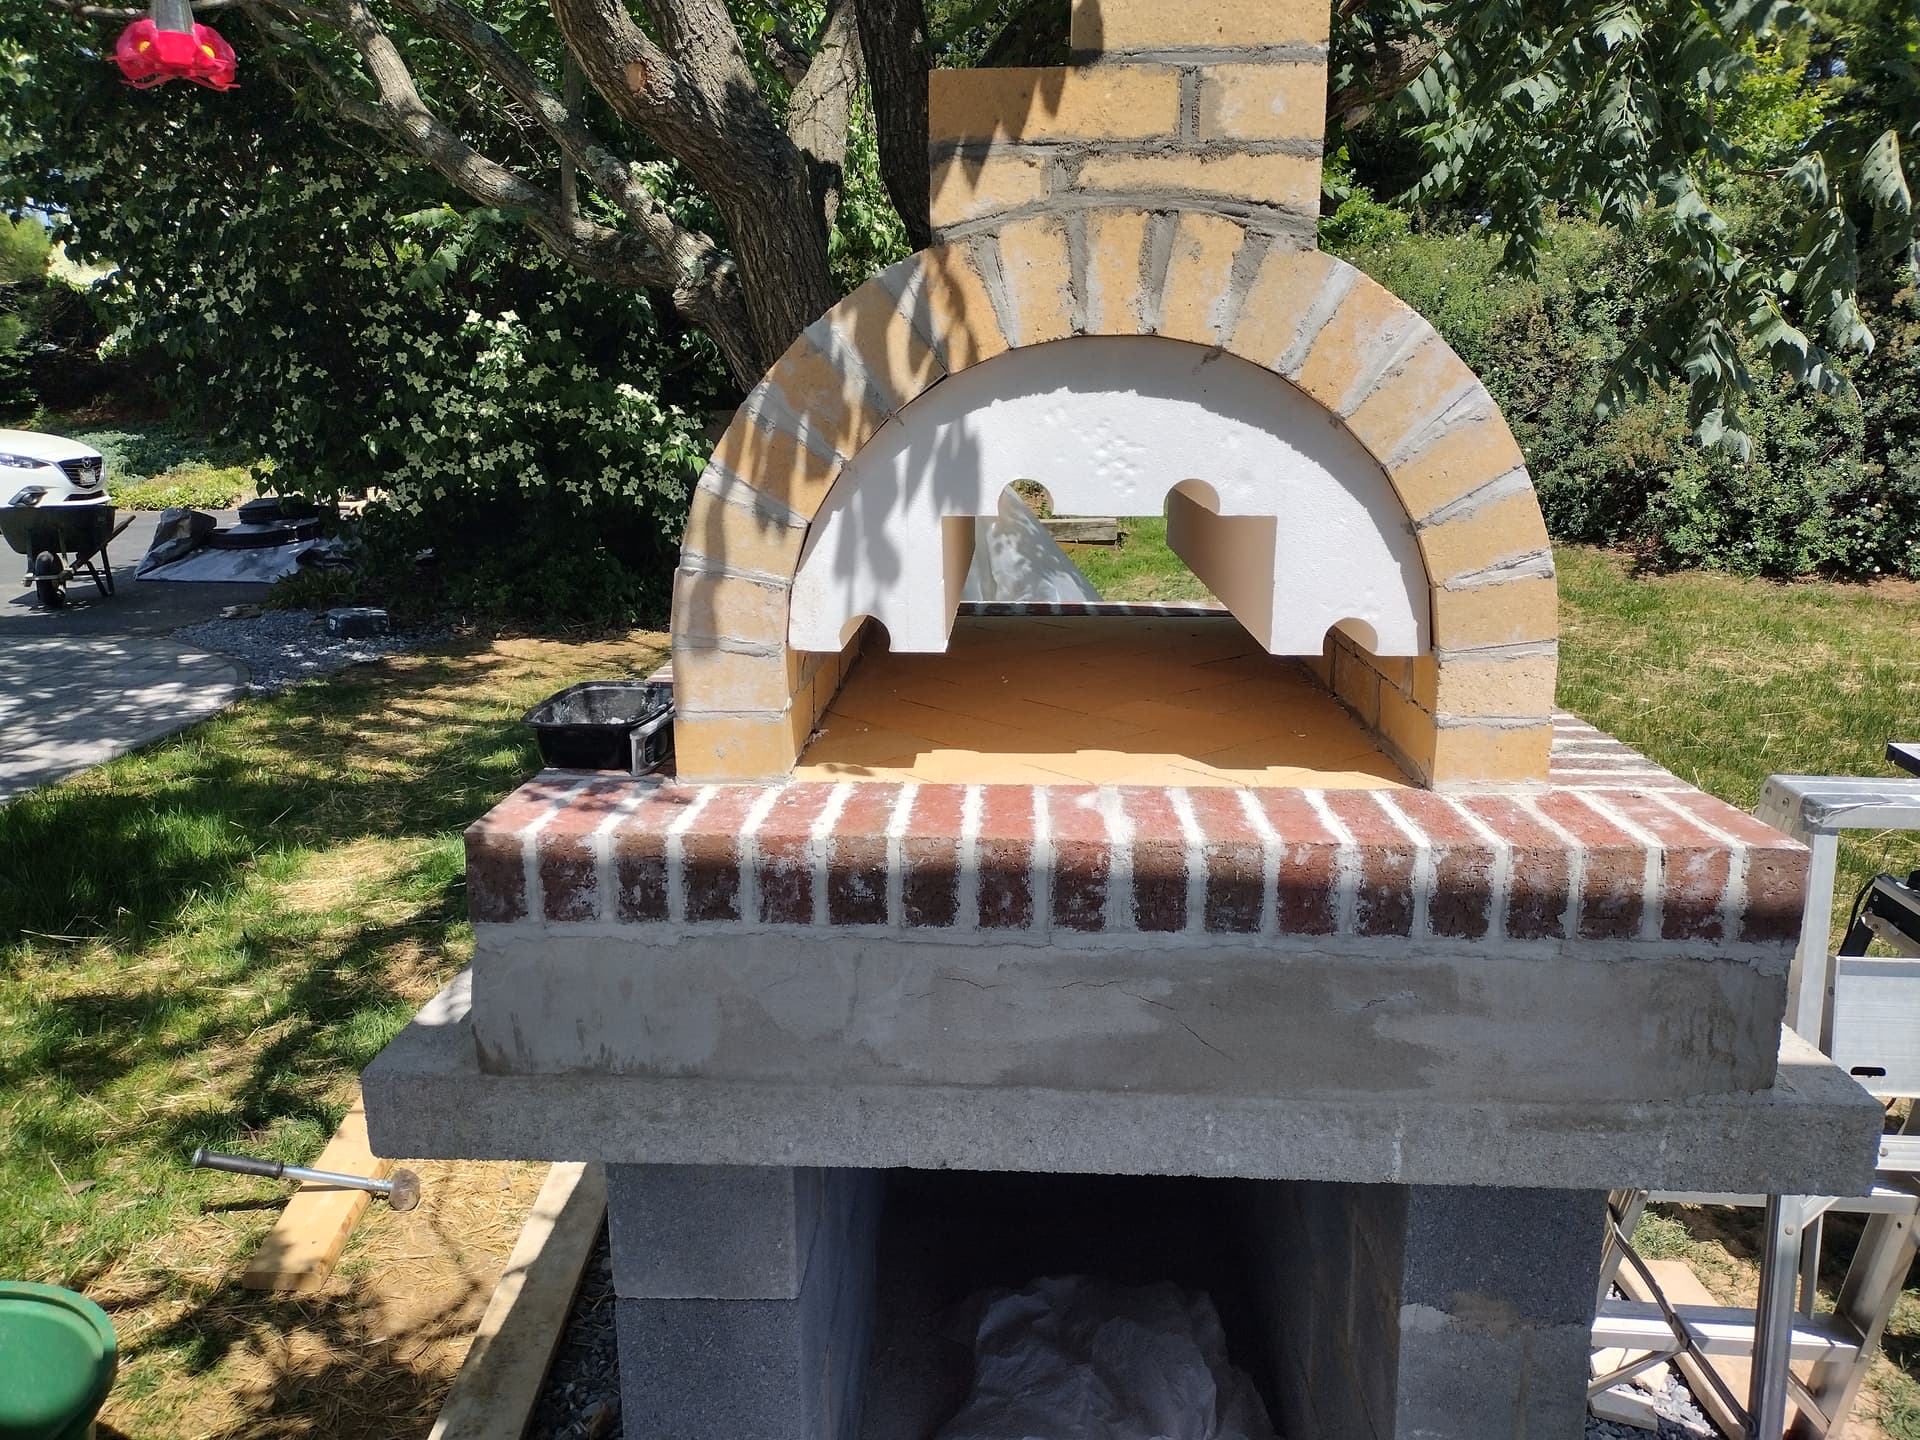
Over the years, we’ve had several customers build the oven arch - then remove the foam form BEFORE attaching the back wall… and the results seem solid. Unfortunately, I did not have the same result on the second BrickWood oven I built (in the early design & testing stages… pre-instructions period).
As I tapped the foam out of the completed arch with a 3lb rubber mallet, the vibration and jostling from the hammering caused numerous cracks in the mortar joints. And long cracks too - all the way down the length of the mortar joint. Even though the mortar looked and felt like it was fully cured - it was not . And as we took the oven apart, I could see plenty of moisture was still deep inside the mortar joints.
Since I designed the oven to be built by homeowners with little-to-zero masonry skills, I needed to make sure that this did not happen to them. The only fool-proof way to decrease the likelihood of this happening would be:
Let the arch dry / cure for a good 25-30 days before carefully removing the foam form, then building the back wall (and we ALL know that no one will wait 30 days - they’ll start removing the foam after 10 days max).
Building the entire oven (including the back wall), then letting that dry for a good week - then removing the foam with a knife or small saw.
The knife / saw method puts less stress on those mortar joints as the foam is removed in one swift motion vs. the push, push, pushing of the foam out the full length of the newly built oven arch.
But again - many people didn’t have the experience that I had and they successfully removed the foam prior to building the back wall. Soooo… in Directions 2.0, I’ll add a " How to Remove foam out the back of the oven" option - but ONLY if they let the oven cure for a good 30 days.
Thank you for the background on that, @BrickWood! This incident is a good counterweight to the arguments for extracting the arch before building the back.
I am speaking from the experience of my oven actually sitting for 30 (okay, 30+) days before extracting, having built the back wall, and I did the knife/saw/Sawzall/cussing method. We had a rare hurricane pass through here in the intervening time, so the mortar had plenty of opportunity to cure.
Adding an option in the 2.0 directions seems like a good way to go, with lots of boldface and maybe a nice CAD rendering of a cracked wall!