Installing a thermometer in the door looks easy enough. I would, though, like to put in a pinwheel damper along with the chimney damper so I can use the oven as a smoker as well. Has anyone put in such a damper? 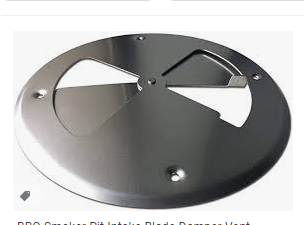
1 Like
Hi Lovealoha,
Yes this type of damper has been used with great success. Check out the thread “custom built pizza oven door”. Tomaso build a door just what your looking for.
Hope this helps.
1 Like
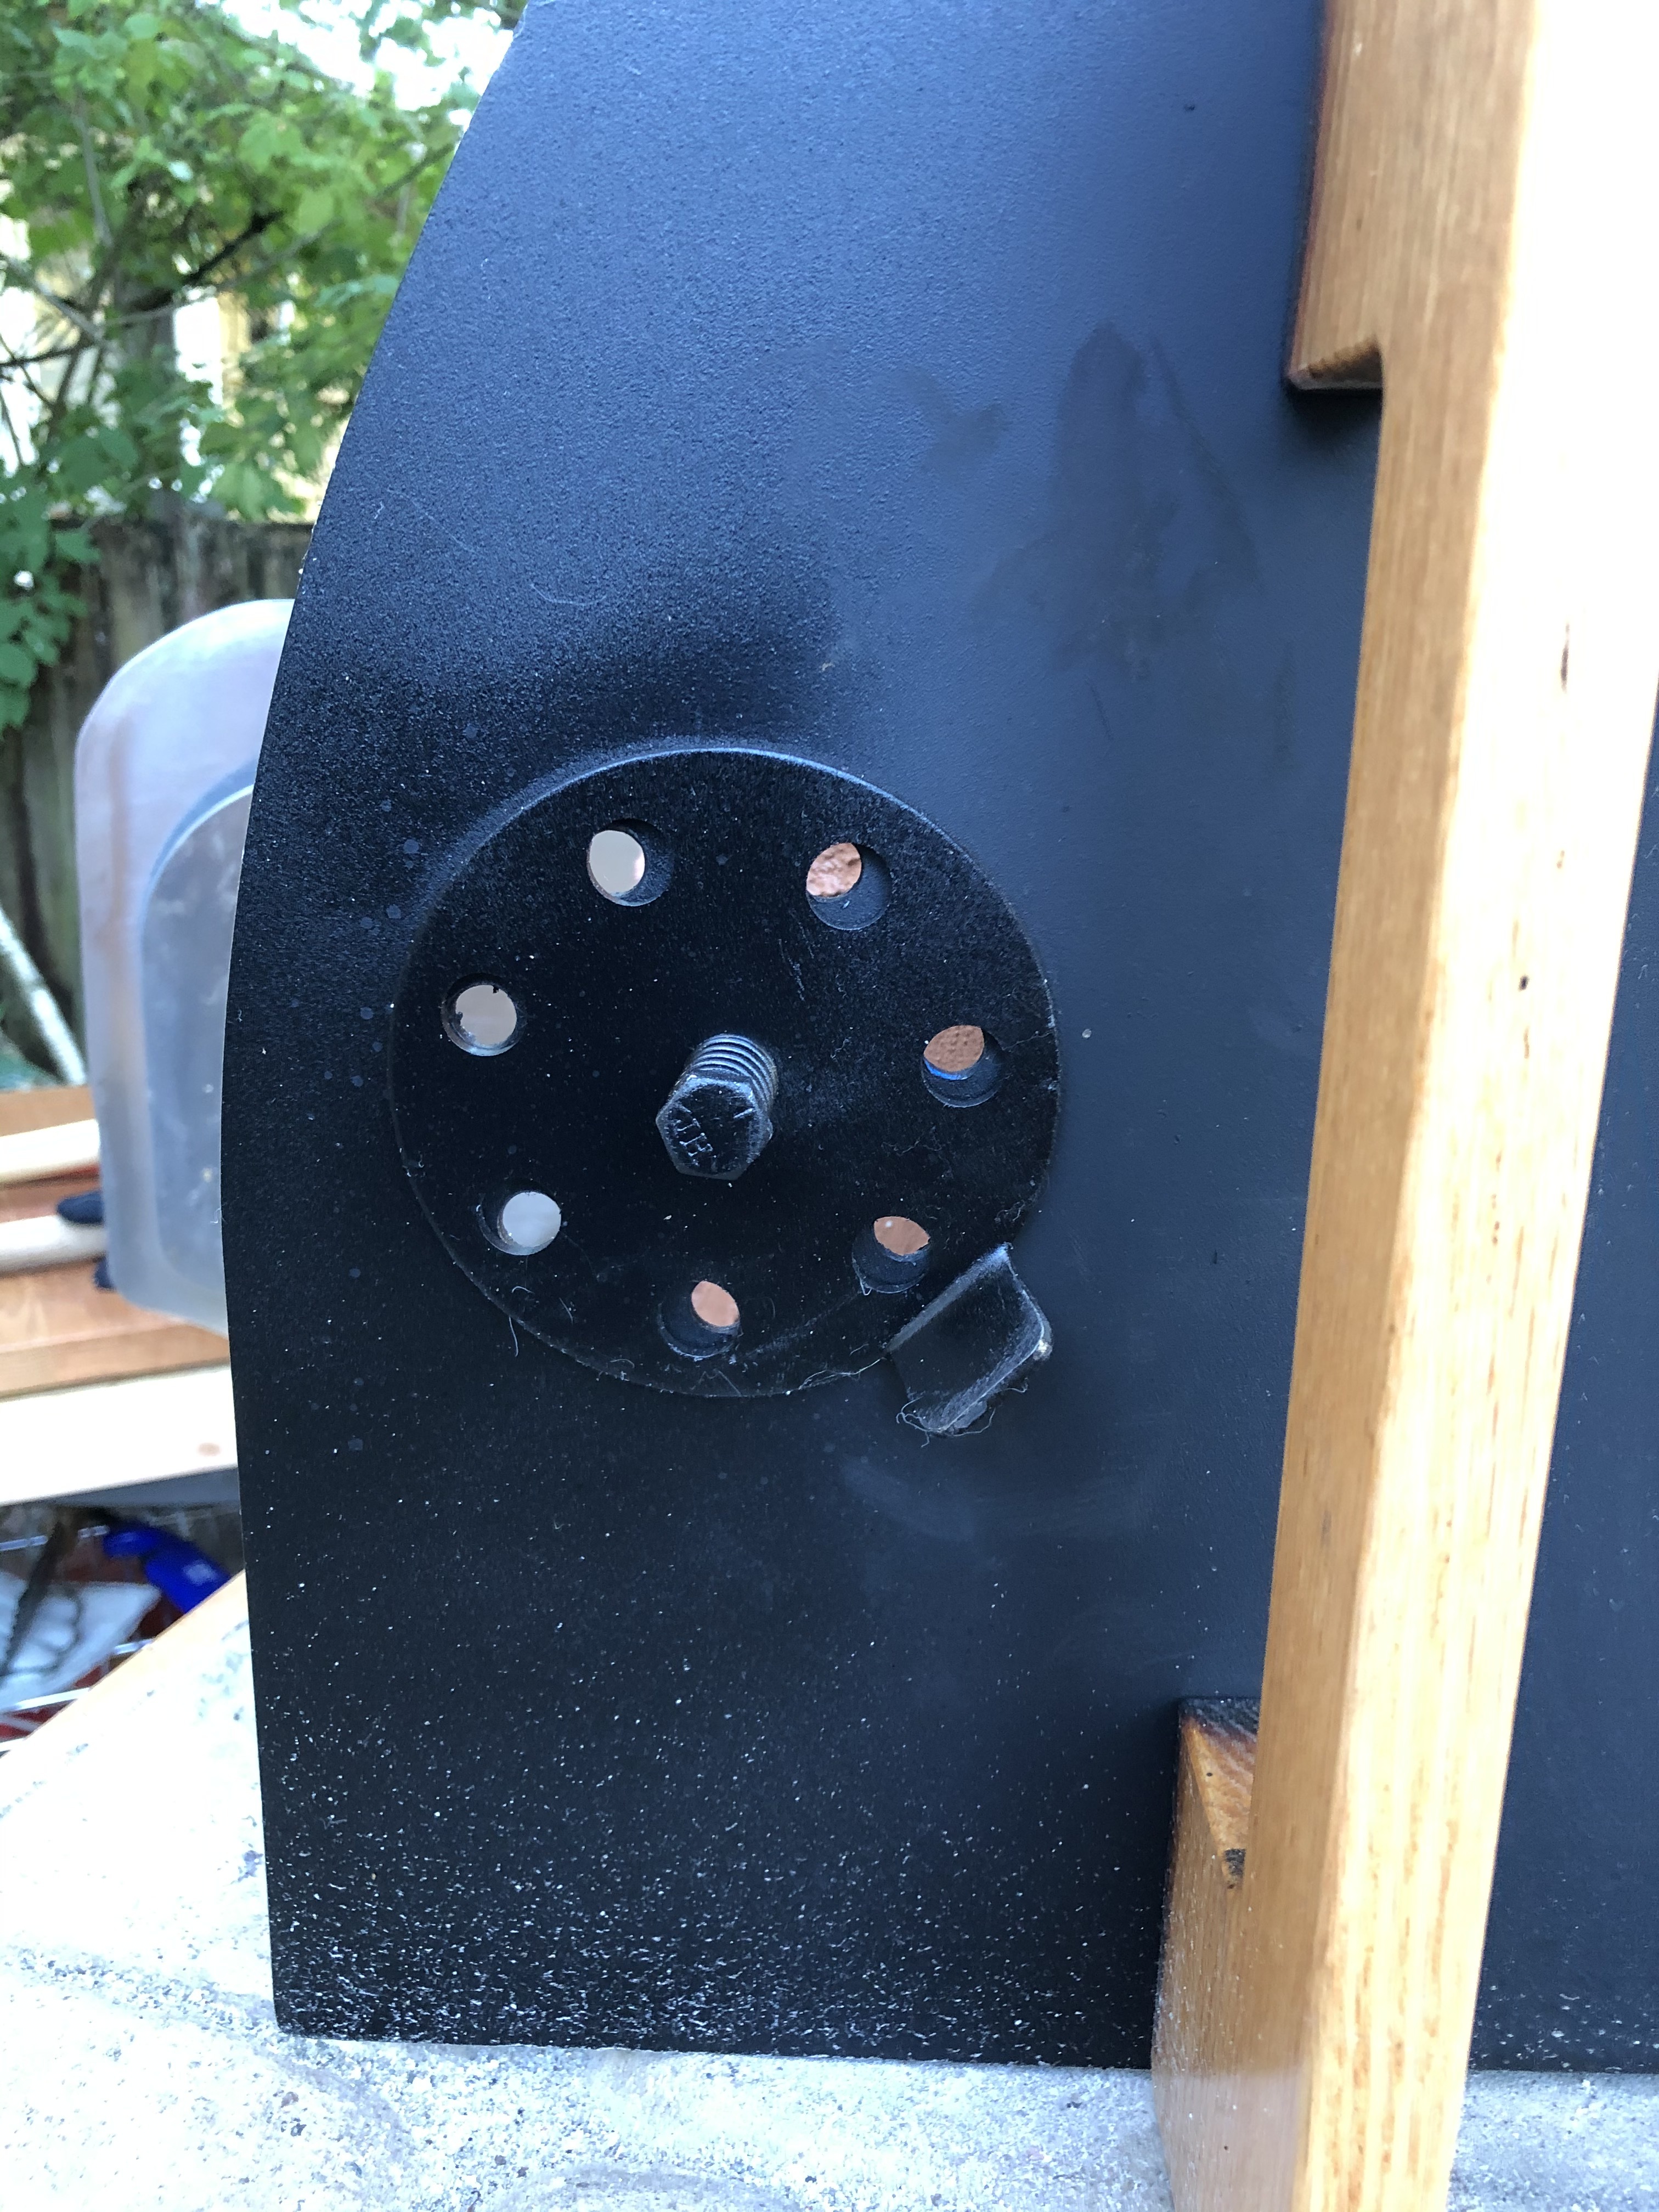
What I constructed is here on some thread…
here’s a picture…attached; need more info, let me know…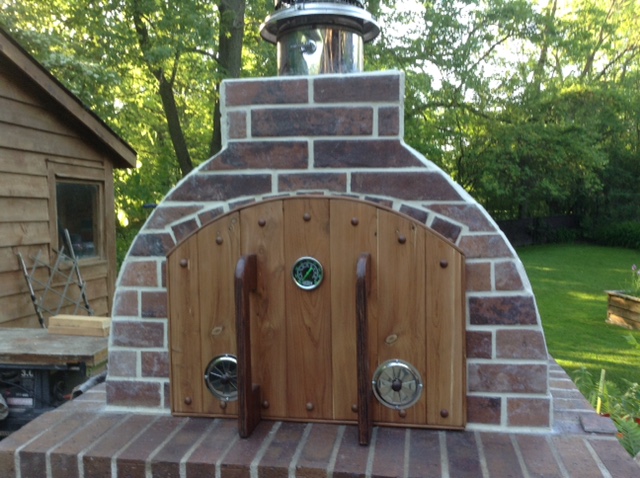
3 Likes
Thanks. I bought the stock door with the kit and am wondering if I can cut a vent in to it. Yours looks fantastic!
1 Like
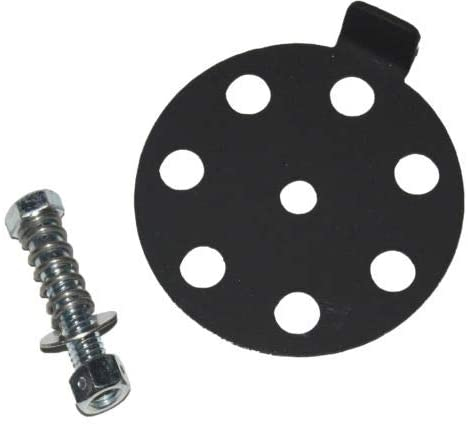
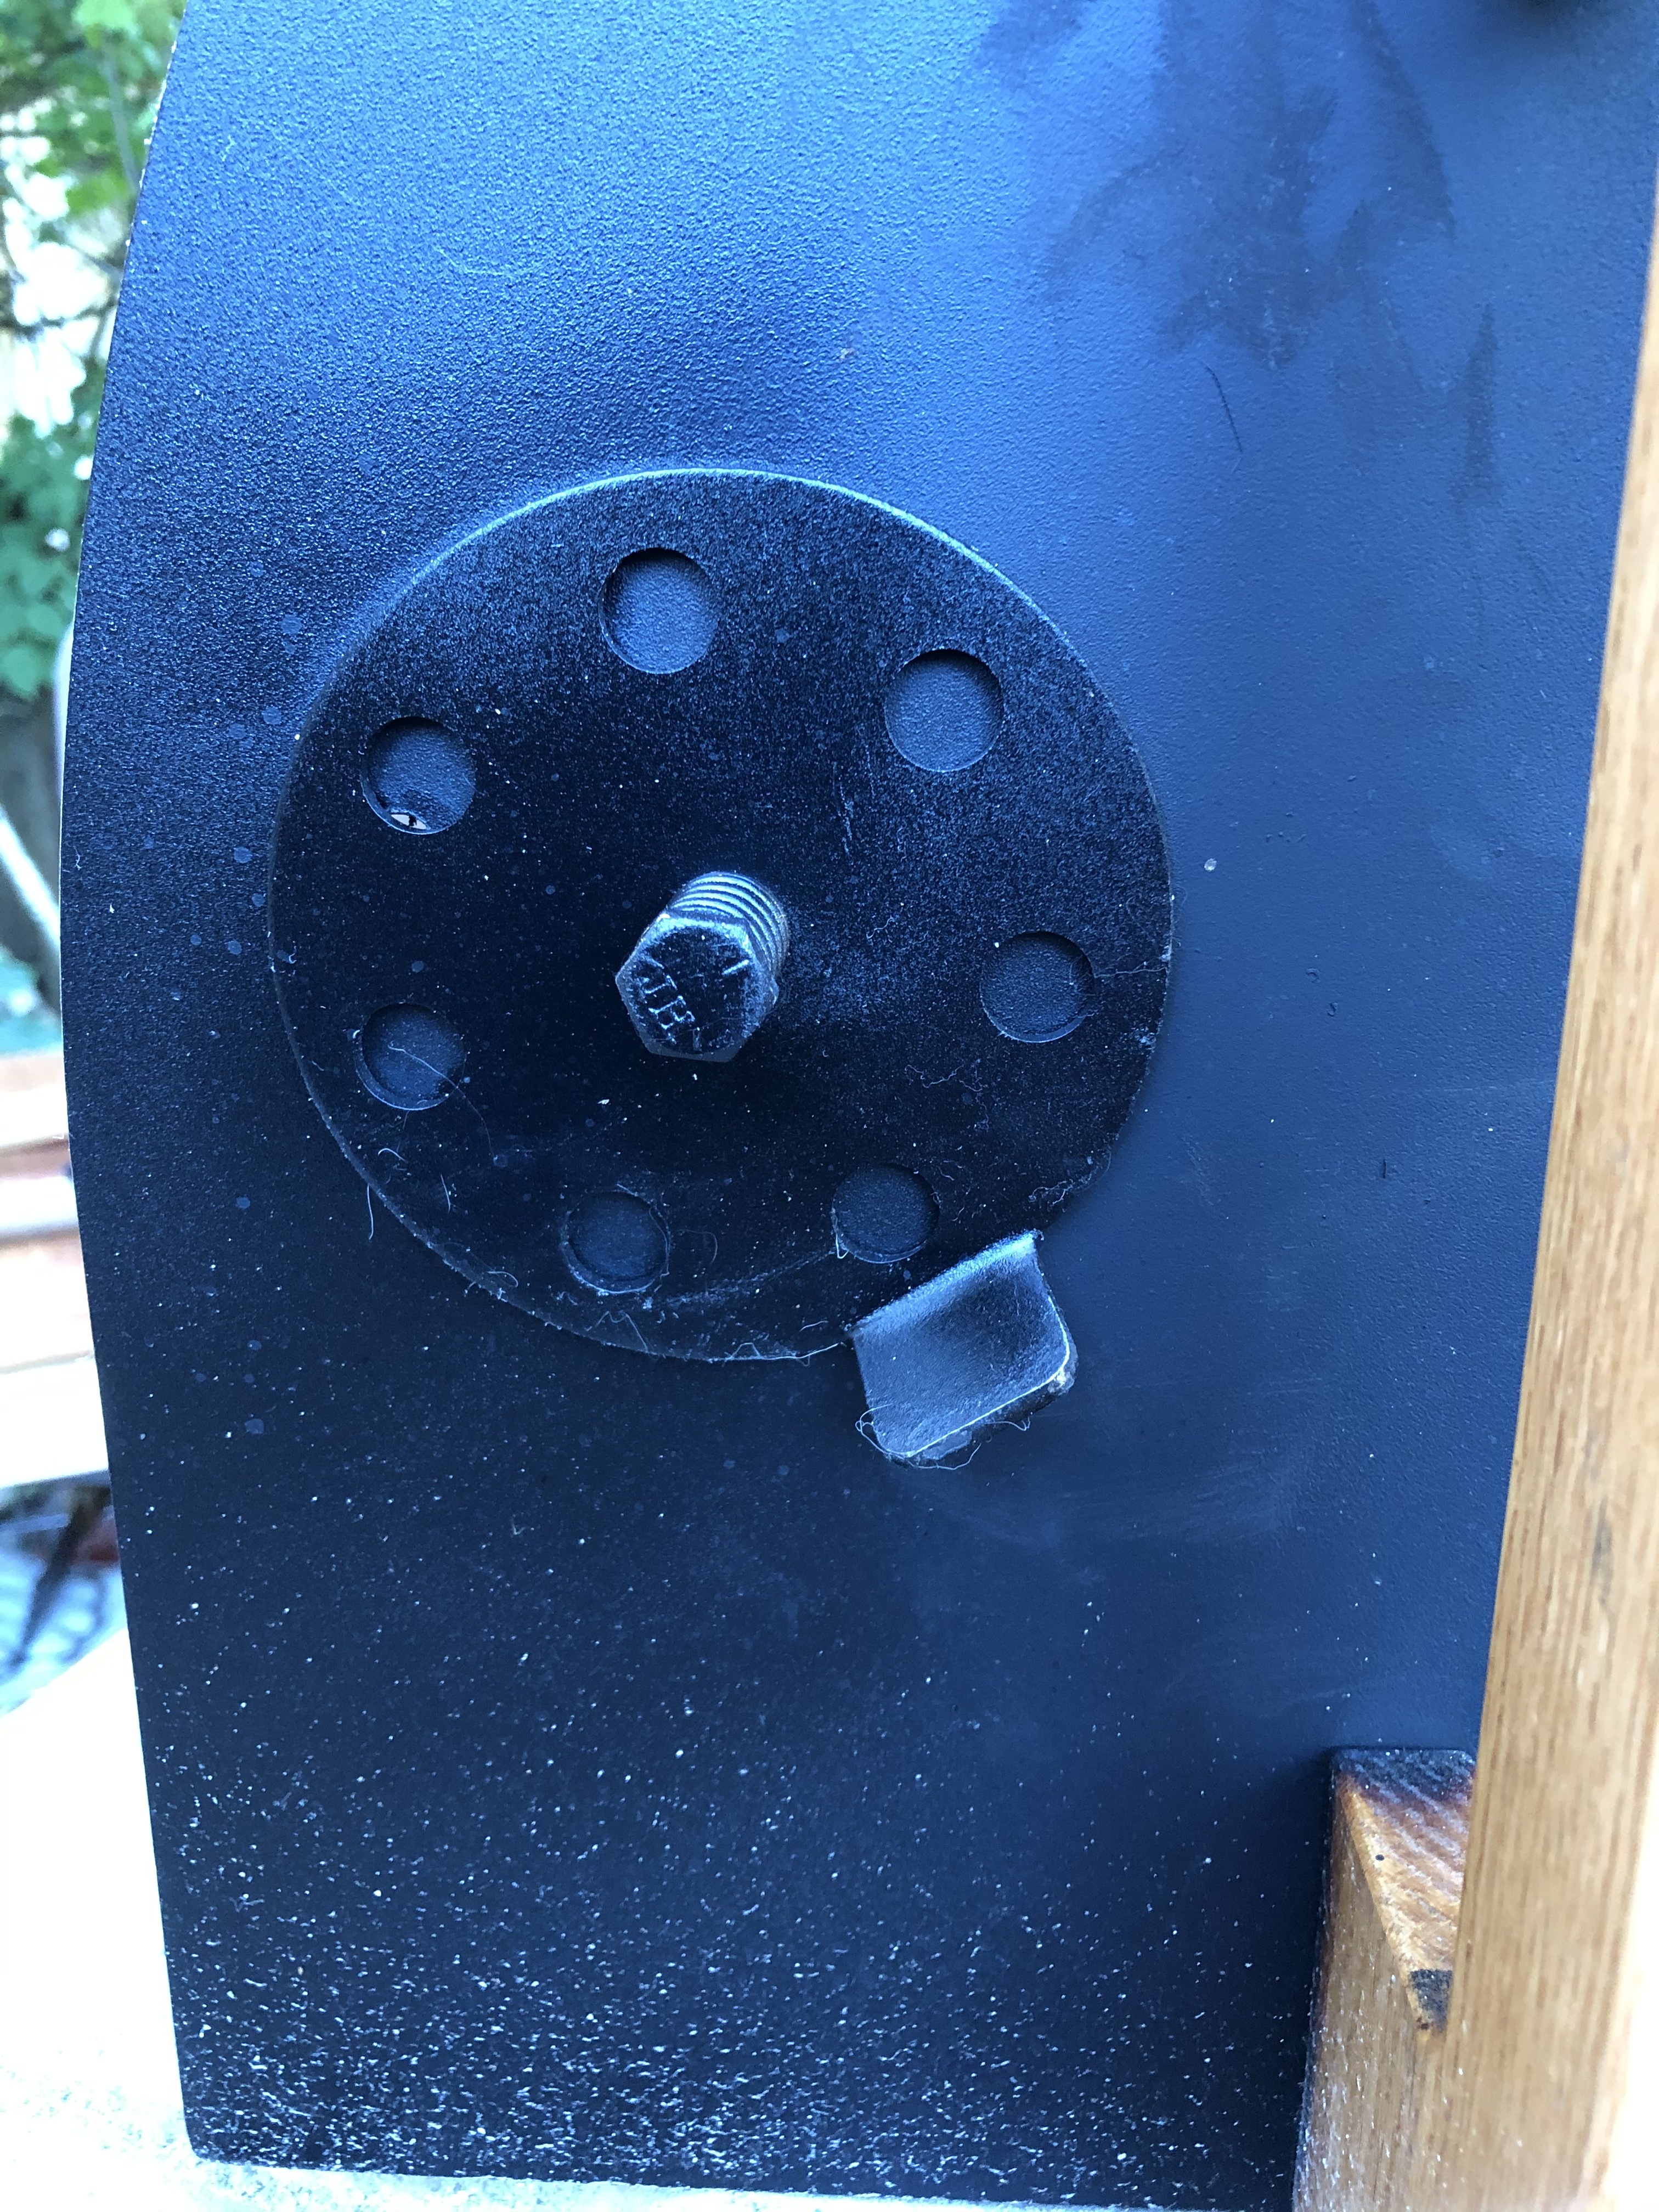
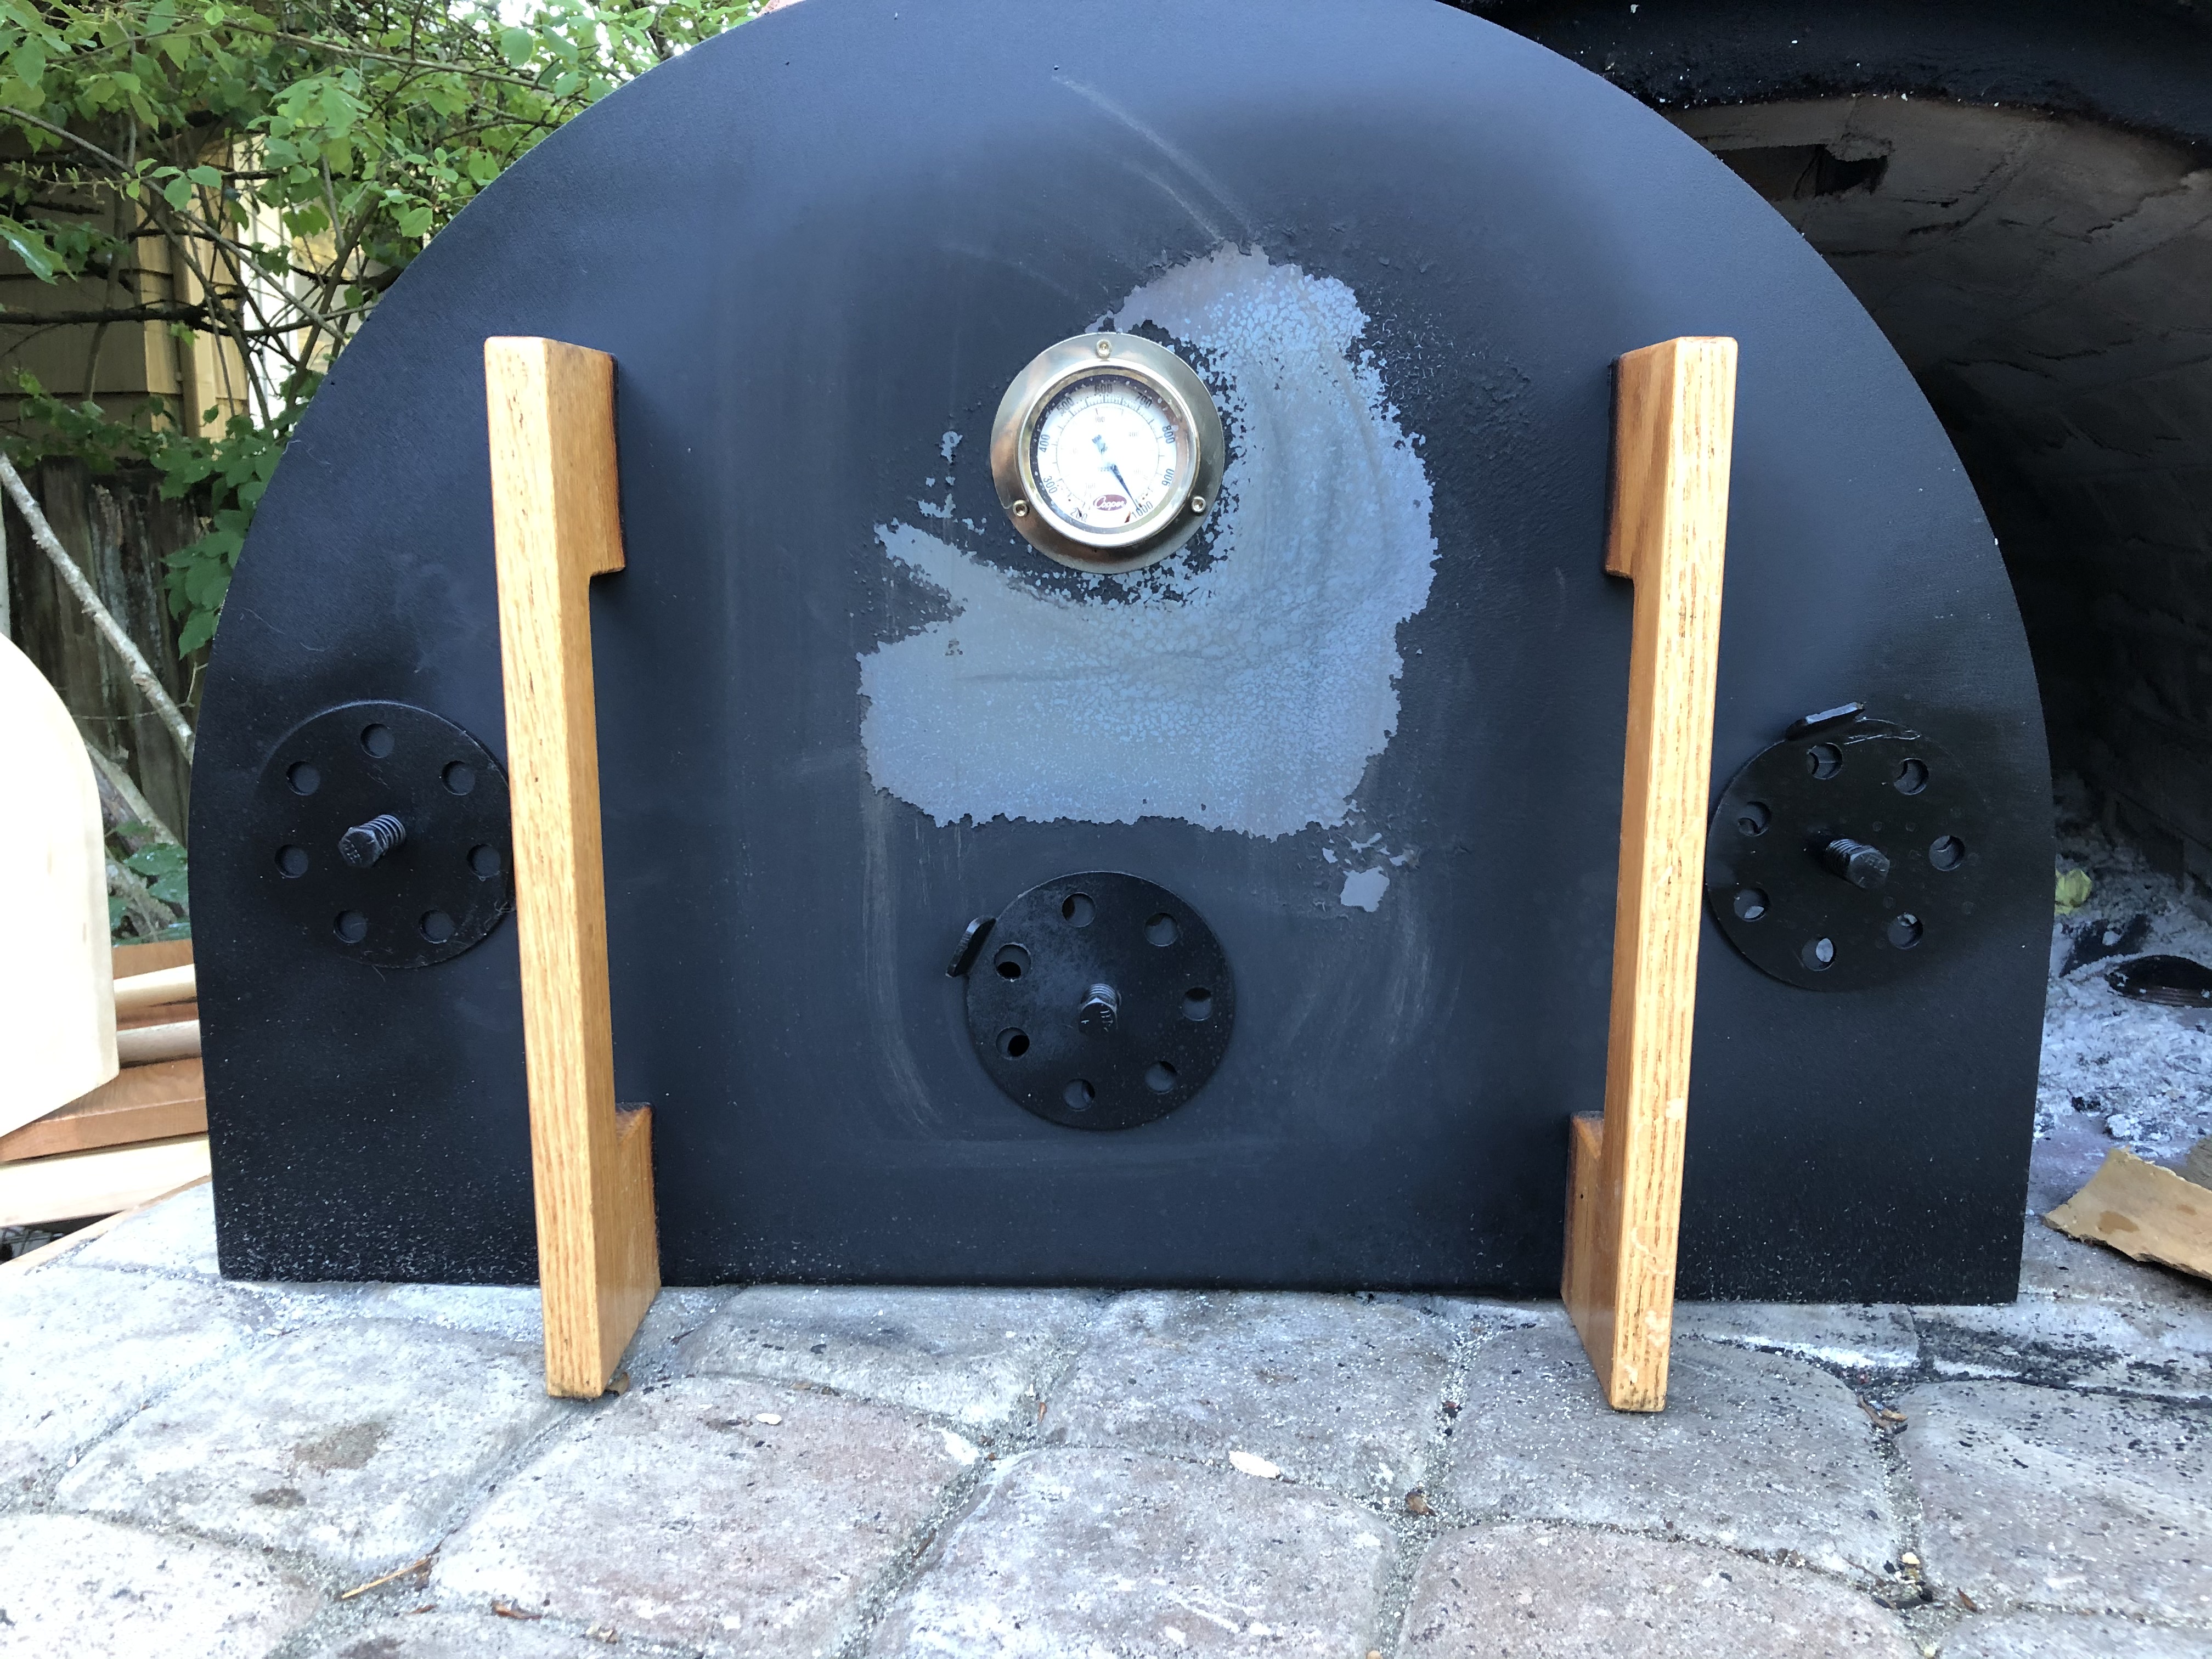
I put three of these across the bottom of the stock door, they work great. I used the 4" ones.
Can you post some pictures? What tools did you use?
I used a 3/8" bit for all the holes, the center as well as the perimeter. The directions call for 1/2" holes for the perimeter, but the 3/8" work just fine.
I can heat the oven up with very little smoke coming out of the front
1 Like
Those are some awesome ideas. Where did you get the wheels and thermometer?
You can cut through the stock metal door…I did: I cut venting to align with my marine vents, and I cut down the original door, so it became the “inside layer” for my new door.
I am constantly amazed at what can be accomplished with an angle saw (w. proper blade…).
You can cut through the stock metal door…I did: I cut venting to align with my marine vents, and I cut down the original door, so it became the “inside layer” for my new door.
I am constantly amazed at what can be accomplished with an angle saw (w. proper blade…).
(8/28) For my wood-framed door, I found what I wanted (small, circular, twist open) at a marine shop in Colorado…of all places: www.westmarine.com/buy/seadog-butterfly-vent-grill
The thermometer was a difficult search…Man-Law is the brand, and it can register up to 900 degrees F… Used to be available from several sources in the U.S. - but not at this time, apparently. I found a B.B.Q. shop in N.S.W.- Australia that does carry them, and bought one on sale from them; postage was crazy ($26.00 AU to the U.S.)…but with the favorable exchange rate I got just what I wanted, and paid about $28.00 U.S. - all told. AND>>>> It glows in the dark ! Whoo-whee !
1 Like
All from Amazon:
4" Polar Array BBQ Grill, Smoker or Pit Air Venting Damper Kit: Amazon.com
Cooper-Atkins 2225-20 Stainless Steel Bi-Metals Industrial Flange Mount Thermometer, 200 to 1000 Degrees F Temperature Range: Amazon.com
I’m thinking I should put some insulation on door; it gets pretty hot.
I used 2 Polar 4" vents in my door - but haven’t used yet. Should I install 3 vents?
One will work; two is plenty. Three seems to be working for @rdw1081 Bob, but it would be optional.
As long as you keep the vents (which are really fresh air inlets) low on the door, you could place them to either side of the handles as Bob has done. That would give you plenty of supply air while keeping your door tightly closed, especially across the top.
Whether you do two or three, having that supply come through the door instead of around it will greatly improve the “low and slow” stage of firing your oven. When you are ready to stoke up to pizza-level temperatures and flames, you’ll want the door off.
10-4, Thanks!
I have the two vents low and on the sides of the handles. I didn’t put one in the middle. These vents and a damper are going to be my tools for curing my oven - just wanted to give me the most flexibility. I think I am going with the fires (and heat) that are longer (~6hours) each day, starting at 250° and going up 50-100° degrees a day for 6 days. Any thoughts or wisdom?
Thanks again for the forum wisdom!
1 Like
Hi, Don!
And you will have that, for sure. I have not installed vents on my door, but following with interest the experiences of those who have.
I’m in the middle of a cure right now, using the “add-a-log” method and an infrared thermometer. I’m finding that the temperature ramps up by about those increments without a lot of monitoring, because the fuel provided each day controls that.
You will find that by the second day your oven is retaining enough heat to be pleasantly warm the next morning. You definitely will have control over your curing fires by regulating how much air goes in and out.
I’d say don’t worry too much, let the fires do their job, and keep remembering you’re six days out from your first cooking fire.
Thanks Mr. MATT!
How long are your fires going and how do the time/temp graphs look? Sorry too much the engineer!
They are long burns. I’m not used to seeing two or three logs fuel a 6 hour fire. I’m not graphing, but spot checks with the infrared gun suggest that there is a “hump” about an hour in where the heat is concentrated close to the source. That’s followed by a gradual decline (door and damper closed) where the oven retains ~300F over a period of 10 hours. I found this morning that, 20 hours after the flame went out, I still had 200F on the floor and close to that on the walls.
My oven has double wall insulation, and I couldn’t be more pleased with that outcome.
I don’t have precise data to back that up, but I certainly respect your question!
1 Like
Plenty of good data, Mr. Matt!! Glad you are nearing the finish line and are pleased with the results!!
Thanks for the info. Curious, how do you know when to put the door on to make the fire last that long. Or do you add supplemental fuel to keep your target temp?? Did you mean you have 2 blanket layers of insulation or a double brick wall configuration??
Finished painting and sealing today. Starting fires next week after we get some badly needed rain here in the AZ!
Hey there Don,
I approach this the same way I would a wood-fired stove (which my 92-year-old Mom in Vermont still uses as her primary heating!).
- Set up your fire with the door off and light her up. There will be plenty of smoke initially while combustion accelerates. Since smoke is just the product of incomplete combustion, that’s expected.
- Once there is more flame than smoke, I put on the door to one side, covering about seven-eighths of the opening. This is enough to cover the “runway” at the top of the arch where gases and smoke are racing toward an opening, and establishes good circulation. Fresh air in, exhaust air up the chimney. You can do the same thing using the vents you installed—in which case put the door on and open them full.
- When the main logs have lost their structure (you can break them apart), it’s time to spread your glowing embers over the floor, close your damper, and close your vents.
The goal is to “soak” the refractory firebrick with heat energy. The lining nearest the active flames will get much hotter than the brick to either side, but once you close things up that energy will spread evenly throughout the oven. The door/damper combination keeps fresh air from convecting the heat out of the oven, and the insulation is a thermal break between the brick lining and the outer stucco shell.
I have used splints of wood to encourage continued flame, especially during the second half of the curing cycle. My wood supply is usable, but I ordered it too late in the heating season to get a true run of well-seasoned firewood this year. Of course, I don’t want to add more full logs because that would push the day’s firing limits.
By “double insulation” I mean that I purchased an extra box of mineral fiber. All BrickWood ovens built to design have a double layer, so this is actually a quadruple layer. It is insanely effective: when the firebrick are fully heat-soaked, so that you can feel the bottom bricks of the arch around the door and know that they are hot…the outer shell is still at ambient temperature. The only place where I sense any warmth in the stucco is just behind the chimney, and I suspect that’s radiation from the chimney bricks.
Glad to hear your stucco is sealed up! Good luck with your first firing, Don. When you light up that first log, it’s seven days to pizza!
2 Likes
So sweet, Mr MATT! Thanks for all the detail - warms my heart! (And always good karma to include your mom in a post, me thinks!)
I wrapped with 3 layers of 6lbs, 1" thick, so I hope to see some similar results as you have!
Finished up my damper construction and door insulation today- still predicting rain for the weekend, so I am holding off on the fires till next week.
Since you are going through firing right now, maybe you can comment on cracks and expansion results I might see. I have a unfired crack in the mortar on the top arch firebrick (L shaped cut brick around the chimney). I can just see it in the front. I did notice some mortar cracks in the chimney flu as well… And of course- I am trying not to fret about perceived mortar deficiencies in the oven proper (my perception -its probably ok - but I tend to be hard on myself). So question - what do you observe during the firing as pertains to oven structure and expansion (if anything).
And I have a thermometer in the door (scale to 1000°), but you said you were using a temp gun. Are you noticing much variation around the oven or once you use the door, everything equilibrates?? And what brand of gun?
Once again hope you don’t mind the questions - I am anxious to finish (but then again, kinda sad as well) I am naming my oven - “Corona Horno” - hopefully that means I won’t have to put a date on it… !
!
2 Likes
Hi, Don,
I think you’re going to be happy with that level of insulation.
Firing is done. I have seen no effect regarding cracks or expansion. The refractory performs as expected.
If you are concerned about the crack in your mortar, here is a product you can use to seal it. I used this for small gaps in the interior (fireside) mortar. It is tinted black and stays black. It air-dries without shrinking, and completely cures when fired. Best part is (unlike the absolute “don’t do it” move of mixing up a little more firestop mortar and applying to the crack—which will fail because it will fall out into your food!) because it is a flexible silicone, it will work its way in and adhere to your mortar. Just go easy, don’t obsess about every perceived defect, and seal a little bit past the ends of the crack.
The trick with a temp gun is to measure the heat on the floor, always. During the curing fires I also measured the arch, the door, the chimney and chimney cap, and the exterior, so I could get a better idea of how the oven is performing. There will be variations of up to 500°F while the oven is fired. Once the door is on and the damper closed, heat energy will migrate throughout the envelope and gradually equilibrate. I found last evening that it takes maybe an hour of that to get a baking environment.
Speaking of which, a little encouragement:
And yeah, it’s a little sad to move away from building mode for the winter…but man, is that offset by the first bite of a pizza that you baked in an oven you built.
Good name for the oven! Happy firing this week!
1 Like