Hi everyone. I have done a few searches and I haven’t seen anything on here that is newer or giving me the ideas I am looking for. I have seen a few people adding gas or propane burners to their oven. I am looking at building an oven and I am thinking of making sure I have the ability to add 1 or 2 propane burners to the oven and want to give it a clean built in look. I am hoping some people have some good photos or ideas that I can build from and get a better idea where to start. I understand Ward Burners are recommended but they have so many various models, etc. Any help would be great!
Welcome to the BrickWood forum!
I’d start with this post:
@PizzaBob did it right, and for your installation where you have no-burn days (which was in a similar post) this would be a good standalone. He also specifies which model he used and how it was installed.
Yes, Ward Burners are a known quantity for us, and so I’d feel comfortable recommending them after seeing folks here obtaining good results with them.
Take a look and come back to this thread so we can talk it out!
Thanks for the post. I did actually read through that one before I posted. I guess I am looking for a more permanent built in solution, so that it’s always ready for either fuel type. I do think that one they did looks great with that custom door though! I was just hoping to do something where you don’t see anything from the outside and it’s all more permanent…knowing of course there will be a need for service and such. I am unsure if I would only need a single burner or dual burners, etc? Maybe have dual for extra heat but only if you want, I am also considering making it where it has an spark igniter.
Yes, that one is a retrofit. But he does have either fuel at his fingertips.
If you plan ahead, you can locate the propane tank in the cavity formed by the base walls and the hearth slab. Locate an opening in the hearth (most likely by using a pipe as a placeholder while you are building), and locate your burner controls on the outside of the oven, or toward the front of the base cavity (you’ll need easy access to those).
Those who have retrofitted have a better idea of what you would need to do than I. But the process should be straightforward, and everyone who has done this seemed happy with the outcome.
Thank you again. From what I have seen on here, is the recommended placement near the back on the bottom of the side or the actual floor? The floor I can see the issue with ashes falling into it without having some sort of cover over the burner for when wood was being used. Or would there be other places that it should be? What if there were multiple burners? We have been looking at the photos on the site of various ovens so I am not sure the exact size we are doing yet, but I am leaning more towards the Barille Grande since it’s not a lot more material and we have the space.
Again, I’m going to leave that to @BrickWood and others to make recommendations. From what I’ve gleaned (and I’m probably in a position similar to you!), the floor seems to work out fine. I’d think the same brass bristle brush that you use for cleaning the floor could be run lightly over the burner gas vents before you start up.
As for oven, I built a Barile Grande and have never regretted it. If you have the space, I’d do that without a second thought.
1 Like
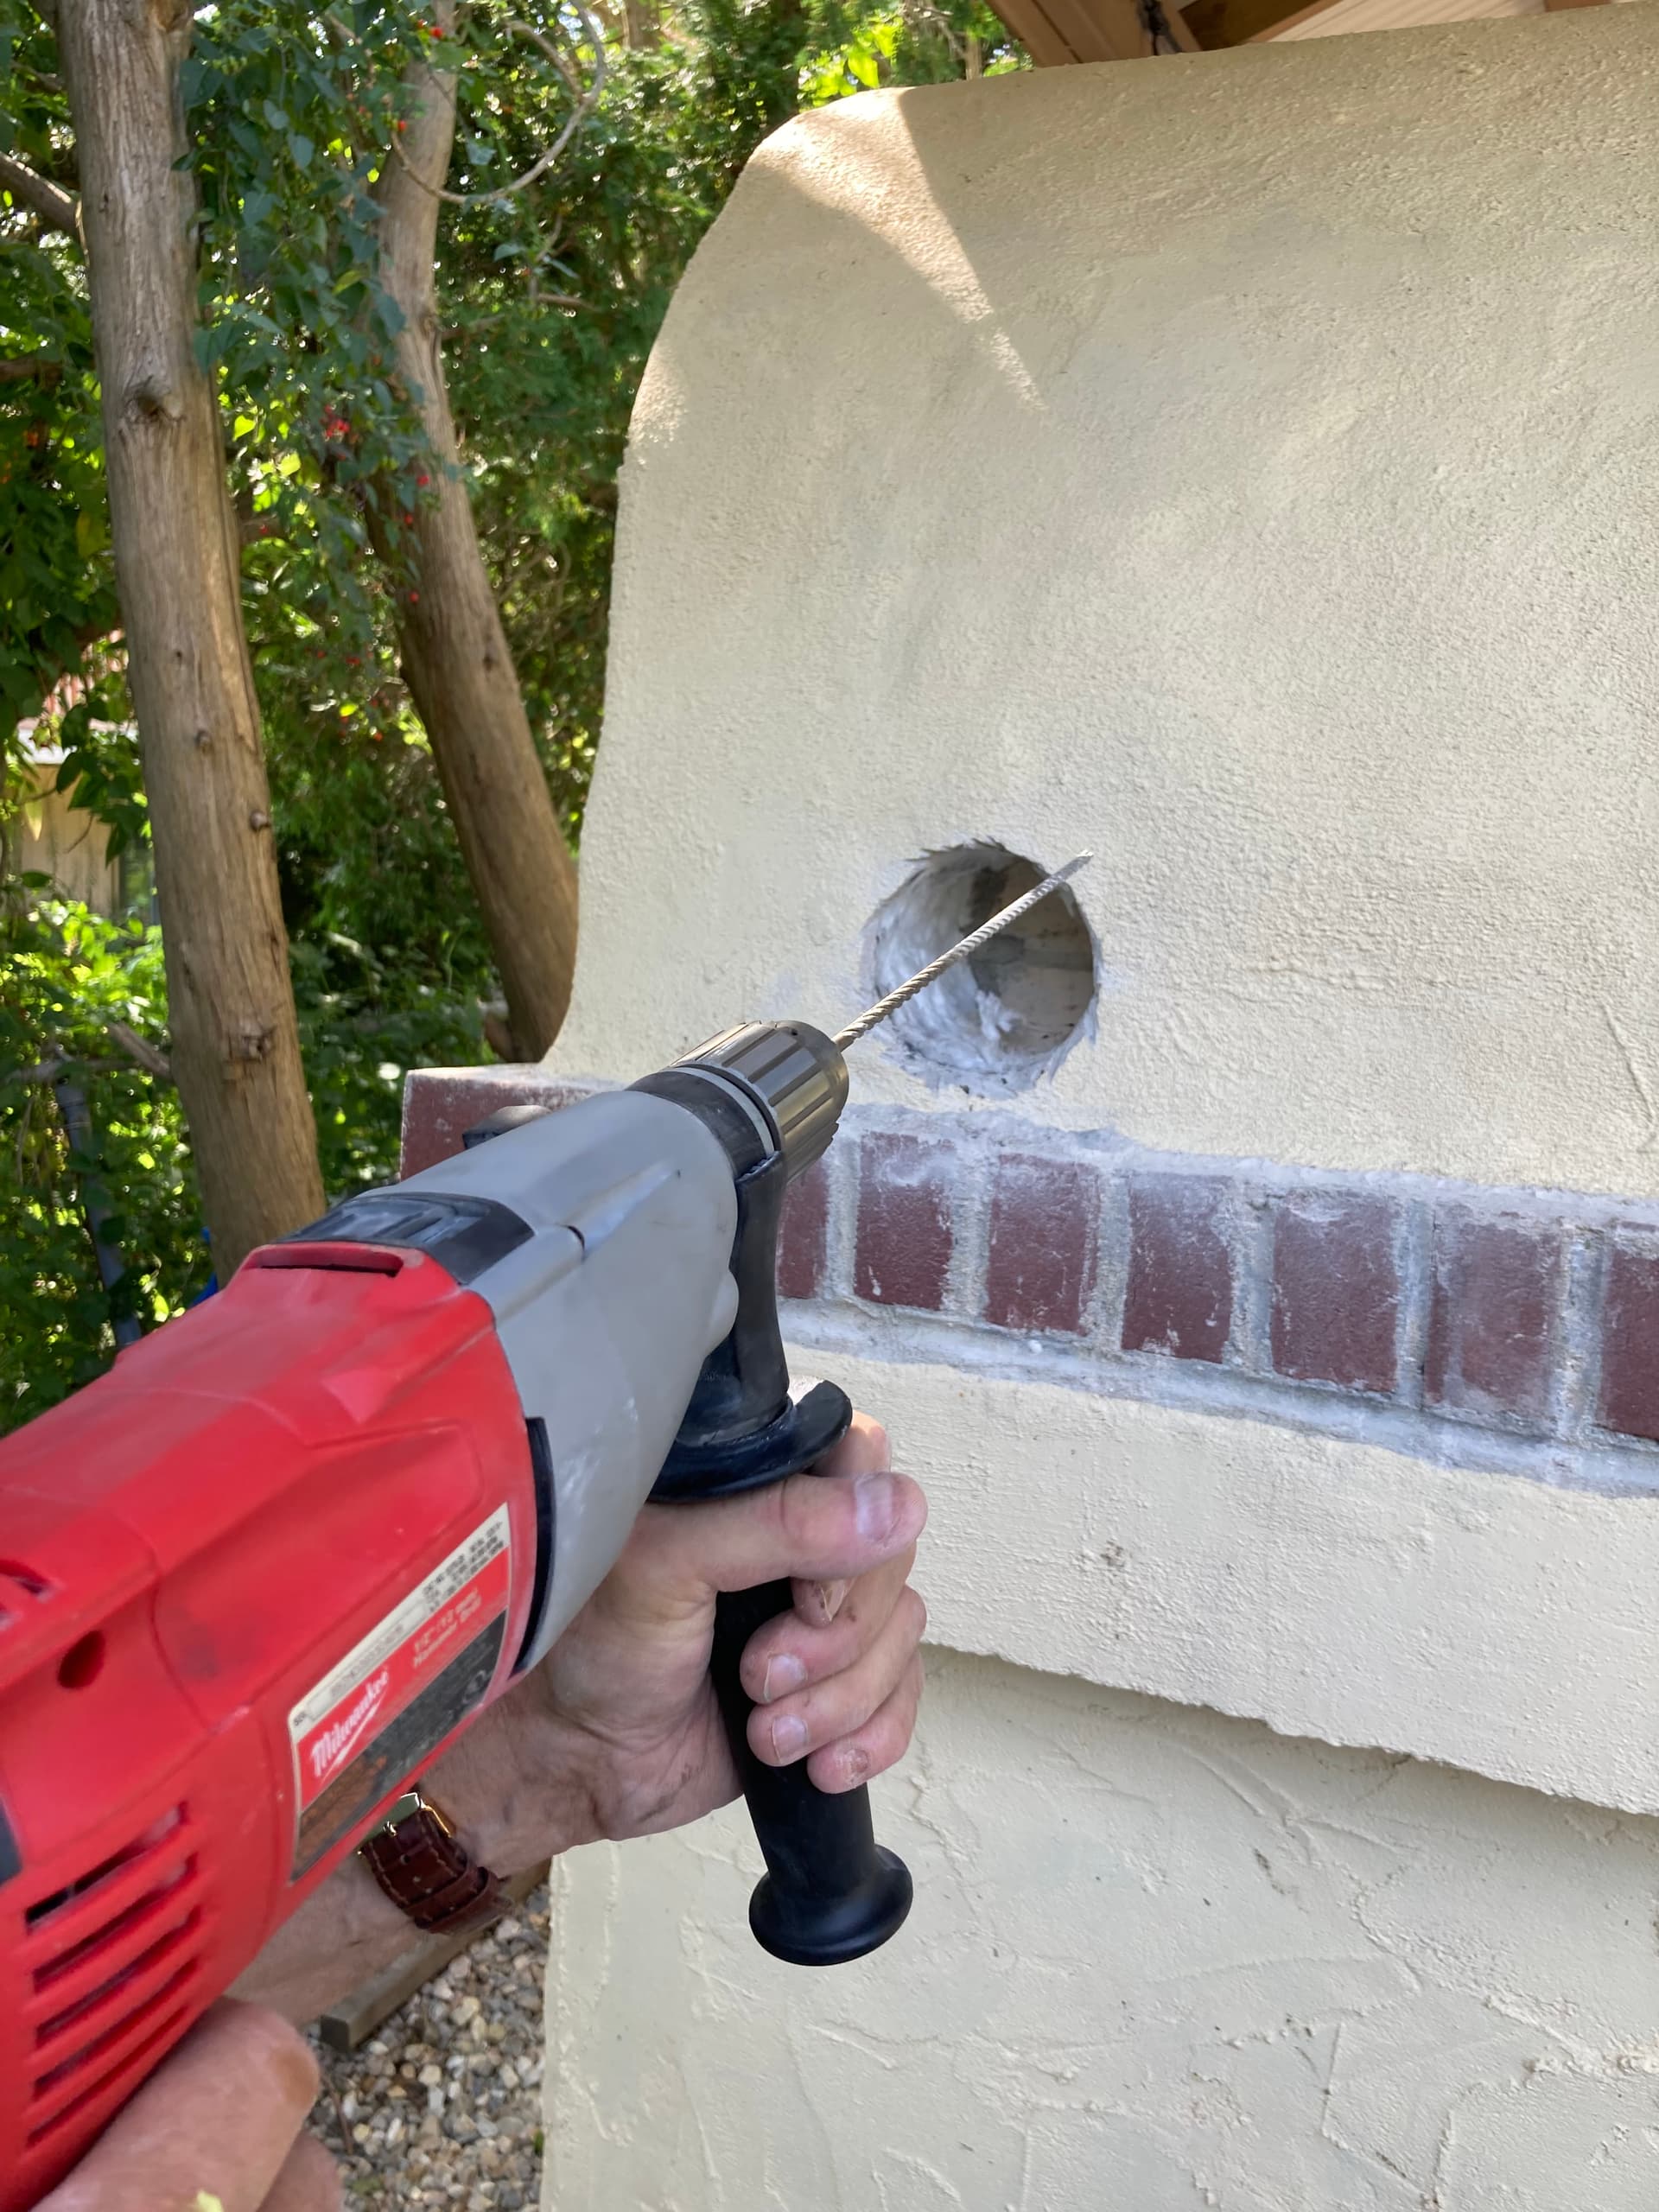
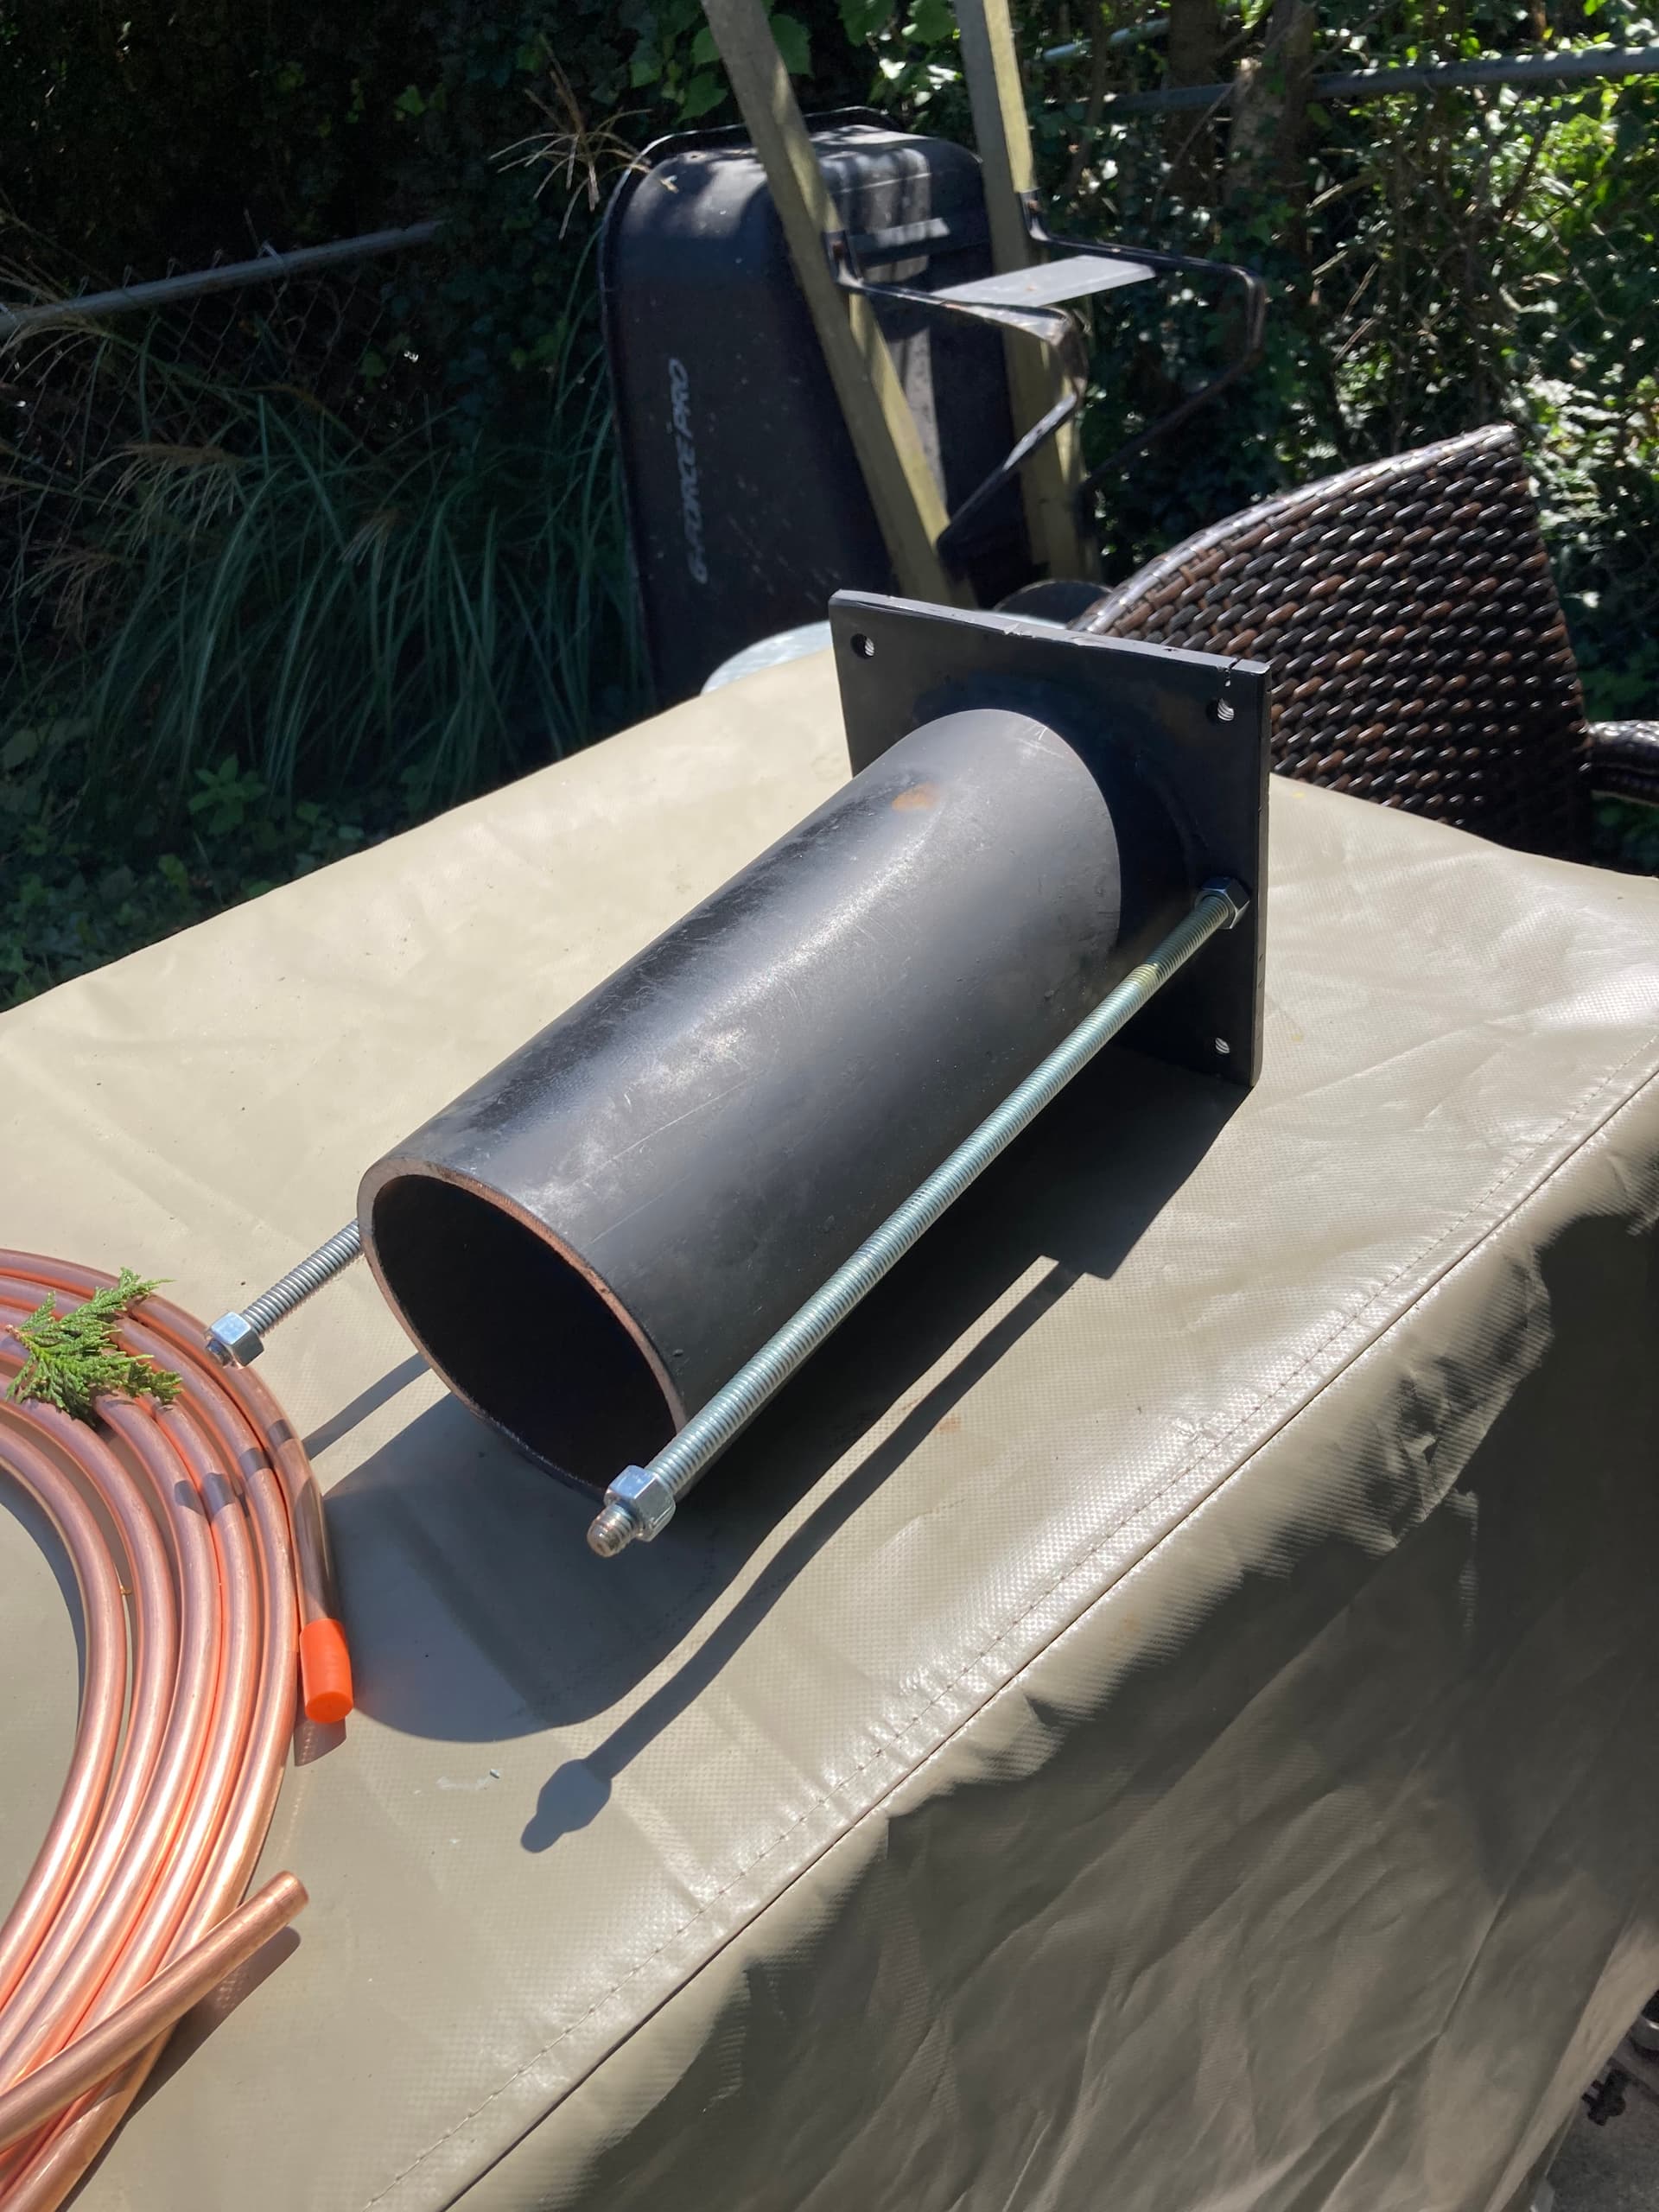
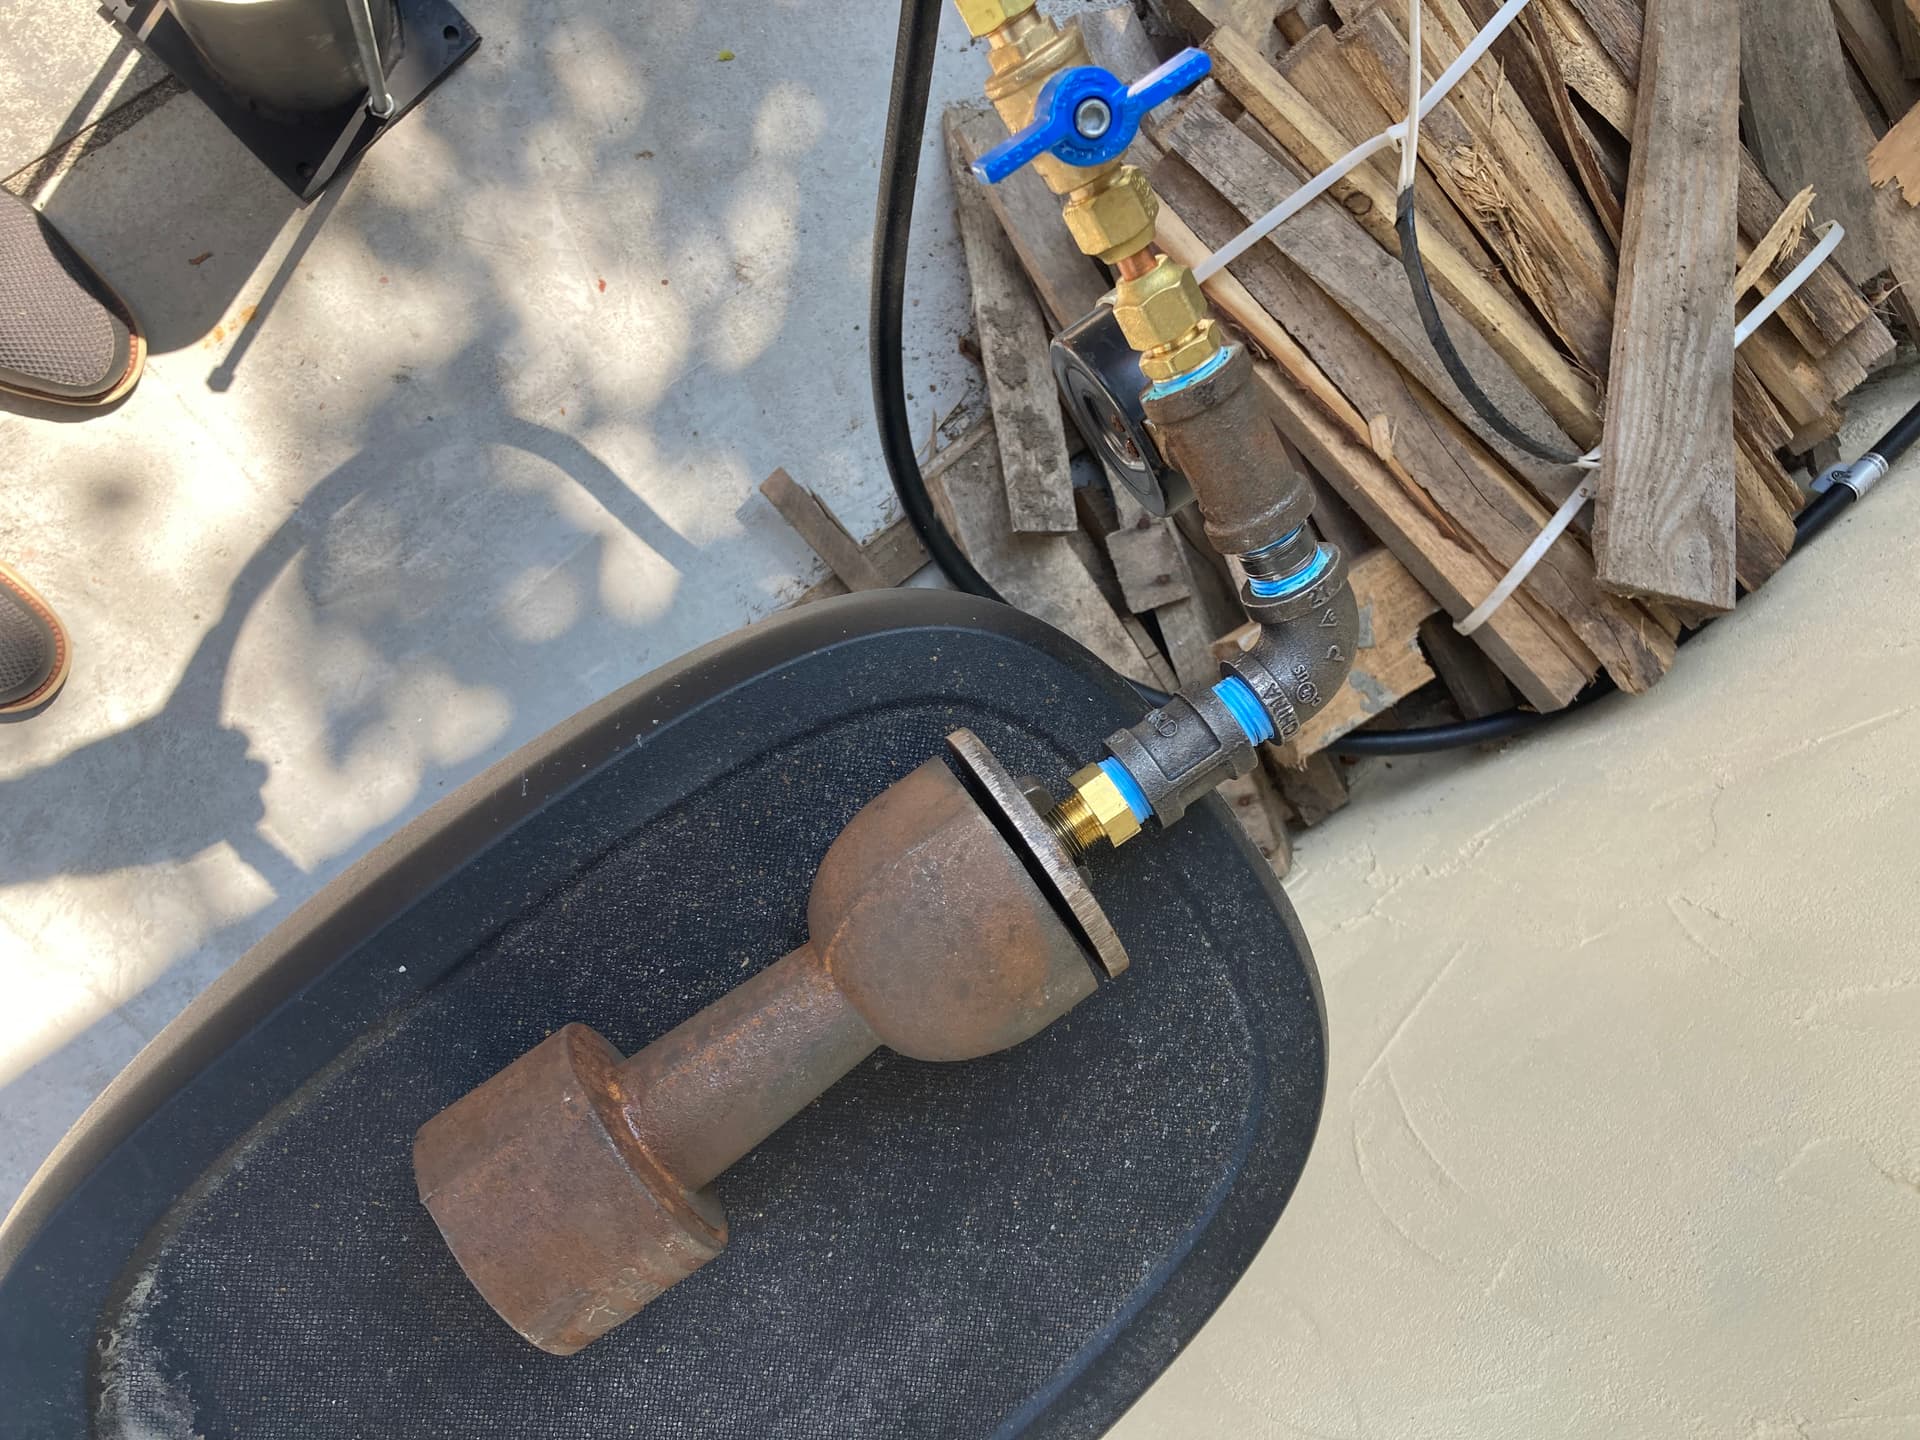
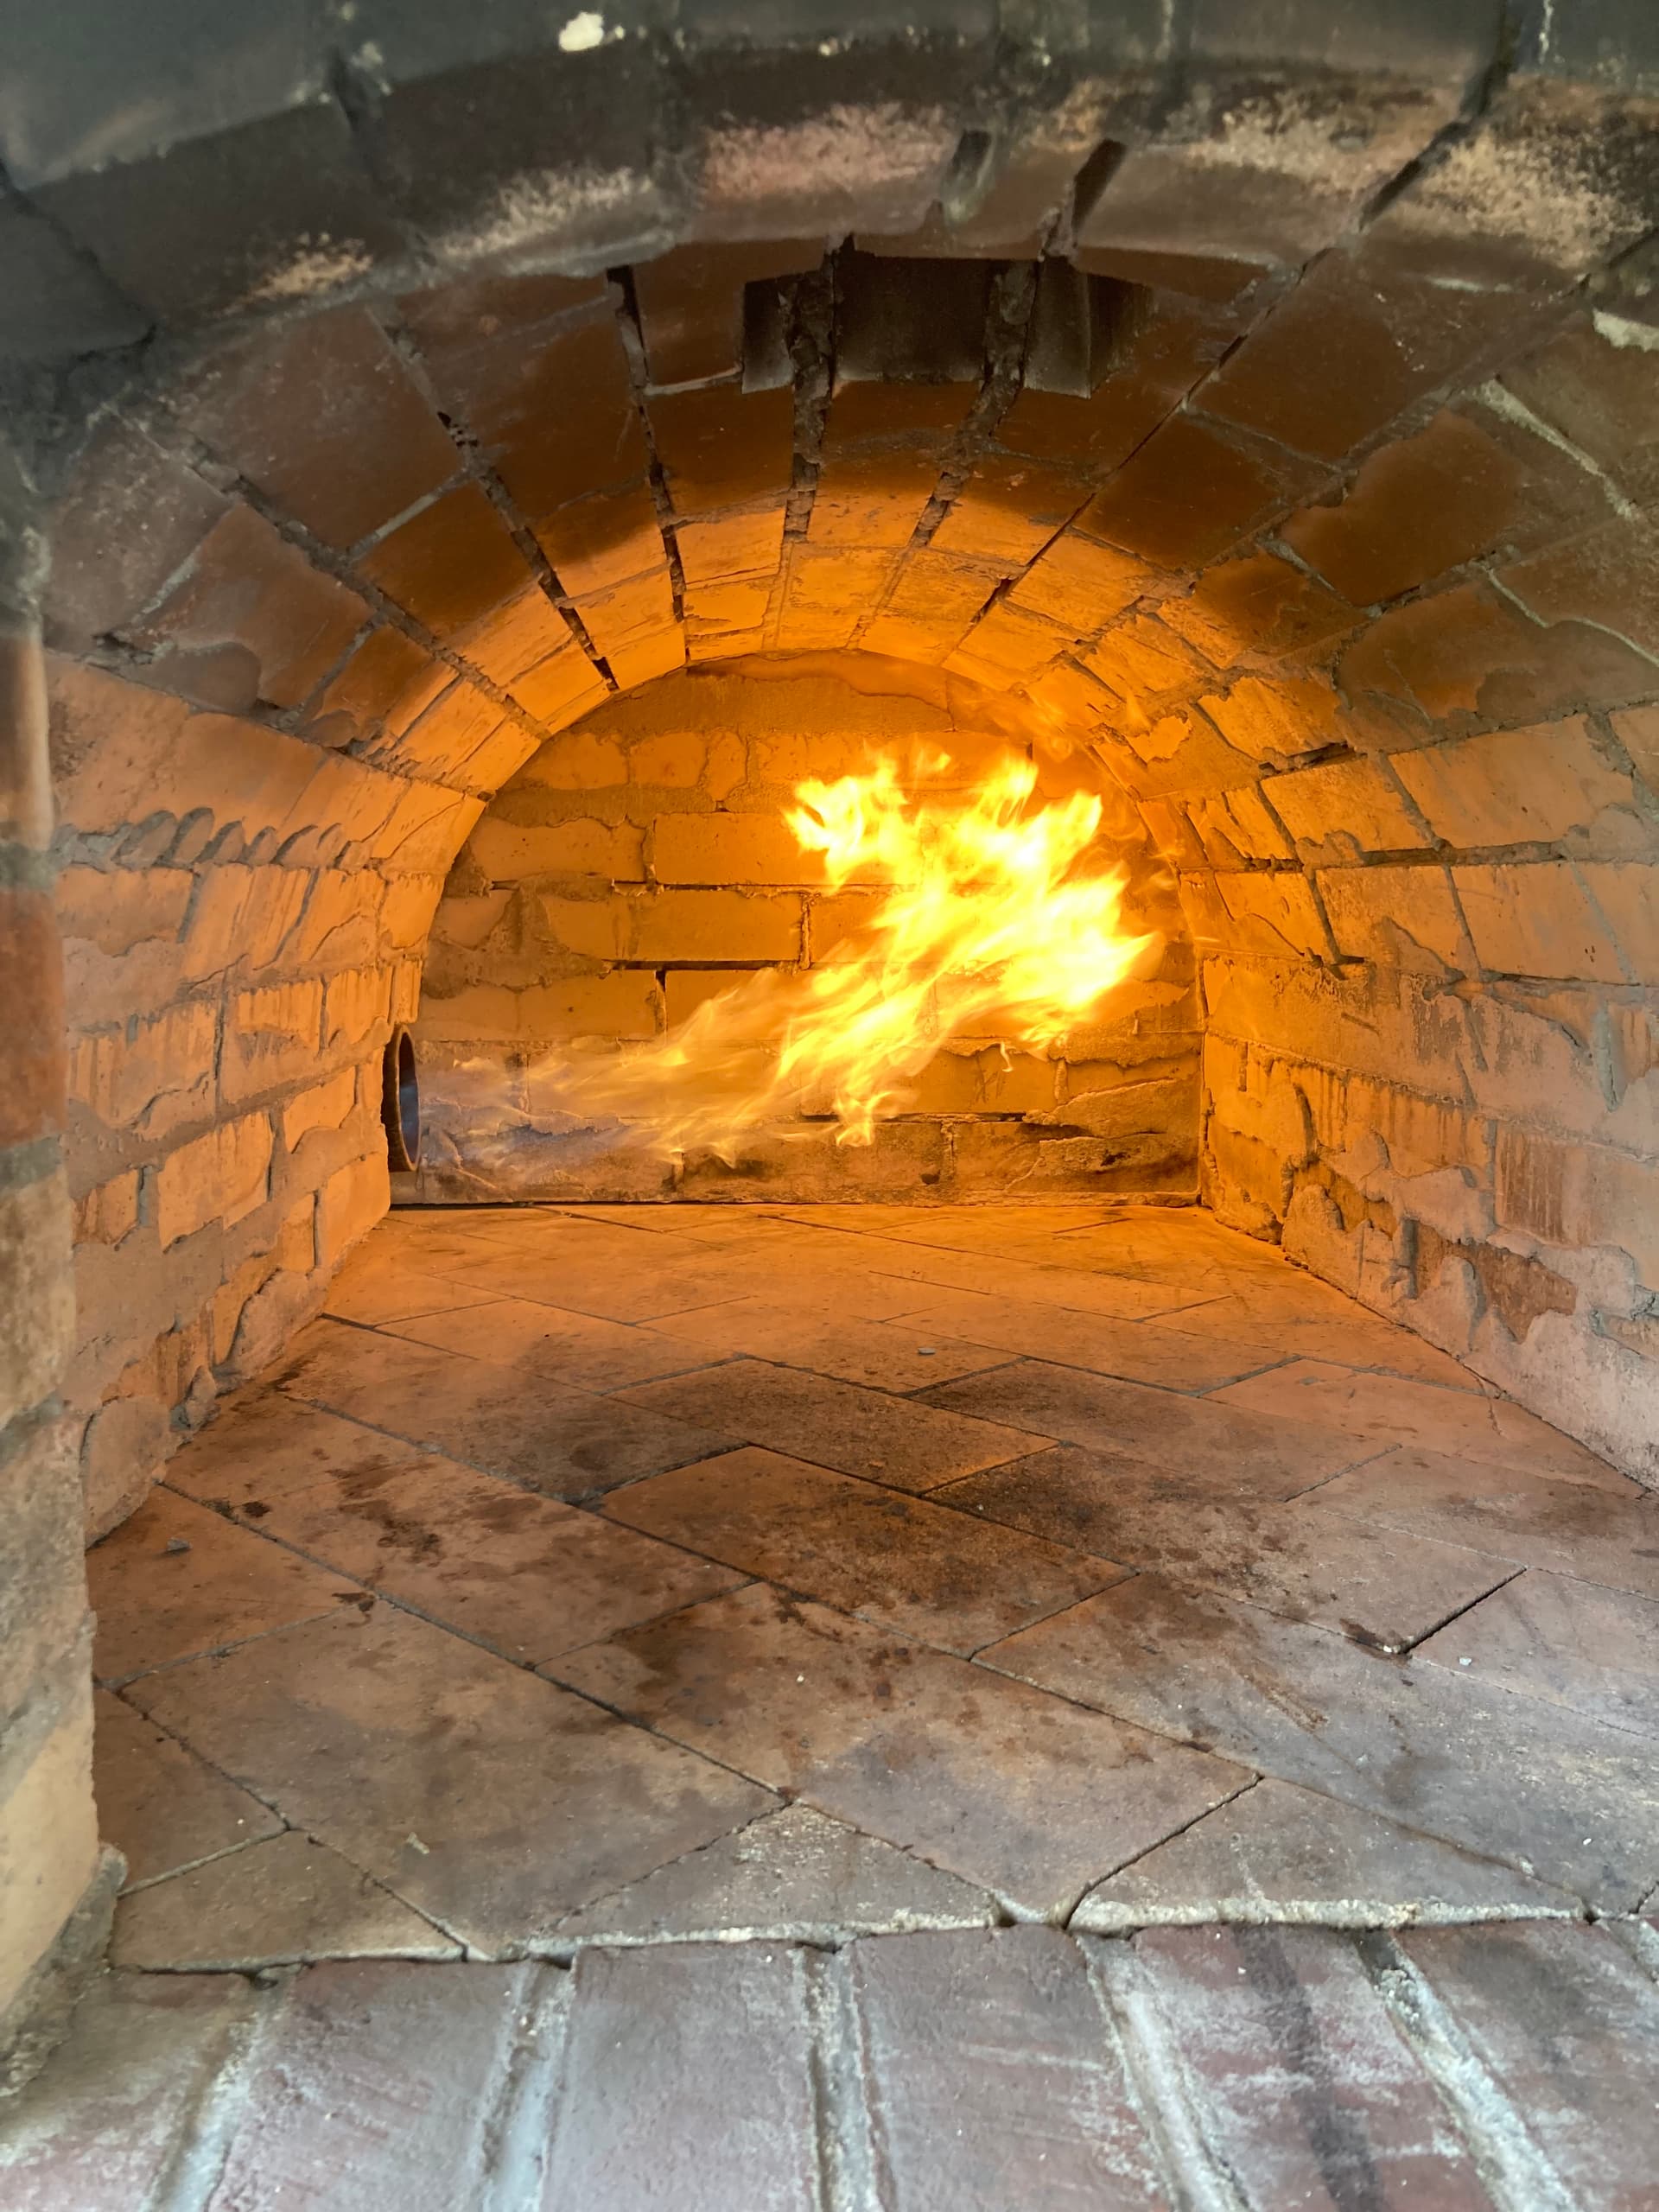
I have retro fitted my Barile Grande with a propane gas supply to a Ward burner. The result has been quite successful.
1 Like
That looks great! Would you mind sharing the model of the burner you used from them please? I am thinking I could simply build it in from the start.
I believe it is the Ward 100. If you call them, they will recommend the proper size. They were very helpful.
1 Like
Hi Don, I just purchased the same burner but what is that mount that you installed?
What would you have done differently?
It is a steel pipe with a plate welded to the outside. It is designed to keep the flame away from the 4" insulation and to house the burner.
2 Likes
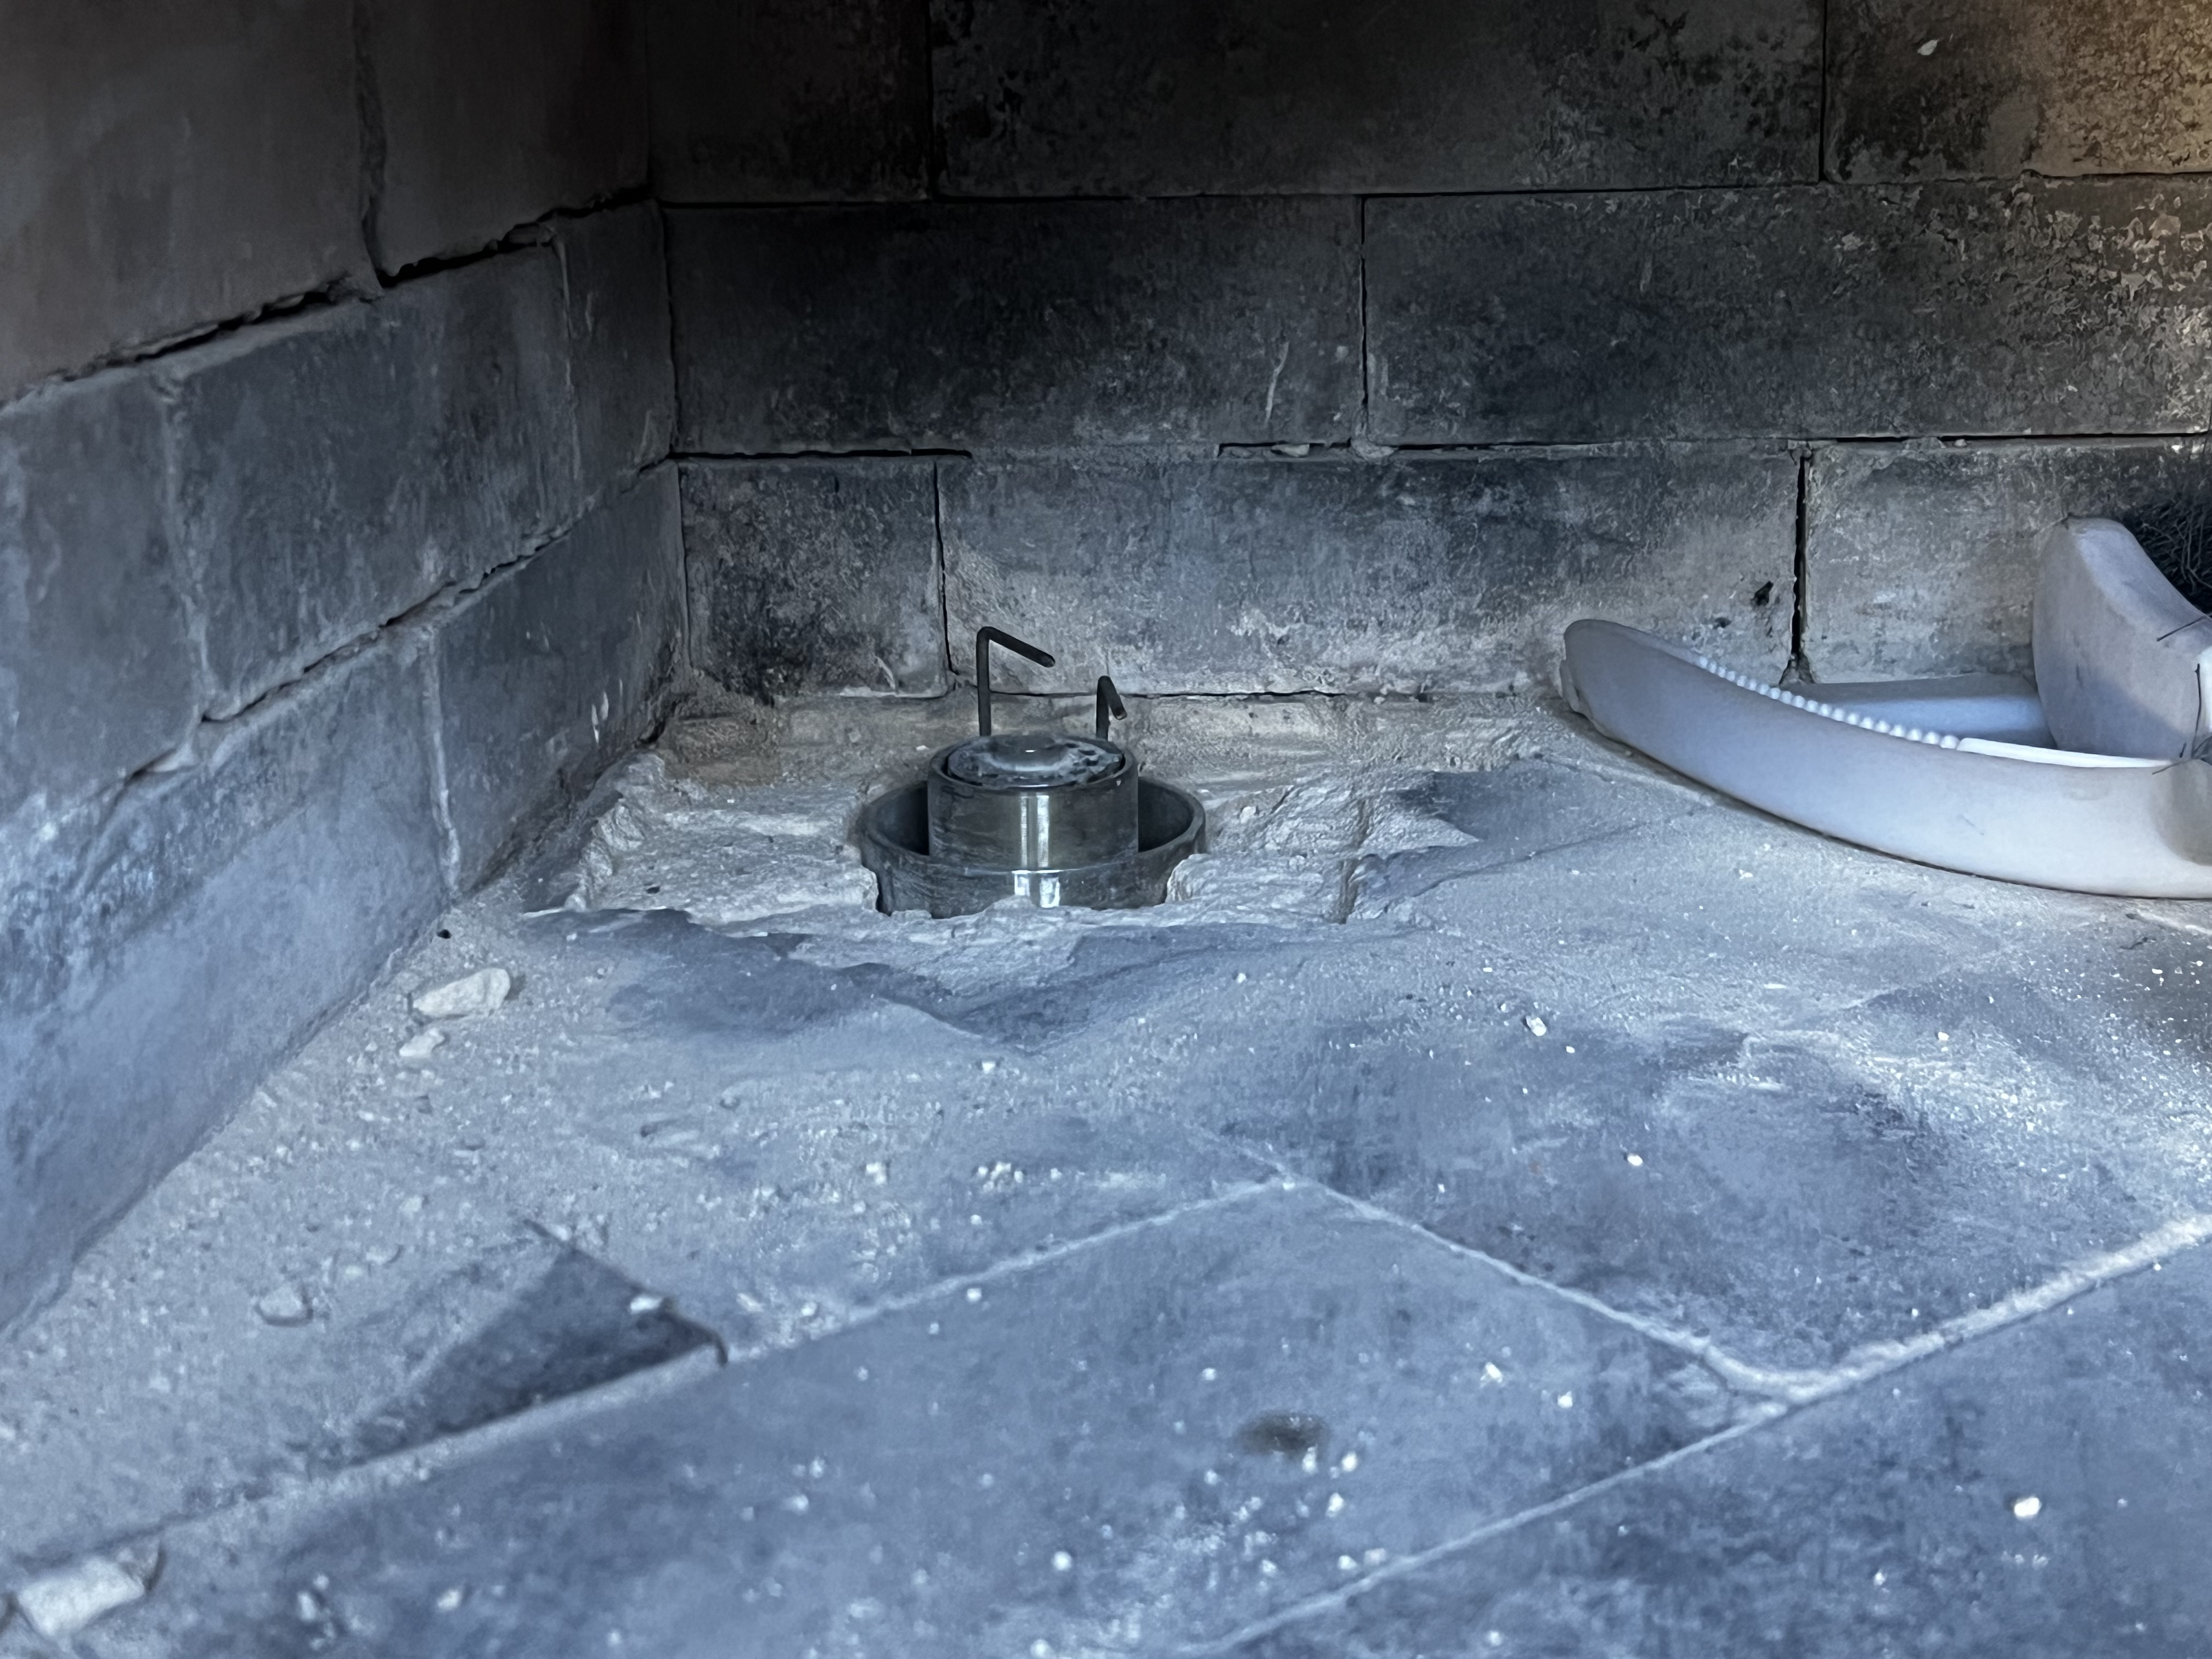
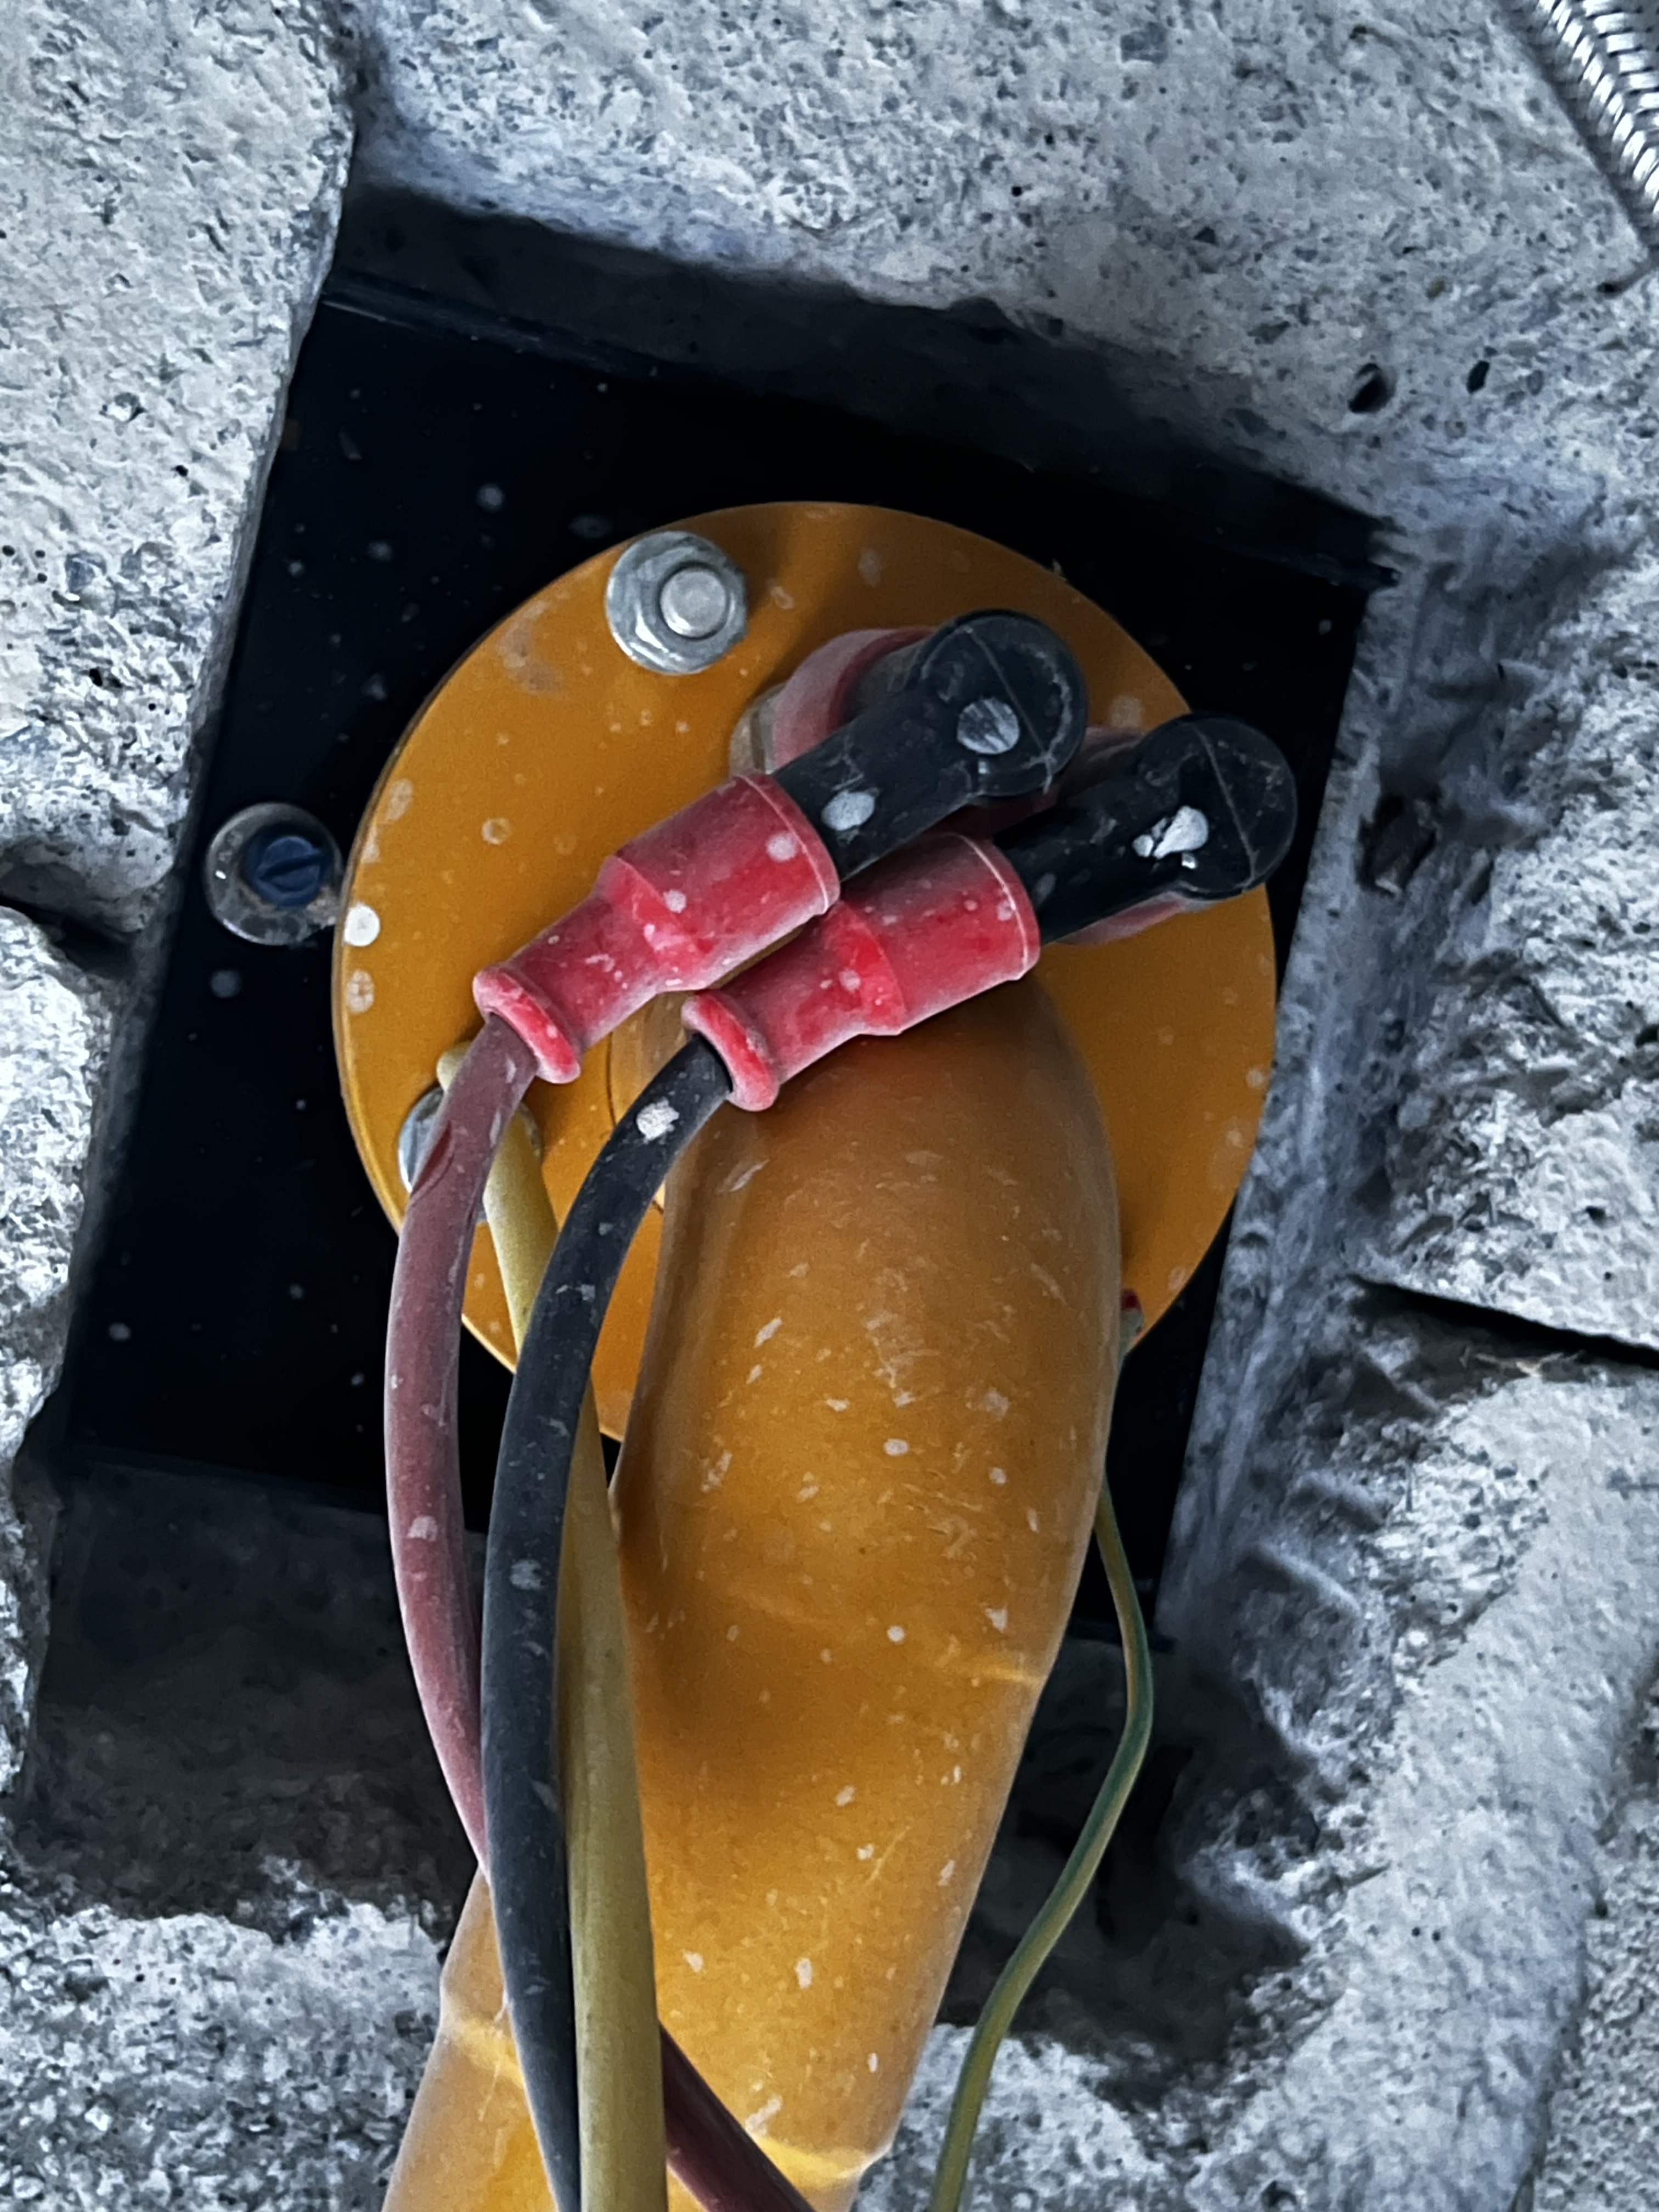
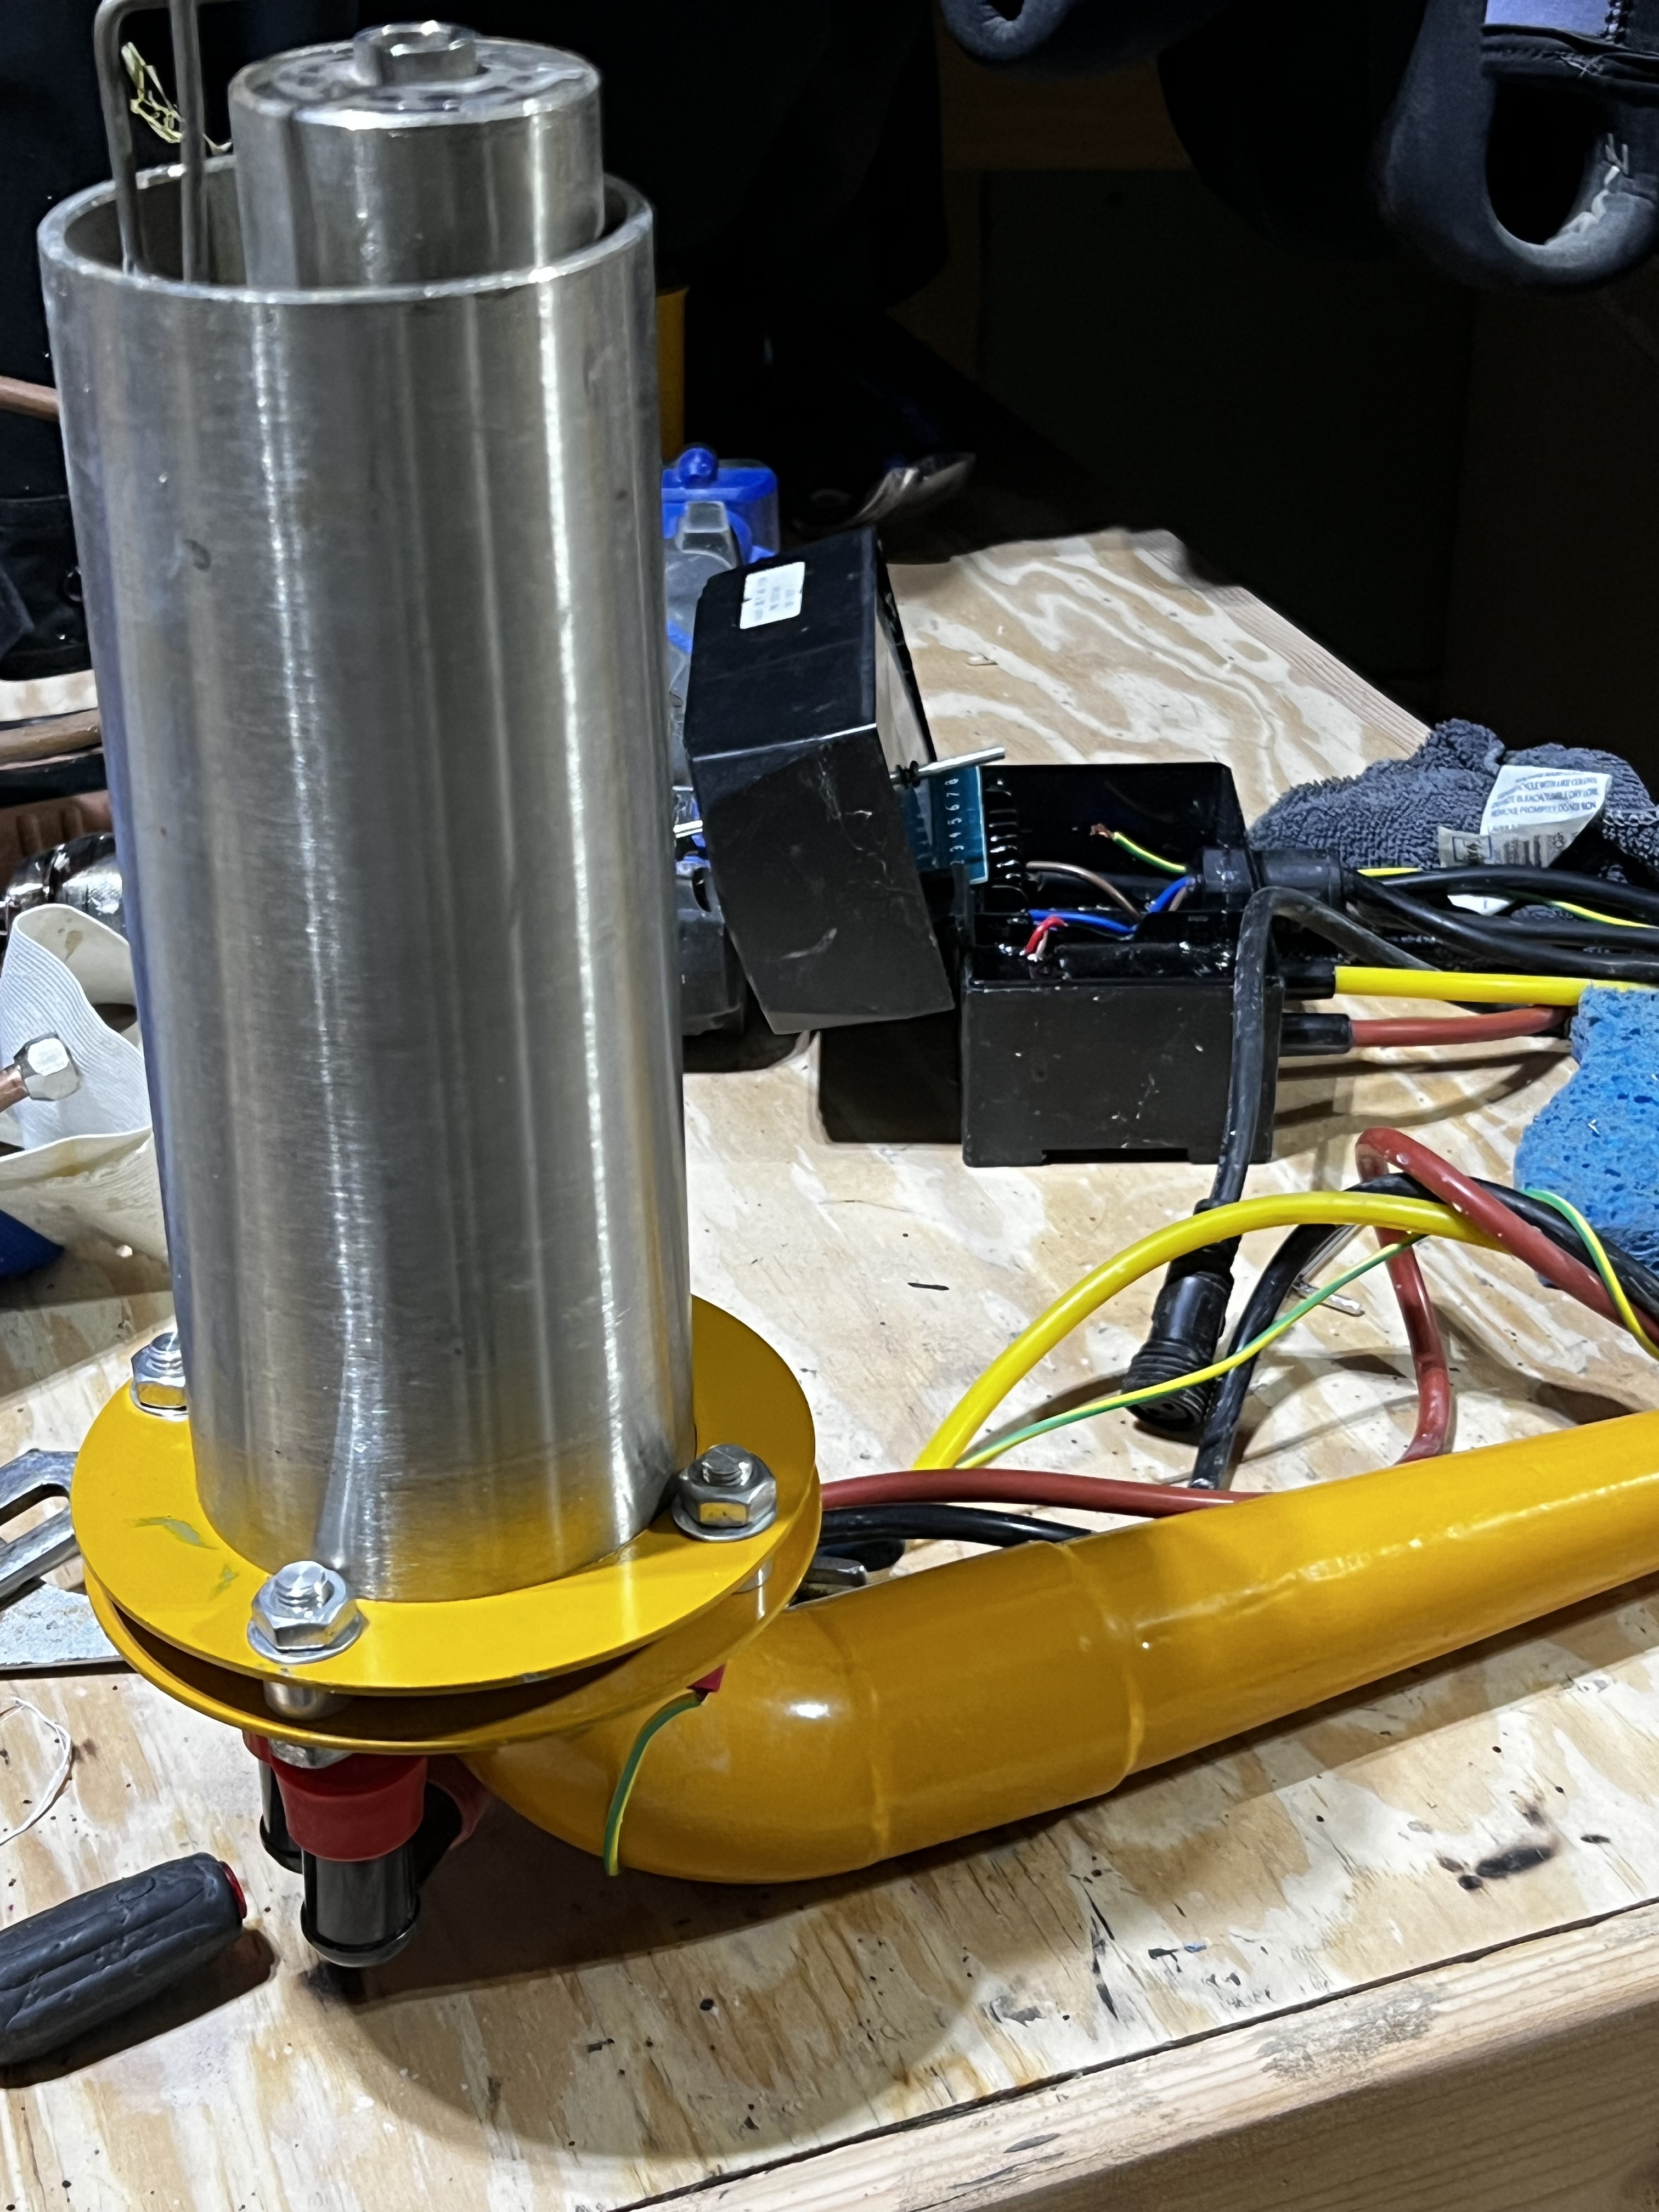
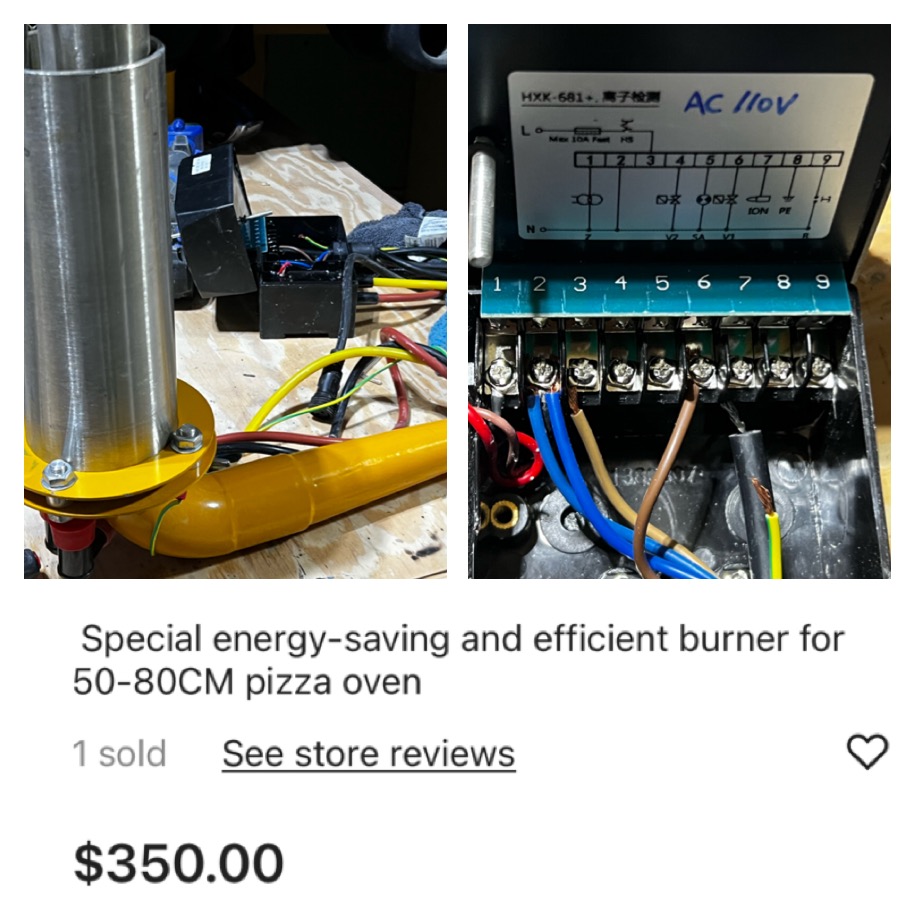
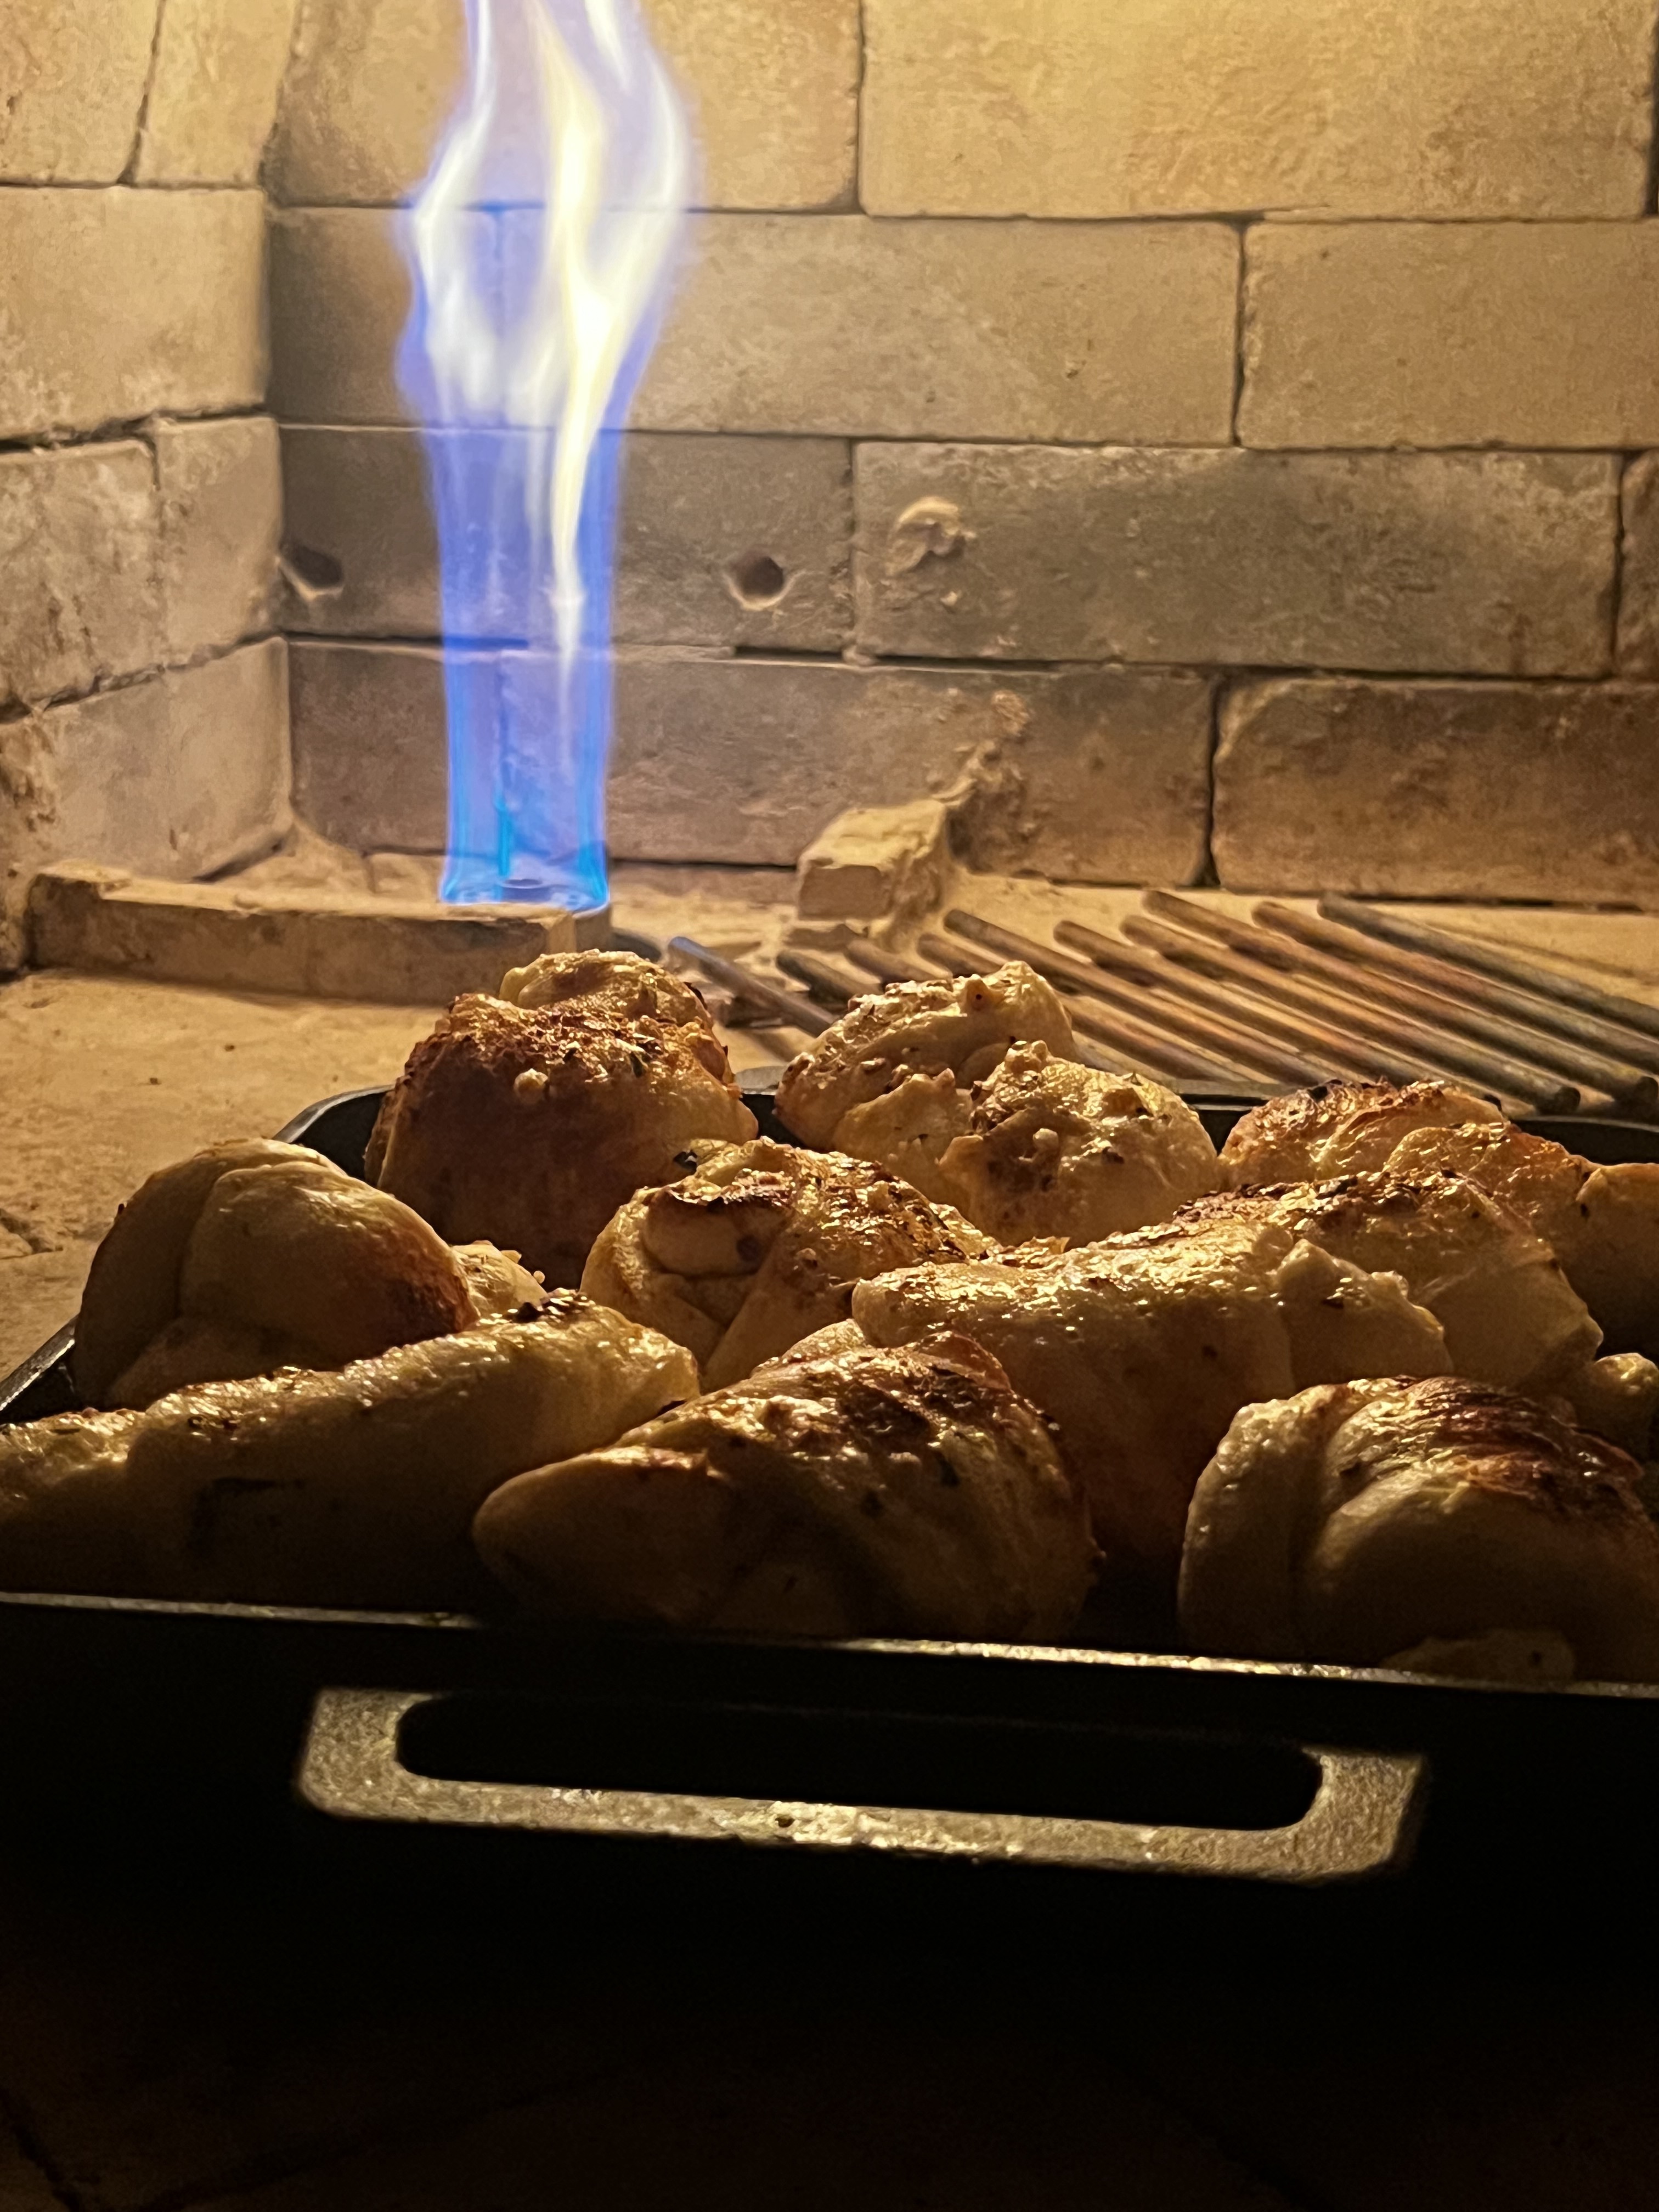
I have only just completed final touches on my matone barile oven. 2.5 years in the making. This is my first post. I installed a propane burner from china through alibaba. I felt paying 2000$ or more for a US based company that also sold retrofit burners was too much. I decided to try their 350$ burner. It installed through the bottom of the oven and gave a clean built in look. The retrofit was a lot of work. Drilling upward on your back required all kinds of protection. ( everything falls on your head) Once installed I built a small wall out of firebrick and supported the wall with welded steel liner to prevent knocking it over with wood. A bit nerve racking to go through Alibaba. (Not US company) But the company I dealt with was always appropriately responsive with questions and problem solving. The burner Worked immediately once I finished learning about propane burner safety and how to connect to a standard propane tank.
Some advice. Make sure you triple/ quadruple check the distance necessary to traverse the thickness of the base. ( I was 1.5 inches short). Also, I needed to purchase a real jack hammer/ drill. (Amazon) This task is beyond painful to drill with a simple concrete drill. The drill/ Jackhammer made it easy. And now I have a jack hammer.
Out of fear of excessive heat coming through floor I installed temp probes under the base and tested the temps when the oven was 700 degrees. The surface temp of the burner never rose more than a few degrees above ambient temperature. The temp at the level of the propane remained at ambient temperature without rising at all. I have installed a permanent temp probe at the tank and after two summers of use temp never rises above ambient temp.
Barring some installation hiccups (wiring came loose) it has worked reliably without any difficulties. On in my second summer still working perfectly.
1 Like
Welcome to the BrickWood forum!
Thanks for sharing your gas burner retrofit. You put a lot of thought into the work, and it looks like it’s paid off. I especially like the safety and data aspects of installing permanent sensors. That’s the kind of thing you’d expect to see on a commercial oven costing thousands of dollars more than a DIY setup, and it adds much value to your oven.
A retrofit is always going to be more challenging because you’re having to work through concrete, steel, and very dense firebrick to get to your oven. I also imagine you encountered a small shower of leveling sand at one point!
But there is that jackhammer…a tool I had to rent when I was digging my oven foundation, Previous homeowners had installled a 15 foot heavy duty steel clothesline pole in the spot, and had anchored it below the frostline (48 inches down) with what appeared to be 4 bags of 4000psi concrete and rock ballast in an inverted mushroom hole. Took the better part of a day for me to get that sucker out, but it did teach me respect for the footings and base I constructed afterwards. Could not have done it without a jackhammer.