In looking through the gallery, and pictures of builds, it appears quite a few folks built the slab in place.
Folks who have some experience with working and forming concrete have done that, Bob. Note the original poster said he had “zero experience” and wanted to know whether someone who is working with concrete for the first time might be successful in building a large reinforced slab with a void balanced on a three sided wall six feet above the ground.
In good conscience it would be hard to say, “Sure, go for it. Piece of cake!”
good point, thanks for replying
1 Like
I haven’t been able to decipher how folks who built these slabs on the garage floor got them up. The idea of a materials hoist seems like it would work, but how does one get enough space under each slab to even begin lifting it?
I used a hand cart that worked fine for me.
When the casting is being removed from the mold, rest it on a couple of boards. Stack several boards high underneath it until you can get a floor Hoist under it.
I rented a portable engine hoist with bottom legs that extended out for support. ($50 bucks for a weekend) Manually slide the slab onto the legs of the hoist and tie 2 ends with strapping and use the hoist boom to raise it up. Reposition the strapping as necessary to make sure it picks up horizontally instead of diagonally. Raise the hoist all the way up and push the hoist over the Base blocks and lower onto the blocks.
Put the mortar on the blocks where the 1st slab will go and pick up the slab with several friends and place on the mortar. I had 5 people move the slabs once on top of the block walls.
The last Slab I made sure the mortar was already underneath.
The trick is having someone remove the straps while everyone else takes the weight of the slab off the hoist and gently place on the mortar. I filled the gaps between the slabs later. I used duct tape under the slab to keep the mortar from falling out.
Take your time and adjust to make it square. Good luck!
Tom
Make sure you put the correct parts on
I downsized mine by 6 inches in length and 1 inch in depth (using more rebar). They are still heavy but we managed at 2 people and a dolly
Hi Tum,
Welcome to the forum! Another possibility: when I cast my slabs, I put the forms on 2x4s before adding any concrete. I can understand why you were perplexed about the forms being flat on the garage floor. If you found yourself there, it would be possible but not fun to drive some wooden wedges under the form; just enough to get some space for something like a handtruck to slip in.
For that matter, getting the handtruck shelf in position and then driving it under with a hammer would work (on the shelf frame, not the axle!), but you might not want to do that if you’re renting the handtruck. 
Good luck with your oven!
I wished I would have put mine on 2x4s also! But thank you for the tip. I wonder if my handtruck (it’s the appliance type) would work with the lip being so small. Will gauge and see if that’s doable. Thanks for the tip!
How did you get the slabs to rest of a couple of boards when removing the casting? Did you use wedges to get underneath the slabs?
Welcome Tom! It sounds like you had plenty of help available, which is great! An engine hoist would be a great machine for this purpose. The materials lift that some of us have used is great for getting the slab up to level, but then you need strong and agile helpers to move it horizontally.
I think this is the part that is perplexing @Tum. His slabs were cast atop a concrete garage floor, which would mean no gaps or clearance to get a purchase on the casting and “get it started.” Was that your situation, Tom? Or did you have some kind of clearance between mold and floor before you added concrete?
1 Like
I used a large pry bar to lift and slide a wedge under the slab. With the help of my strong son’s we set up to slide two by fours under. Will use a hoist to lift onto place. Would do the lift with five guys but hard to get five together at same time.
The build has been easy so far. Looking forward to that first pizza.
2 Likes
Welcome to the community @tomnsmith!
Pry bar sounds like the ticket. You don’t say it, but I’m guessing you used some kind of block as a fulcrum for the bar. Classic.
Thanks!
Update - I ended up using a crowbar to get enough lift before sticking a combination of dowels + 2x4s underneath each slab. I used an engine hoist to lift it upright enough to get it onto a dolly to transport to my part of the yard where the pizza oven base was. Then I used the same engine hoist to lift the first slab onto the base. Ended up having 4 friends come over and lift the rest by hand.
1 Like
Did you folks wait for the motor that holds the slabs onto the base (so after step 48) to dry before pouring the insulated cement into the slabs divot? The instructions do not say to do that, but it seems like you should?
Hi Tum,
In the end, those slabs were no match for you (well, really, the five of you! ![]() ).
).
I don’t think there’s any need. If you are using the Perlite/Vermiculite mixture, you’re not adding a huge load. You might be adding a little more with castable refractory, but I still don’t think that would be enough to disturb it. Your load is distributed pretty evenly across three slabs, and unless you’ve got that stuff at the ready while you’re hoisting your slabs onto the blocks, I think your mortar would already have been compressed and starting to set.
1 Like
Yes, they were no match for us! 
That makes alot of sense about the Perlite/vermiculite mixture not being too huge of a load. I am indeed using that instead of the castable refactory. For the Perlite/vermiculite mix, do you guys fill up a 5 gallon bucket with vermiculite, then mix it with a gallon (i’m just going to eyeball 1/5 of the 5 gallon bucket) into another container?
1 Like
Yes, sort of. First, I’d consider using Perlite because it’s a little less expensive and more importantly it does not retain water the way Vermiculite does.
For your mix, if you can get one of those cheap black plastic mortar trays from a hardware store (it looks like the dirty dish tray in a restaurant), you’ll find it easier to mix the ingredients. That would be the “other container” you’re describing.
But yeah, you can kinda eyeball this a bit. Or, you can use an empty gallon milk jug, cut off the top, and voila! take five scoops of the Perlite, one scoop of the Portland cement, and you have a proper mix.
That way you don’t risk having too little cement (not enough to hold your mix together), or too much (not enough insulation under your hearth).
Good luck!
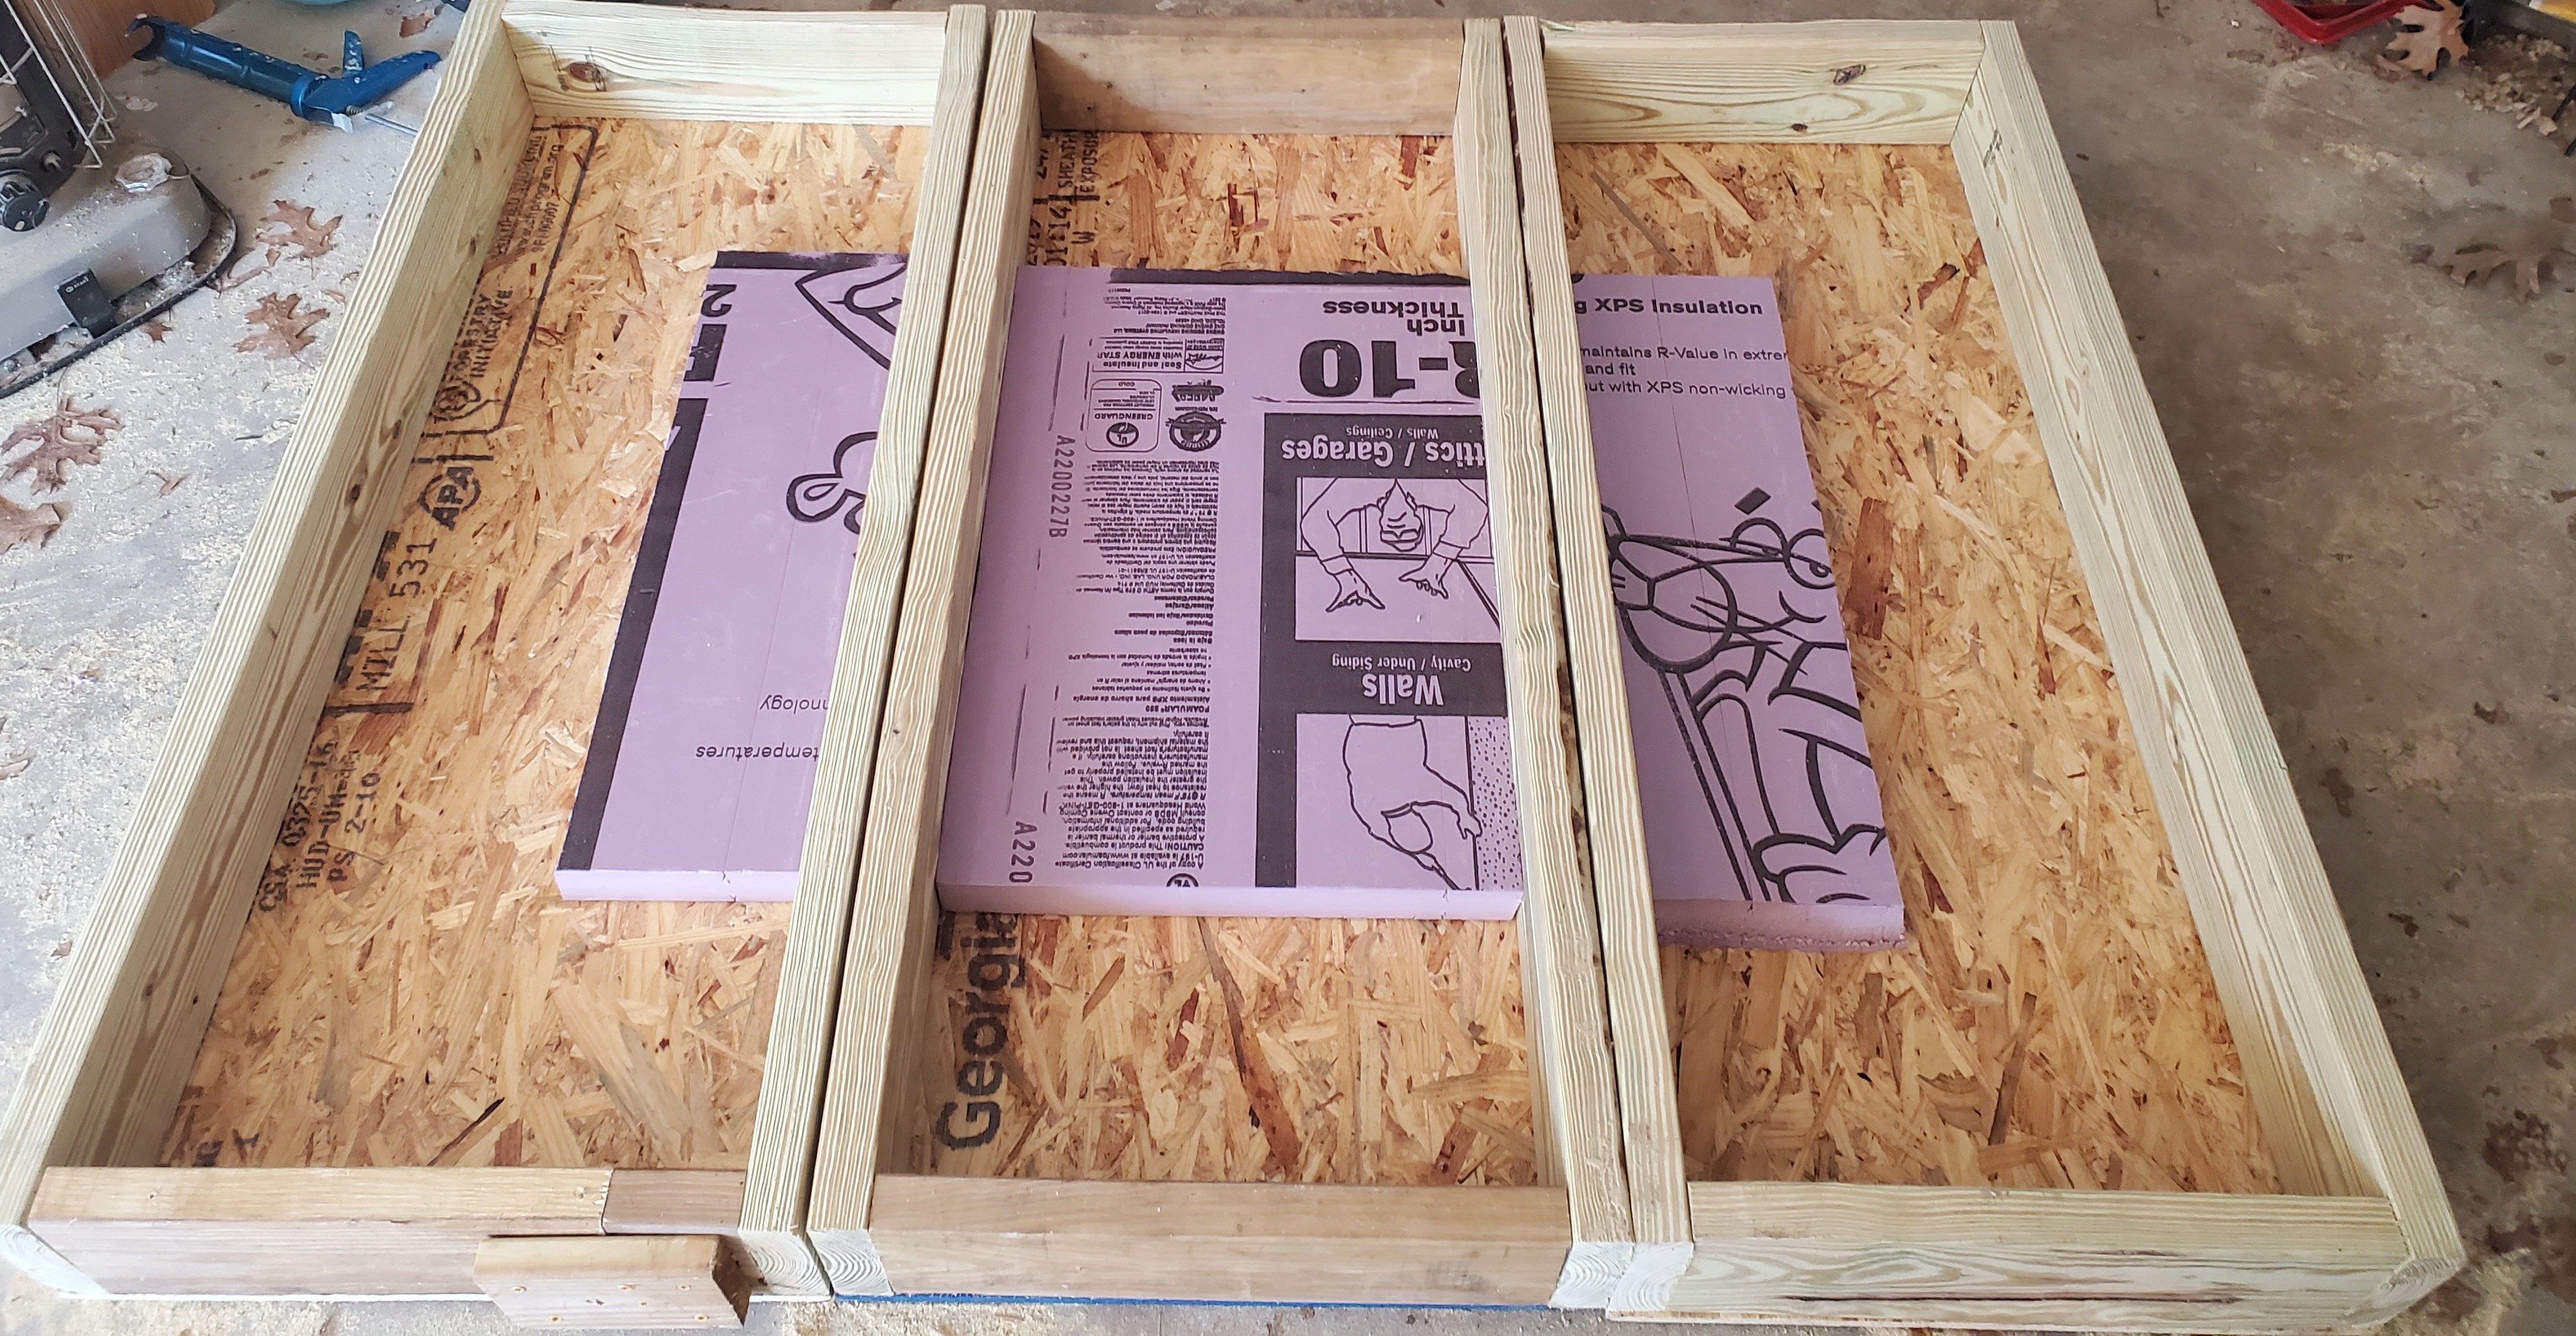
With a little extra time on my hands I decided to build a pizza oven. The plans provided by Brickwood Ovens are very detailed and the discussions and tips shared in the forum have been extremely helpful. With that I thought I would share something that helped me and might be an option for others.
I built the hearth slab face down using the 3 forms, as detailed in the plans, but right on top of the block base. The top of my block base was perfectly level. To support the hearth forms I cut a piece of plywood to the inner dimensions of the base. I then used 4x4 supports to make it level with the top of the base. The plywood and 4x4s supported the middle of the hearth slabs as they cured. I placed the middle and front hearth forms on top and checked for level, arranging the forms so that I would only need to flip the slabs over and they would be in the right place to form the void. After 4 days I removed the plywood and 4x4 supports and unboxed the two slabs from the forms. A friend and I flipped the two slabs over into place. Then I poured the rear slab on top of the first two, again taking into account the placement when it would be flipped over to complete the void. While doing it this way did take additional time, and still required flipping the 375ish lb. slabs, it was much easier for a friend and I to flip them than lift them from the ground to the top of the base.
2 Likes
Welcome to the Brickwood Forums, JMT! So glad you shared this with us. This is one clever way to solve the lifting problem, and it sounds like it worked well for you. Did you happen to take any photos of your slab process? Even if you didn’t, this is a very clear description of how you did it.
Happy baking!
2 Likes
Thank you Matt. I did take some photos, I like to document each project. Of course the one photo I forgot to take was the third (rear) slab positioned on top. All I did for that one was position the middle and front slabs after they cured for 4 days, and poured the third slab on top of those two. I then flipped that slab after 4 days and slid it into place. I tried to attach some of the photos to this post, but it looks like can only attach one per post.
2 Likes